

Come Together (Part 1)
Making rivets and cold connections
By Arthur Anton Skuratowcz
A well-placed rivet on a piece of jewelry can hold together components that can’t be soldered or embellish an item with a different color of metal. Tube rivets can add ornamentation or be used for stone setting.
Most rivets used in jewelry require hand hammering, but the use of crimping pliers is another option. In this two-part article, I’ll demonstrate the hand-hammering style of riveting, as well as offer some useful supplemental tools to improve rivet shape and consistency.
In this first installment, I cover basic riveting for holding parts together.
(Click here for the second installment, which demonstrates tube riveting.)
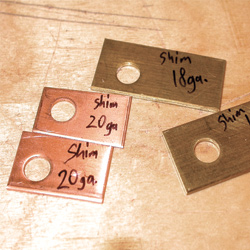
1. One of the first obstacles you run into with riveting is how long to make the rivet wire. I found that using metal shims with holes punched into them greatly improves accuracy and consistency. An 18 gauge shim provides good rivet dome height, and a 20 gauge shim provides enough wire for a flush rivet.
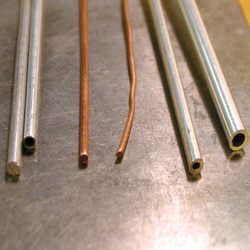
2. Here is a sampling of wires and tubing used for riveting jewelry: aluminum wire and tube (left), copper (middle), and sterling silver (right). Aluminum and copper are perfect for practicing.
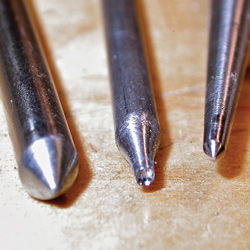
3. Here are some homemade shaping tools for flaring tubing and capping rivets.
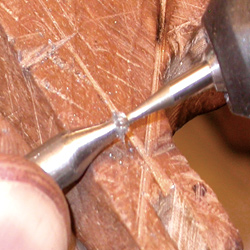
4. The capping punch is made from scrap steel rod with a tapered end. Using a a ball bur, “cup” the end with a concave cut.
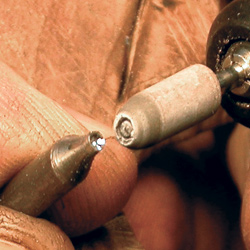
5. Use a silicone polishing bullet to detail the cup end. This will leave a cleaner cap on the rivet.
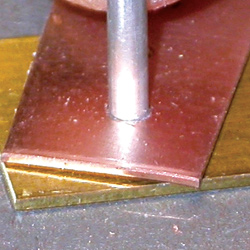
6. Begin with an 18 gauge (approximately 1 mm) shim on the bottom, allowing the wire or tubing to stick out a millimeter.
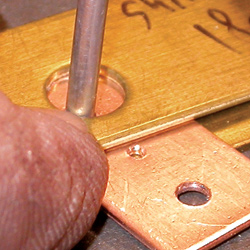
7. Slide the second shim over the top of the wire, sandwiching the plate or plates in between. Using two 18 gauge shims allows the wire or tubing to protrude 1 mm on either side, regardless of how many plates you are riveting through.
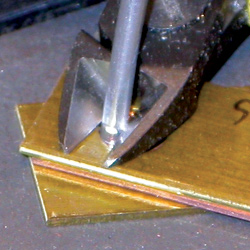
8. Holding it all together, either snip off or mark the wire for sawing.
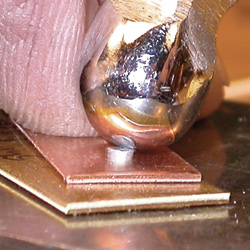
9. Hammer the wire top in a circular motion around the wire edge. Using a polished domed hammer leaves shiny indentations. It also flares the wire into a rivet. (Notice the bottom shim was left in place so that the wire still protrudes 1 mm on the other side.)
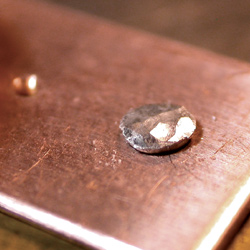
10. This aluminum rivet hammered quickly and easily—and offered a great way to practice on a soft, inexpensive metal. The hammered top has an ancient look to it.