

Above the Fold
Charles Lewton-Brain on the art of foldforming
By John Shanahan
It’s entirely possible that if Charles-Lewton Brain had not learned to speak German, the art of foldforming may never have been created. After finishing art school, he learned of Fachhochschule für Gestaltung, an influential school in Germany that one of his teachers had attended in the sixties. At that teacher’s urging, Lewton-Brain packed up and went to enroll. Upon arriving, however, he was told that there had been a change of policy at the school, and unless he spoke German, he was not allowed to take classes.
“I went back to my apartment and started studying,” he says. “I studied for weeks, learning just enough to get by. When I went back for an interview, I answered everything yes or no. In German. It was enough, and they let me in.”
While there, under the tutelage of Klaus Ullrich, Lewton-Brain was introduced to the idea of incorporating the process marks that come from jewelry creation as design elements that help to inform each piece. It’s the philosophy that became the foundation of foldforming. “He made everyone play with the material for six to eight weeks first,” he says. “You weren’t allowed to make anything. After that time, you would begin to design using the things you’d figured out you could do with the metal. One part of my experiments dealt with folding materials. It was a small part of what would become a huge range of techniques for making surfaces and textures. Later, when I was in grad school, I committed to giving a paper on these techniques at a SNAG conference, and I had to systematize it because I was going to give a major conference paper for the first time! That was what brought it all together.” Prior to that, he says, developing what would become foldforming was a process of experiment-making and note-taking, working toward a high degree of repeatability. It led to the categorization of what Lewton-Brain recognizes as the 10 types or looks of foldforming, and the art as it is known today. (For a list of the types of foldforming, see “The Looks of Foldforming.”)
Natural Formations
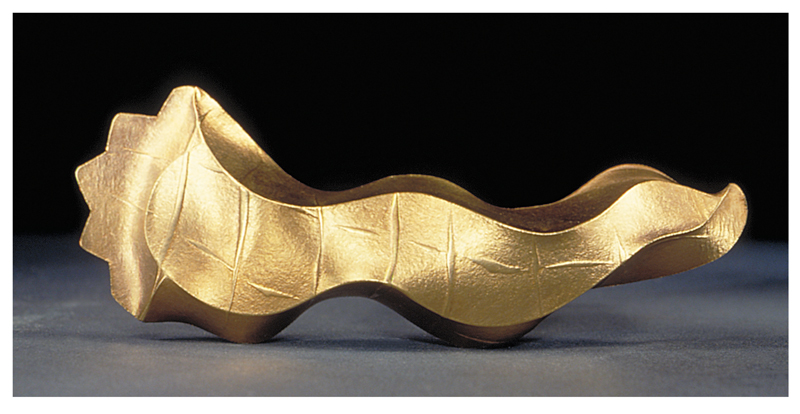
In foldforming, a sheet of metal, often a square or a rectangle, is (as you might guess) folded and then hammered, rolled, or otherwise manipulated. Starting with a square or rectangle is done for a couple of reasons, chief among them is that it creates the least amount of waste and is easy to cut with bench shears. The shape of the blank, how the metal is folded, what tools are used, and how many times or ways the metal is worked, and whether that work is done on the folded or open sides, all lend to the finished look. Regardless of what’s done, the look of a foldformed piece will have a strong organic feel. And there’s a reason for that. Hammering along the folded edge creates an effect analogous to how a seashell grows.
“In a shell, the cells on the outer part of the structure grow faster than the cells on the inner part,” says Lewton-Brain. “This automatically generates the seashell shape. In foldforming, I am stretching the material on the outer part of the folded sheet more than on the inner part, which also produces that shape.” While a seashell is just one of the looks that can arise from the process, the shapes that result are a mix of how the metal is treated and where the work is done.
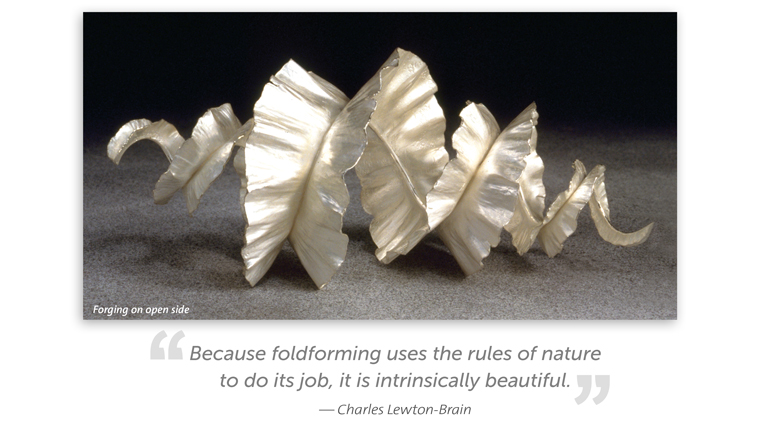
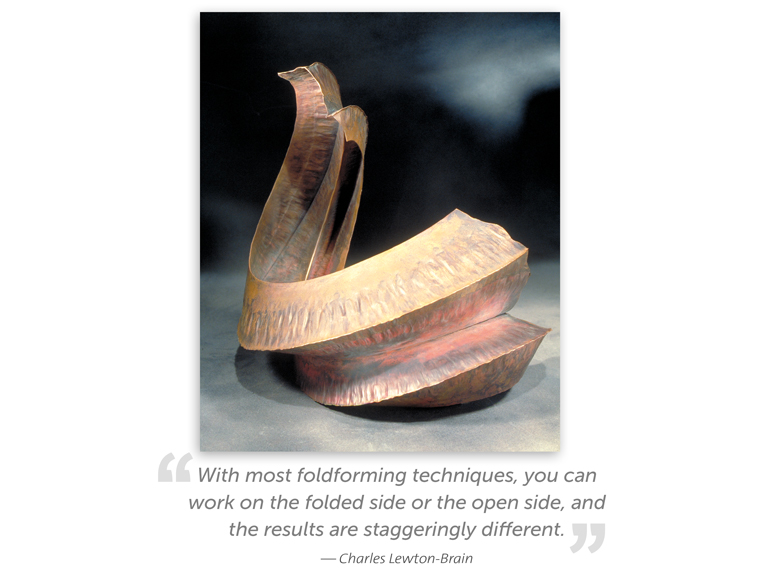
“With most foldforming techniques, you can work on the folded side or the open side, and the results are staggeringly different,” Lewton-Brain says. “Let’s say I take a rectangular piece of material and fold it in half lengthwise and then cut the corner off so it’s tapered on the open side. If I forge on the folded edge, then I get a seashell. If I forge on the open side, I create something that looks exactly like a ruffled leaf. To look at them you would not think those shapes were related in any manner but they come from an identical object.”
The style’s organic essence is, Lewton-Brain says, both part of its aesthetic allure and its metalsmithing appeal. “I think humans see nature as beautiful,” he says. “Because foldforming uses the rules of nature to do its job, it is intrinsically beautiful. Every shape and form that comes out during the process—I’m not making that happen. I’m setting up a situation where the material does it. Then I’m composing with that result, or making combinations from it.
“Were I to make that seashell in a traditional metalsmithing manner, I would have to use two sheets of metal and forge them [into shape]. It would take me four to six hours to make by traditional means. With foldforming, it’s seven minutes. The reason that it’s fast is that nature is doing the work. When nature does anything, it uses the least amount of energy possible. It’s called low-energy, high-entropy form.”
Soft and ductile metals work best for foldforming. Lewton-Brain notes that gold and platinum alloys work well if they’re between 0.3 mm and 0.5 mm thick; silver is best used at 0.5 mm; and base metals can be used at any thickness. In fact, you can use any thickness of any type metal you like, but for beginners, Lewton-Brain suggests using 24 gauge (0.5 mm) copper.
“It teaches well,” he says. “There’s way less struggle. The thicker a metal is, the harder it’s going to be. With copper it’s easier to see what’s going on, and you can then apply that to more rigid materials.” While he may not recommend trying it at the outset, he has seen students tackle foldforming in 3 mm thick titanium and 6 mm thick steel. One memorable student’s choice of material points out another reason why an inexpensive metal, such as copper, makes for a good first outing.
“She brought in a sheet of 14k gold that was about 14 inches by 14 inches,” he recalls. “She insisted on doing everything in 14k. I tried to convince her to do it in copper because if preciousness is not there, you don’t care if you fail. If you’ve got preciousness, you’re going to stop yourself from experimenting.”
And it’s in the experimentation, he says, that students find the possibilities of foldforming and how they can bring it to bear in their own work. From sharp folds to raised pinches to spirals, the art can produce innumerable variations and combinations that can then be blended with other jewelry-making techniques to produce individual expressions.
Lewton-Brain also suggests that it’s important, when you’re starting out, to keep notes on your processes, and to hang on to samples of what you’ve done. You don’t want to find yourself in a spot where you like the result you’ve achieved but then can’t do it again. “If you do something interesting, don’t change it. Pick up another piece of metal and try to repeat it. Once you pass by a certain result, if you don’t record it, you’ll never get back there again.”
Knowing what you’ve done and the order in which you did it creates what he sometimes refers to as recipes. Do steps a, b, and c in order, and you will come away with a predictable and repeatable result.
Ready, Set, Fold
Another draw of foldforming is that for the most part, it requires no special tools. Lewton-Brain recommends having a T-stake, smooth-topped vise, and various knives and pliers (including flat, broad-bladed pliers) for unfolding the metal. A rolling mill comes into play for one variation of the art. However, the most indispensable tool for the foldformer is the right hammer—and the hammers you have in your shop probably aren’t right.
“If you fold a piece of material over and hammer the folded edge with a straight hammer, you’re going to pinch it and it’s going to thin and break,” he says. “On a proper foldforming hammer, the middle of the hammer is mostly flat, and the sides curve gently away from the straight part. This allows you to strike the metal with the hammer tilted slightly so you’re not hitting with the flat part—you’re hitting with the curved part. It allows you to strike and forge the metal, squish it, and make it go places but not hit the actual fold. You’re actually hitting inside the fold.”
Some suppliers now carry hammers designed for foldforming, but Lewton-Brain also notes that it takes just a few minutes to modify a “normal” hammer. (A video of this process is available for purchase here.)
Keep in mind that foldforming isn’t necessarily meant to be a complete art in and of itself. Consider it a stepping-off point for your ideas, or an inspiration starter. “Foldforming gives you hundreds of three-dimensional raw materials and complex textures to work with, which can be used for casting models or other things,” Lewton-Brain says. “You might want to cut it up into pieces and reassemble it. It’s not going to give you a perfect piece. You have to design that. It’s giving you a whole lot of fast ways to get shapes and forms to create with.”
From its beginnings as the work of an art student expanding his craft, foldforming has emerged as a deep, varied art form that allows for a broad range of expression. Even so, its comparative ease, moderate tool requirements, and recipe-based repeatability make it an inviting style for artists searching for a new space in which to play. For Lewton-Brain, it is a logical extension of what he’s always done. “I consider foldforming drawing,” he says. “I started as a graphic designer. My favorite media was pen and ink. I’ve spent my life in metals trying to figure out ways to draw with the metal.”
And for giving us this art and these possibilities, we say danke schoen.
More:
Click here to read Lewton-Brain’s At The Bench: Hammer It Out, Making a Romero fold brooch.