

Get to Know Your Gravers
Small but Mighty
Exploring the tool that’s carved out a big role at the bench
By Sharon Elaine Thompson
Gravers are some of the most unassuming tools on a jeweler’s bench—tiny steel chisels that look deceptively simple. But in the hands of a skilled craftsperson, they can do everything from shaping precise stone seats to carving intricate textures or producing brilliant, hand-cut lines that machines can only mimic.
Their most well-known role is in hand engraving, where they’re used to carve clean, reflective lines into metal surfaces. From ornate scrollwork to finely rendered lettering, engraving adds detail, value, and unmistakable character to a piece.
“Engraving has a unique look, a crispness to it, due to the nature of the incision, the fact that metal is shaved away,” says Doug Hall, a senior instructor in GIA’s Jewelry Manufacturing Arts program in Carlsbad, California. Though engraved cuts can be mimicked through molding, casting, and CAD/CAM, a graver cuts beneath the surface, lifting curls of metal as it goes and leaving behind bright, precise incisions.
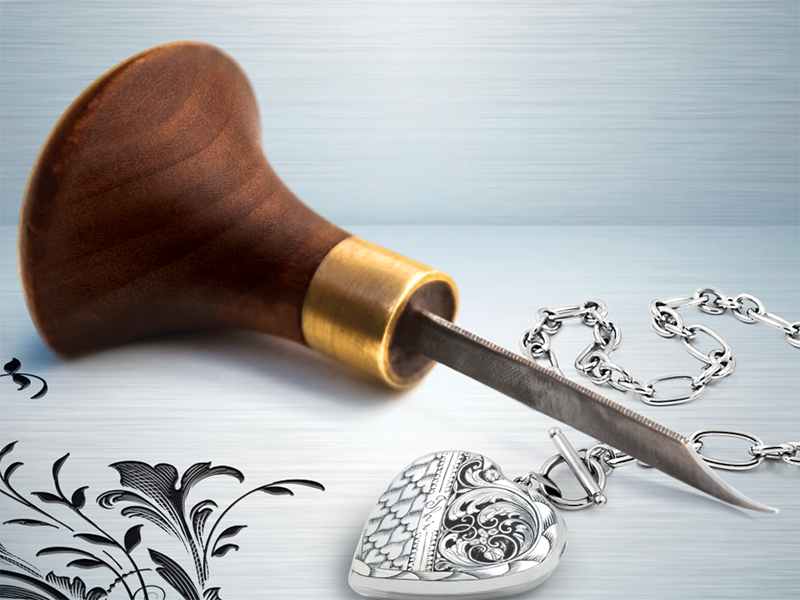
While engraving may be their most iconic use, gravers also play a critical role in stone setting, including bead setting, pavé work, and bright cutting. They’re used to carve seats or stones, refine settings, and polish or burnish metal in ways burs and files can’t match.
“I use gravers for stone setting, both in creating the seats and also in cleaning up afterwards,” says Jenn Parnell Kirkpatrick, a jeweler, setter, and instructor at Silvera Jewelry School in Berkeley, California. When setting a fancy cut stone, a flat graver can “go into the point at the same angle that the seat is cut for the pavilion,” she says, noting that the graver allows access to tight corners a bur can’t reach.
Gravers can also burnish, refine, and brighten a finished piece. After setting a stone in a thick-walled bezel, for example, Parnell Kirkpatrick runs a flat graver with a polished heel around the inside edge, both tidying the line and reflecting more light onto the stone. It’s a technique used by jewelry houses such as Tiffany and Cartier that takes the work from “the basic level of stone setting…up to ‘wow!’” says Parnell Kirkpatrick.
From engraving to setting and beyond, gravers are quiet workhorses—versatile tools that elevate craftsmanship at every stage. They demand patience, skill, and a sharp edge, but in return, they offer precision, control, and a finish that machines simply can’t match.
The Tool Itself: Anatomy, Materials, & Variations
So, what exactly is a graver?
A graver is essentially a carving tool, says Jim Grahl, principal at Grahl Designs in Costa Mesa, California—a miniature, hardened-steel chisel used to remove metal. Gravers typically come in standard lengths but can be shortened to better fit smaller hands.
Graver shapes are defined by the cross-section of the cutting edge: flat, round, knife, square, 105, and onglette. The flat, round, knife, and square shapes are fairly self-explanatory. The 105 graver, so named because its V-shaped cut is wider than 90 degrees, is a staple for many setters. The onglette is shaped like the hull of a boat, with the sides of the V slightly curved in cross section. A Florentine graver resembles a flat graver but has fine lines etched into the belly and is used to create basket-weave or crosshatched textures.

The end opposite the cutting edge features a tang that is fitted into a handle, traditionally mushroom-shaped and made of wood. Many gravers have a flat side on the handle, allowing the user to feel the correct orientation of the cutting edge by touch.
Engravers should hold the graver at a shallow angle to the surface being engraved so that the graver does not dig too deeply into the metal. Their fingers don’t wrap around the handle, but instead should sit right on the edge of the flat, explains says Marlen Hazel, an engraver in San Francisco who teaches at Silvera Jewelry School, comparing the grip to the one she uses on a violin bow.
Hall anchors his little finger on that flat surface, which “helps me steer or rotate the graver on its long axis.” This control allows for varying cut widths and the calligraphic look often associated with hand engraving.
As a stone setter, Grahl prefers rounded handles, though he uses flat-sided ones as well. The GRS handle is one of his favorites. “Its weight acts a bit like the counterbalance to the graver in my hand,” he explains. Differently shaped handles also help him identify tools by feel alone. “The different shape tells me which graver I have in my hand.”
Gravers are made from various types of steel, each offering varying levels of hardness and toughness. “A graver made of tungsten carbide steel is potentially more prone to chipping and fracturing because of the extreme hardness,” says Hall. “A graver made of high-speed steel (HHS) or even hardenable carbon steel may not stay as sharp as long, but it may not crack as much.”
The choice of material depends on the engraving and setting work being done, the metal being worked with, and how securely the work can be held. For harder materials such as knives, a harder graver is often necessary. But for soft, precious metals, high-speed steel (HSS) is the preferred material for many jewelers. “It’s not very brittle, unlike carbide gravers, which chip more often,” says Hazel. “It’s a good steel.”
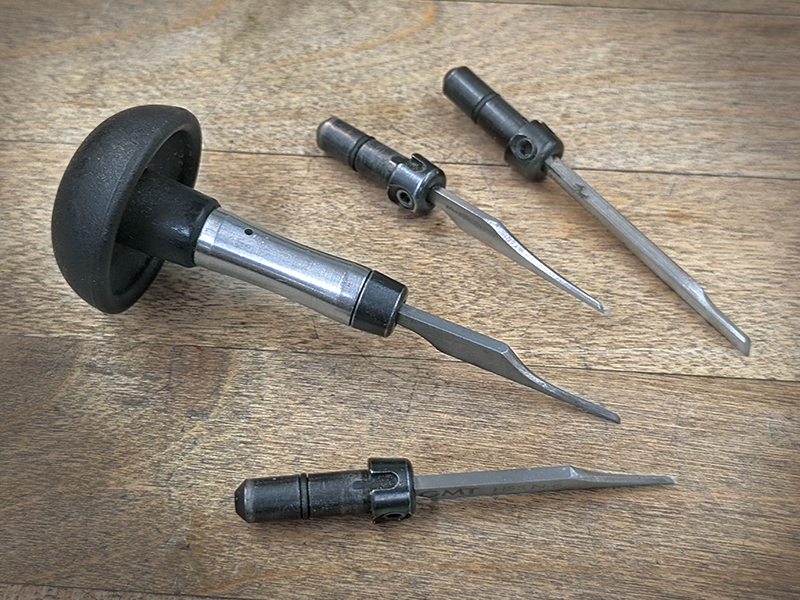
Gravers come in a wide range of shapes and handle styles, each tailored for specific engraving, setting, or finishing techniques.
While carbide gravers are brittle, they polish to a higher sheen. “A good polish on the carbide graver [cutting edge] will give you a higher reflectance [on the cuts] than any of the other [types of steel],” says Hall. “It’s a subtlety that a lot of people won’t notice, but an experienced engraver will.”
To achieve a mirror finish on the graver’s face and heel, “many engravers use very fine grit diamond embedded in a rubberized disc as a rotary tool in a flex-shaft or micromotor,” says Hall. Diamond grit on a hard leather strop or ceramic or cast-iron disk in a rotary hone also produces a bright, reflective finish.
Setters, including Parnell Kirkpatrick and Grahl, often choose HSS for practical reasons. “HSS works better on platinum when it comes to raising prongs,” says Grahl.
Technique, Control, & Holding the Work
Proper use of a graver requires secure stabilization of the workpiece. Jewelers may use leather sandbags, dop wax, pitch bowls, or engraving balls. The harder the graver, the more rigidly the work must be held because if the holding material flexes or vibrates, a carbide graver can break.
“If you can’t stabilize the piece, carbide is not a good choice—even though you might want to use it,” says Hall.
Setters usually use whatever holding device they normally use, such as a wooden ring clamp, though they can be difficult to orient to the correct angles for complex setting. Both Grahl and Parnell Kirkpatrick recommend GRS’s clamping systems that work much like an engraving ball, allowing them to rotate the work precisely to any angle and hold it securely when setting.
To use a graver, the tip is placed against the surface, and downward and forward pressure is applied, raising a curl of metal ahead of it as it cuts. Simple in theory, but the technique requires practice. “It’s a two-handed dance,” says Grahl. The dominant hand pushes the graver, while the non-dominant hand moves the workpiece into the tool.
“One of the non-intuitive things about engraving is that the hand holding the graver is held essentially in the same position,” explains Hall, “You rotate the engraving ball so you’re turning the work into the tool.” Especially with power-assisted tools, the graver hand may barely move at all—making a smooth-turning vise essential.
Traditional hand engraving demands significant strength in the hand, arm, and shoulder strength to hold the graver steadily and firmly against the metal as it’s moved into the tool. It must also be held at the right angle to make the cut. It’s important not to try to do too much, dig too deeply, or use too much power when you make your cuts.
“If your angle of attack is too steep, you use too much strength, or the graver is not sharp, you can skip off the surface,” warns Grahl.
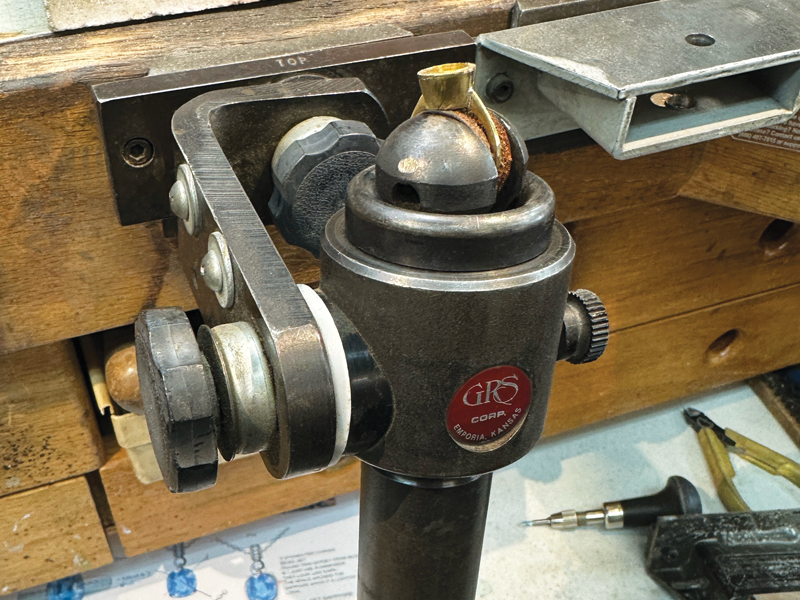
Secure workholding is essential when using a graver—systems like the GRS clamp offer precision and stability.
Power-assisted tools such as the GRS GraverMax or Lindsay AirGravers reduce the required strength, increase control, and lower the learning curve. “With a power-assisted graver and someone to lead the way, you can get what you need to learn in a few days,” says Hall. Still, repetition is key. “You need to take the time to develop your muscle memory,” says Grahl.
“I would say 90 to 95 percent of graver work, for setting, is getting your angles right and seeing what the graver is doing,” adds Parnell Kirkpatrick. “Once you have your angles right, you can do this very quickly.”
Clear visibility is critical. Many setters work under a microscope, which improves tactile feedback and helps prevent overworking the metal. Without that visual, “there’s a tendency to brutalize the metal,” says Grahl. And pushing too hard increases the risk of losing control of the graver, digging too deeply, hitting a stone, or leaving an unintentional cut on the surface.
“Make sure you have the correct magnification for your personal situation,” says Parnell Kirkpatrick, so you can “see the graver cutting. You see the curl that’s being raised by the graver. You can see the line that’s being left behind.” If you are raising a “stitch”—the small curl of metal that will be turned into a setting bead—says Parnell Kirkpatrick, and you can’t clearly see what you are doing, you can cut off the metal you need to create the bead.
Maintenance, Sharpening, & Skill Development
A sharp graver is essential. “If it’s not sharp, you’re going to hurt yourself,” warns Grahl. “The graver will skip and bite your finger.” Worse than the wound, the graver may gouge into another section of metal, which will then need to be fixed.
Checking for sharpness is simple. If the edge reflects light, it needs resharpening. “It should be as sharp as a razor,” says Grahl. Even if it looks sharp, it could offer resistance when you start to push it. That could mean there’s a tiny ding in the edge that can cause drag and affect performance.
Traditionally, gravers were sharpened by hand with a whetstone, which requires getting into a habit of “cut, sharpen, cut, sharpen,” says Grahl. Learning to hold the graver at the right angle to get the edge you need takes a long time to learn.
Although he was trained to resharpen with a whetsone, Grahl now uses the GRS GraverHone, a rotary table with diamond disks. “The problem with a hand hone is that we are not machines,” he says. “With a diamond hone, it’s so much easier to get the right angle and you remove less metal.”
Alternatively, some engravers prefer diamond sharpening cards—thin, portable, inexpensive tools that don’t develop grooves like traditional whetstones. They come in a variety of grits and can be very convenient.
Whichever method is used, sharpening is a constant process, as the graver edge needs to continually re-sharpened as it is used.
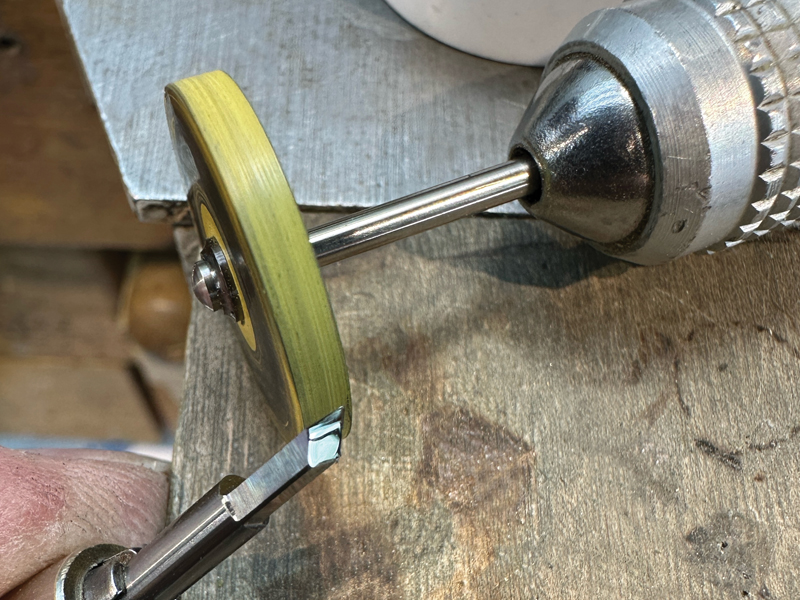

Left: Polishing the graver’s face and heel enhances precision and produces brighter, more reflective cuts. Right: Sharpness is key: A diamond hone keeps graver edges crisp, ensuring clean cuts and safer work.
“One of the things I tell my students is that the most important thing you can do in engraving is to learn how to re-sharpen a graver,” says Hall. “Anybody can sharpen a graver, but if you can’t resharpen it, that’s a very long day.”
Sharpening strictly by hand takes a long time to learn. However, there are jigs available that hold the graver at the correct angle when sharpening. Hall notes that GIA students often use these jigs in conjunction with a motor-driven diamond hone so they can focus on the engraving process.
“The beauty of those systems is that they’re almost bulletproof,” says Hall, noting that they provide a “reliable, repeatable, sharp graver.”
Although modern tools have made learning more accessible, the road to mastery still requires commitment. Traditionally, both ornamental engraving and graver setting techniques required a long apprenticeship.
And while a student can quickly pick up the basics with access to power-assisted engraving systems and sharpening equipment, the length of apprenticeship hasn’t changed. True graver proficiency still comes down to practice, patience, and a sharp edge.