

Tricks, Techniques, and Tools for Superb Soldering
Hot Tips for Cool Joins
Expert advice on mastering one of jewelry making’s deceptively tricky skills
By Sharon Elaine Thompson
(Originally Published by MJSA July, 2025)
Soldering is one of those jewelry skills that looks simple, but really isn’t. The heat, the metal, the solder—each behaves a little differently, and even small missteps can lead to big problems. Use too much solder and you’ll be cleaning up excess. Overheat the piece and you can end up with pits, a weak join, or a melted disaster.
Even experienced jewelers will tell you that soldering isn’t something you master once and forget. Each job brings its own quirks, and there’s always something to troubleshoot. That’s why we asked veteran jewelers, educators, and technical experts for their best advice. What follows is a collection of hard-earned lessons from the bench.
Prep Makes Perfect
Good soldering starts well before you light the torch. Clean the metal by removing all surface contaminants—grease, pickle, adhesives, or polishing compounds. Ensure join surfaces are smooth, even, and burr-free, and fit together tightly.
“Clean, well-fitted pieces and adequate flux are essential for good solder flow,” says Jeanette K. Caines, director of Jewelry Arts in New York City and author of Soldering Myths Demystified.
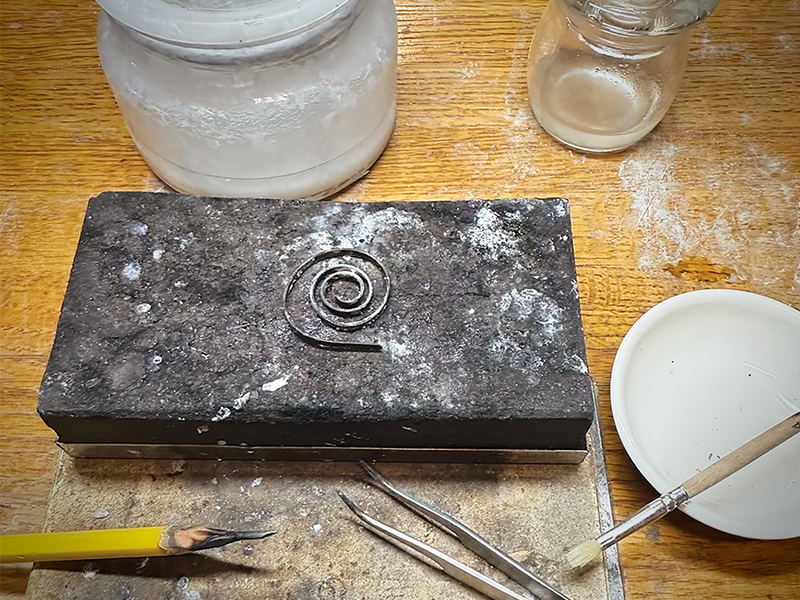
Jason Chandler, founder of the Portland Jewelry Academy in Portland, Oregon, recommends a dry run before firing up the flame. Especially on tricky jobs, he’ll set everything up as if he’s about to solder. “I get everything set up, grab my torch and solder pick, and go through the motions of the job making sure that I can brace, reach with the torch, or hold the parts in place,” he explains. If anything feels awkward or unstable, he reworks the setup until it feels right. “I do this as many times as I need to until I am comfortable with everything. I then light the torch and do the job.”
The Flux Factor
Available in a paste or liquid, flux is your friend when soldering, but only if you’re using the right type for the job. Applied to the metal before soldering, flux keeps the surfaces clean and promotes even solder flow.
For gold work, long-time jeweler and educator Nanz Aalund of Calgary, Alberta, Canada, recommends the traditional boric acid and alcohol dip, a staple at goldsmiths’ repair benches and among hobbyists working in silver.
“Traditional boric acid and alcohol dip is all the flux a high-karat gold needs,” she says, but notes that the dip is usually not strong enough for silver. “Paste flux all over everything is best for soldering silver.”
Why the difference? It comes down to how the metals interact with oxygen and heat. Gold doesn’t oxidize easily and only requires localized heating at the join, making a light barrier flux like boric acid in alcohol sufficient. Silver, on the other hand, absorbs oxygen readily—up to 10 times its own weight, says Aalund—which can cause firescale and interfere with solder flow.
Usually formulated with borax, “paste flux creates a glass-like barrier that helps protect the entire surface of the metal,” Aalund explains. Because silver must be heated more evenly and thoroughly than gold before solder will flow, the flux needs to work harder and longer to guard against oxidation.
Joe Silvera, co-owner of the Silvera Jewelry School in Berkeley, California, cautions safety when using flux. “Most fluxes have some toxicity, because of [ingredients such as] borax and boric acid,” he says. He recommends choosing healthier fluxes, such as borax and water or Firescoff. “Use ventilation and/or wear a mask rated for solder fumes,” he says.
Sheet, Wire, or Paste?
Solder is an alloy designed to melt at a lower temperature than the metal it joins, and it comes in sheet, wire, and paste forms. Your choice often depends on preference, but some situations call for one over another.
“In the case of soldering a large bezel, wire is a good choice because you can use stick soldering,” says Scott Bradford, technical sales engineer at Gesswein in Bridgeport, Connecticut. “You heat the bezel and back plate, touch the end of the wire solder to the seam, and work your way around.” For a long seam, he says, this works better than trying to balance lots of tiny solder chips in place.
That said, wire solder can be messy if you’re not careful, warns Charles Lewton-Brain, a long-time jeweler, educator, and author based in Calgary, Alberta, Canada. But with practice, it’s possible to “solder as cleanly as with carefully placed chips.” He recommends using soldering tongs “to avoid burning one’s hand from radiant heat.” The pair he uses he made from welding rods and measure between 14 and 18 inches in length. “They look like miniature blacksmiths tongs with very long handles, one of which is bent so that it locks onto the other one.”
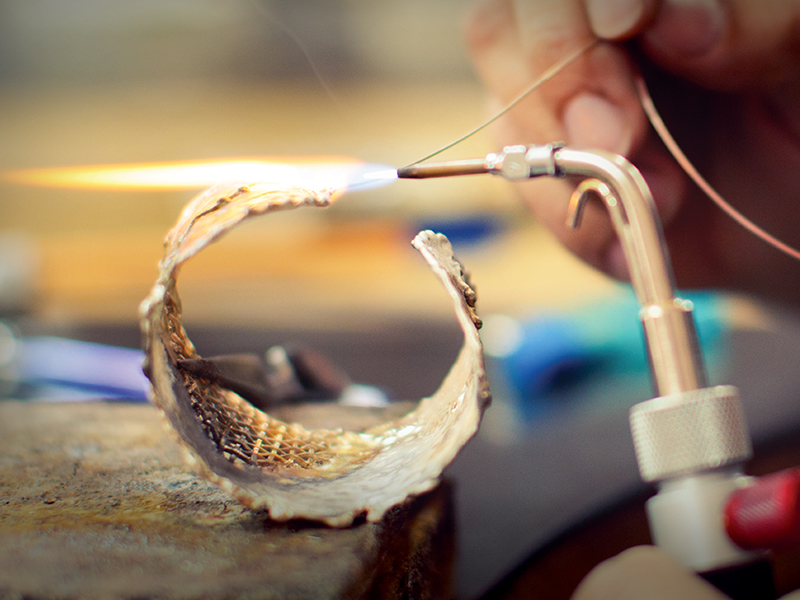
Choose the solder that best suits the job: sheet solder offers control and versatility, wire solder is ideal for long seams, and paste solder excels in tight spots such as chain links.
He’s also recently taken to using color-coded hemostats, which are normally used for clamping blood vessels during surgery, as clamps for different wire solders. The handle for each type of solder is spray painted a different color and they are always loaded and ready for use.
Michael R. Kosinski, co-owner of Metal Arts Academy in Auburn, California, prefers sheet solder for its versatility and control. “Cutting the solder into an organized grid (first, vertically, then across) helps to accurately provide the pieces you need.”
Finally, there is paste solder, which is good for specific operations. “I prefer to use paste solder only when doing chain repair and when soldering earring posts,” says Bradford. Using a precise amount of paste ensures the solder doesn’t flow too far and lock down a group of links. “Any operation where you don’t have much access to place the solder is a good one for paste.”
But paste solder dries out quickly, he cautions. Store it in a small plastic bag, and after dispensing it, “pull the plunger back out slightly so the syringe doesn’t continue to ooze,” he advises. “And make sure to have enough heat. You have to heat solder paste pretty fast for it to flow correctly.”
Typically, you’ll use gold solder for gold and silver solder for silver, but what about soldering gold to silver? “Use silver solder,” says Aalund. “Flow the solder into place, on the gold, then sand it down just a bit for leveling.” After that, use a sweat soldering technique to attach it to the silver. Sweat soldering involves heating the soldered gold piece a second time while it’s placed on the silver base, so the solder reflows and bonds the two metals together. This helps keep the solder exactly where you want it, reducing the risk of it spilling into unwanted areas during assembly.
Support Matters
The soldering work surface doesn’t just protect your bench—it affects heat control, stability, and even the success of the join. There’s no one-size-fits-all option, and most jewelers keep a few surfaces on hand depending on the job.
“There are many kinds of refractive surfaces you can solder on,” says Lewton-Brain, “from pumice chunks to kitty litter.” If you opt for the latter, however, he warns, be ready for a surprise, as it “pops” when first heated. “Use safety glasses, wear an apron, and don’t wear sandals,” he says.
Jenn Parnell Kirkpatrick, a jeweler and instructor at Silvera Jewelry School, favors Solderite boards and charcoal as all-purpose soldering surfaces. Although charcoal degrades quickly, she says, “it’s soft enough to push elements into to hold them in place for prong settings or similar.”
Charcoal has another benefit, adds Aalund. “It’s carbon in abundance and will aid in keeping the metal from oxidizing.” She pairs it with a simple spinning tray, designed by Ronda Coryell, that lets her easily reposition the piece and get the torch exactly where it’s needed.
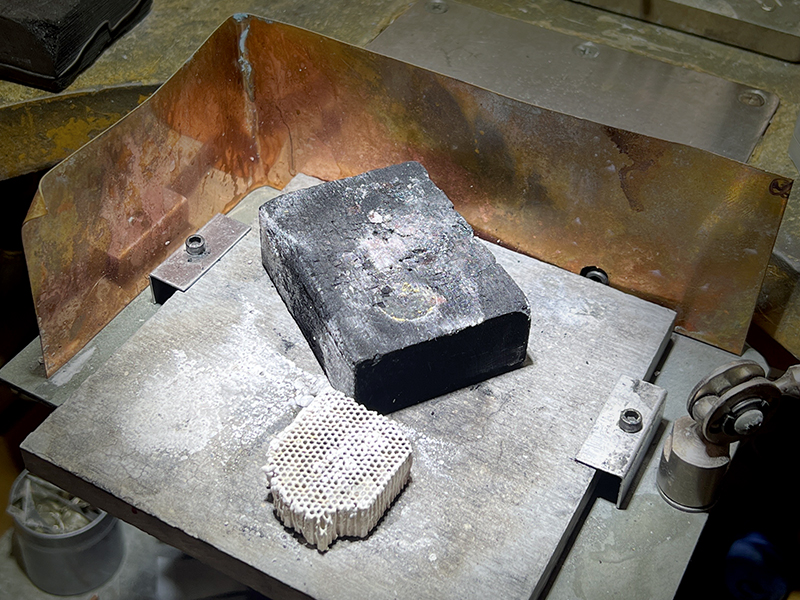
From charcoal blocks that reduce oxidation to ceramic surfaces that stay flat and firebricks that offer easy cleaning, your soldering surface plays a key role in achieving clean joins.
Charcoal blocks aren’t cheap, and they can split under heavy use. Lewton-Brain extends their life by embedding the block into a metal tin filled with casting or soldering investment. This keeps the block clean, stable, and easier to handle. He also suggests using a plant mister to extinguish the block immediately after use, rather than letting it smolder.
Still, Lewton-Brain prefers firebricks—the same kind used to line ceramic kilns. They can be sawn, shaped, and cleaned easily by rubbing them against another brick. Parnell Kirkpatrick agrees, especially for delicate chain repairs, noting that ceramic surfaces help pull heat from the piece, reducing the risk of overheating.
In addition, if you need something to remain flat for alignment purposes, a ceramic or honeycomb surface will remain flat even after a lot of use, she says, which neither Solderite or charcoal do without constant refinishing.
Finally, even when using a fireproof surface, Silvera suggests adding a shield around your setup. He fashioned his own from base metal to protect his bench from stray flames and reflected heat.
Tools of the Trade
When soldering, controlling the solder itself is critical, and most jewelers rely on solder picks to keep it where it belongs. “Soldering is a two-handed operation,” says Silvera. “Don’t be shy about getting in there with your pick to push the solder around or to stroke stubborn join lines.”
Lewton-Brain’s pick of choice is titanium. Since solder won’t stick to it, he can form a ball of solder on the pick’s tip and slide it right into position, or even split a molten ball cleanly in two. Titanium picks are readily available, but for a DIY option, he suggests making your own from titanium bike spokes. “Your local high-tech bike shop often uses titanium spokes and may have bent ones for free.”
Kosinski, however, prefers a different approach. “Instead of a pick, I apply flux to the seam, heat it until the flux ‘glasses over,’ then use tweezers to dip the appropriately sized solder [chip] in flux and place it where it is needed. The piece will stick in place, and I can direct the flame in the proper direction to get the solder to flow where I need it.” This gives him more control, but he admits there are exceptions, such as chain soldering, where using a pick is faster and more practical.
For an unconventional but effective pick, Kosinski has used sharpened graphite pencils. “Solder never sticks to it,” he explains. “Just put a good long point on the end, and as you use it, the wood will burn away.”
Steady As You Go
Since humans have only two hands, they rely on tools to make up the difference. Third-hand tools, cross-look tweezers, and soldering weights all help stabilize components during soldering.
Lewton-Brain recommends having a variety of soldering weights in different sizes to hold items down during connection. Traditionally, these are made from steel blocks with attached hold-down rods. They’re hard to find commercially but easy to make from steel sheet and rod, or even an old needle file brazed to a block.
Third-hand tweezers are a common choice, but Parnell Kirkpatrick offers a caution. Because the tweezers default to closed, “if you grip a piece, and it gets hot and soft, the tweezers will deform it,” she says. Instead, she uses it much like a soldering weight: She rests the tweezers gently on the piece, using the tool’s weight to hold the work down rather than clamping it.
She also keeps a stash of small titanium scraps and ‘dirty’ metals (“the dirtier, the better” because solder won’t flow onto it, she says) for use as shims, allowing her to adjust the position of the work precisely.
Kosinski takes a scavenger’s approach. He’s repurposed spring steel bristles fallen from street sweepers to make holding clips or coils for elevating work off the soldering block. “It’s a little unconventional,” he admits. He also has “an old hacksaw blade turned into a clip to hold pieces on a ceramic soldering pad.”
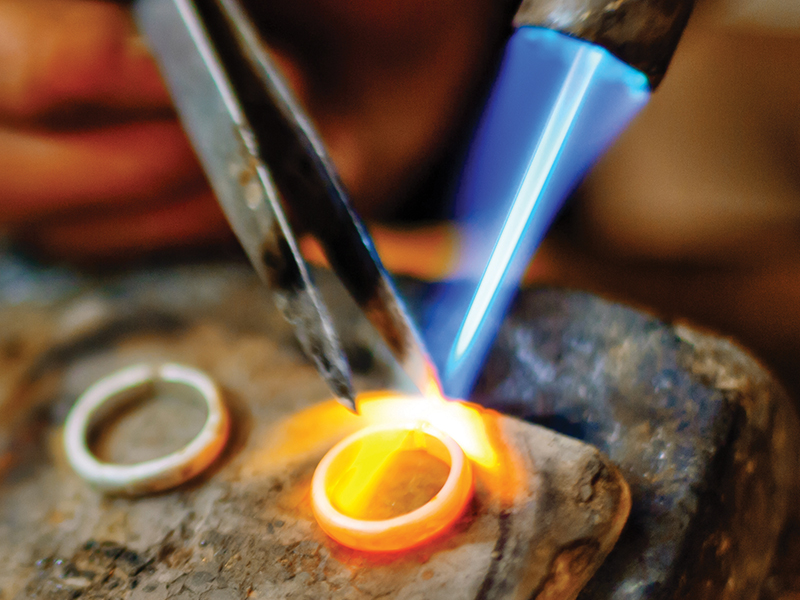
One often overlooked tool is binding wire, says Aalund, noting that it’s “the least used and misunderstood technique for holding things in place while soldering.”
Lewton-Brain agrees, specifying that thin (30 gauge), two-strand twisted cable iron binding wire is ideal as it is less likely to burn out during soldering and can expand as it heats, avoiding indentations on the metal.
Never use wire as thick as the sheet metal being bound, he adds, and never cross the wire over open spaces, as the metal will soften and bend inward, collapsing the form. Instead, use hooks and tension loops to redirect the pressure to stronger areas of the object, relying on the form’s structural strength rather than the wire’s.
“It is better to take an hour to wire a complex job up and [enjoy] five minutes of trouble-free soldering than it is to have to go back and repair or fix problems,” says Lewton-Brain.
Where It All Comes Together (or Falls Apart)
All the careful preparation—clean metal, the right flux, and secure holding—leads to the critical moment: heating the piece. Yet this is often where soldering goes wrong, especially if you don’t account for how different metals react to heat.
“If you treat gold like copper or vice versa, you’re in for a wild ride,” says Parnell Kirkpatrick. Copper is notorious for pulling heat away from the area you’re trying to solder. “You must bring the entirety of the copper piece up to soldering temperature, regardless of where it is in relation to the solder seam. If you don’t, copper won’t solder, and you will overheat your solder trying.”
While silver, brass, and bronze also bleed heat, they retain it a bit longer once the entire piece is warmed. You’ll still need to heat the whole piece, but you can focus on the seam a little sooner than with copper.
Gold and platinum, on the other hand, hold heat exactly where the torch is aimed. “You don’t need—nor want—to heat anywhere other than the seam,” she adds.
Heat control is everything, says Bradford. While many jewelers obsess over matching torch tip sizes to tasks, he recommends focusing more on flame proximity. “If the piece is heating up too quickly, move the torch away slightly to slow things down, and if it’s too slow to heat up, bring that flame in closer,” he explains. “With good heat control, changing the tip on your torch becomes a rare thing.”
“Hot and fast is the key,” adds Caines. “Solder will not flow if it does not get hot enough, fast enough. Heat is like a magnet, and solder will flow to the hottest area of your piece first.”
Fuel choice also matters. Bradford recommends moving beyond butane, which has limitations when soldering larger pieces. Propane, acetylene, or oxygen setups may seem intimidating, but with proper safety procedures, he says, they’re worthwhile upgrades.
Caines also dispels a couple of soldering myths. First, stop moving your flame around! You won’t reach soldering temperature quickly enough “if you’re constantly jiggling or circling the flame,” she says. The longer it takes for the metal to get to soldering temperature, the better the chance the metal will oxidize, your solder will get dirty and refuse to flow.
And second, stop heating the entire piece, especially if it’s large, like a bracelet. If you try to heat the whole piece, your solder seam will not get hot enough, fast enough, to fill. “Keep your torch positioned on the seam you’re trying to fill,” she says.
Parnell Kirkpatrick offers a simple but often overlooked reminder: When possible, let gravity help you. She says that too often jewelers use third hands to suspend pieces and then try to balance components. “When you can, simply lay the piece down, and let gravity help in holding elements together,” she says. “You can’t do this with every situation, but you can make your life easier by asking yourself if you can.”
Finally, remember that your soldering board can act as a heat sink, especially when cold. Preheating your surface, as well as the metal, can make a big difference. “If I’m soldering a bezel onto sheet, without preheating or lifting it [the sheet] up, the solder will run up the bezel or the bezel will melt,” says Silvera. “I will preheat the charcoal, then preheat the sheet, and then place the bezel and move on with soldering.”
But heat sinks can also be your ally, especially when joining large pieces to small ones. If you’re soldering a large piece to a small piece, the small piece will heat up super-fast and possibly melt before the solder flows. To prevent that from happening, “take a piece of scrap sheet and have it touching the small piece so heat can transfer out and into the heat sink,” says Bradford, noting that he keeps a small pile of brass bits at his soldering station for this purpose.
Perfect soldering isn’t magic, it’s a combination of careful preparation, clean metal, flush joints, the right solder and flux, thoughtful use of tools, an understanding of metal properties, and confident, controlled heating.
It’s also about patience and persistence. As Lewton-Brain puts it, sometimes the best soldering jobs are those that took the longest to set up, but only minutes to execute.