

All About Jewelry Polishing
Polishing to Perfection
Why the final step in jewelry making is anything but simple
By Sharon Elaine Thompson
(Originally Published by MJSA March 2025)
Quick Links: What Is Polishing? • Planning for a Perfect Polish • Tools of the Trade • Polishing Compounds • Safety
Jewelry in a well-lit case is often a dazzling interplay of light, reflecting off gemstone facets and polished metal surfaces. The polished metal enhances the stones’ brilliance, reflects the color of the gemstones themselves, and can give a piece its distinctive shine. But that brilliance doesn’t happen by accident. Polishing, the final step in making a piece of jewelry, is as vital as any other step in the manufacturing process. Despite its importance, some workshops still treat it as a simple, unskilled task.
That’s a costly mistake, warns Charles Lewton-Brain, a jeweler, educator, and author based in Calgary, Alberta, Canada, who notes that inept polishing can remove up to 30 percent of the metal by weight. For every 3 dwt (4.67 grams) of gold, imagine losing one dwt down the drain, into your ventilation ducts, into your sweeps barrel, or walking out the door. Now think of how many pennyweights of metal you process every year.
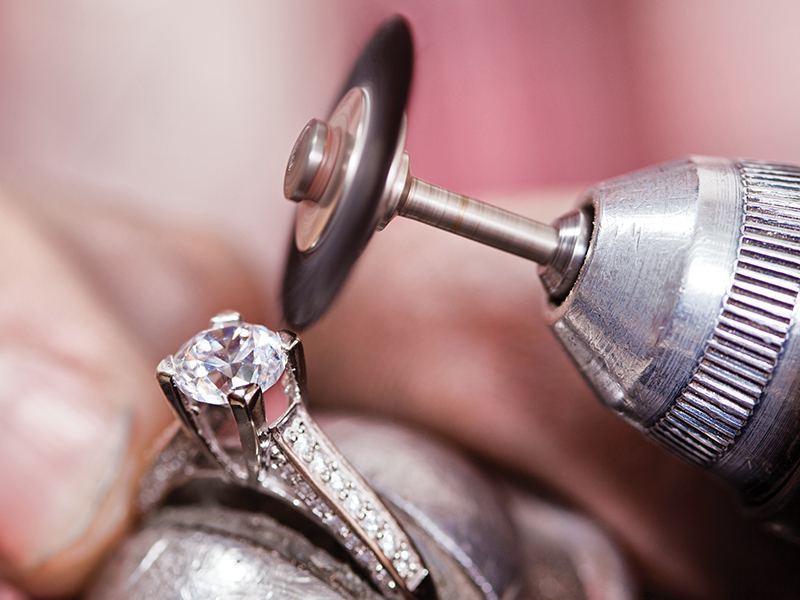
In Germany, where Lewton-Brain trained, polishing is taken seriously enough to require a formal apprenticeship: three years for a polisher and five years for a fine polisher. The difference, he says, lies in precision.
While a polisher can do a great job, if you give a fine polisher a piece of jewelry weighing 13.5 grams, it comes back with everything “razor sharp with a weight of 13.3 grams,” he explains. “Almost no metal loss.” You could almost say that fine polishers are worth their weight in gold.
What Is Polishing?
Polishing is the process of abrading a metal surface using progressively finer abrasives—such as emery, silicon carbide, tripoli, or rouge—until the scratches left by the abrasives become so fine that they are invisible to the naked eye. The result is a reflective, mirror-like surface that enhances the jewelry’s overall appearance. However, achieving this high polish doesn’t begin at the end—it should be part of the planning process from the start of production.
Polishing begins well before the buffing wheel, with careful steps during production to ensure minimal metal loss and maximum shine. The fewer marks you make during the manufacturing process, the less weight you’ll lose polishing them out. Therefore, there should be no mark in the wax or resin model, no mark on the metal sheet, wire, prong, or bezel that you will have to remove in the polishing process. Lewton-Brain says that businesses that emphasize fine-quality jewelry keep pieces in velvet-lined trays as they move through production to help reduce unnecessary scratches, making the final polish easier and more effective.
Planning for a Perfect Polish
According to Joe Silvera, co-owner of the Silvera Jewelry School in Berkeley, California, polishing begins with abrasives—silicone wheels, sanding sticks, files—before moving on to the flex-shaft or buffing machines.
While many people are taught to start with a coarse abrasive and work down to a fine one, Lewton-Brain sometimes recommends a different approach. “Don’t start with damaged metal if you plan for it to be highly polished,” says Lewton-Brain. Counterintuitively, he believes jewelers should think about starting the other way around, with a fine abrasive. Only if a fine abrasive doesn’t remove the marks you want to remove should you move to something more abrasive. The reasoning behind this idea is that you don’t want to put marks onto the metal before taking them off again.
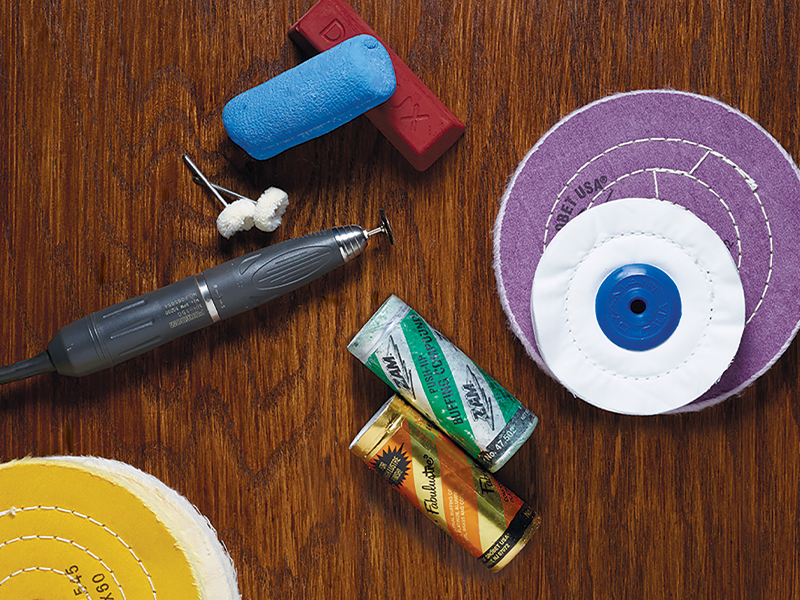
There are, broadly speaking, two tiers of polishing. The first, more aggressive, step takes out the visible scratches and is referred to as “cutting.” The second, and final, stage of polishing is “coloring,” which removes the scratches left by the more aggressive methods, replacing them with finer and finer scratches until they are invisible to the unaided eye, and the surface of the metal is highly reflective.
Tripoli and red rouge are the polishing compounds traditionally used for gold, silver, and other non-ferrous jewelry metals, such as copper and bronze: tripoli for cutting, rouge for the coloring stage. (Platinum is polished with compounds specially formulated for it.) However, there are many branded polishing compounds available, a number of which are water-soluble that makes cleaning up both the jewelry and workspace much easier.
Tools of the Trade
There are a variety of bristle brushes as well as muslin and felt buffs used to apply polishing compounds. The larger the brush or buff, the faster it cuts. The harder the buff or shorter and stiffer the bristles on a brush, the faster it cuts. For control, use small wheels and a flex-shaft. For faster work, use a larger buff or brush on the buffing machine.
Bristle Brushes
Bristle brushes are a key component in the polishing process, particularly for jewelers working with intricate designs and areas that require precise control. Both Lewton-Brain and Silvera start polishing with these versatile tools, which can vary in stiffness, length of bristle, and number of rows of bristles. The type of bristle used determines how aggressively the brush will cut into the surface. Black bristles, for example, are stiffer and more aggressive and stay more rigid, hitting mostly top surfaces, says Silvera. They’re ideal for polishing flat surfaces and removing stubborn material. White bristles, on the other hand, are usually more flexible, softer, and not as aggressive but “good for smashing into little corners,” says Silvera. Brown bristles offer a middle ground, providing moderate flexibility and cutting power—a combination that Silvera finds himself choosing most often.
The length of the bristles also affects performance. Shorter bristles are more aggressive and remove material quickly, while longer bristles provide greater control and a gentler polish.
“Shorter bristles take off more faster,” says Lewton-Brain, “but I like the longer ones, they’re more comfortable as to what the effects are. I use them more, and as they wear, they become shorter for the rarer times I want [shorter bristles].” This adaptability allows jewelers to tailor their approach depending on the specific needs of each project.
Because the bristles bend when pressure is applied, they create a broad polishing surface. Silvera compares their sweeping motion to that of a soft-bristled broom moving across a floor. This motion is especially useful for following the natural contours of a piece, ensuring that rounded surfaces are polished evenly. For Silvera, bristle brushes are indispensable when cleaning up small details and crevices before moving on to the buffing machine.
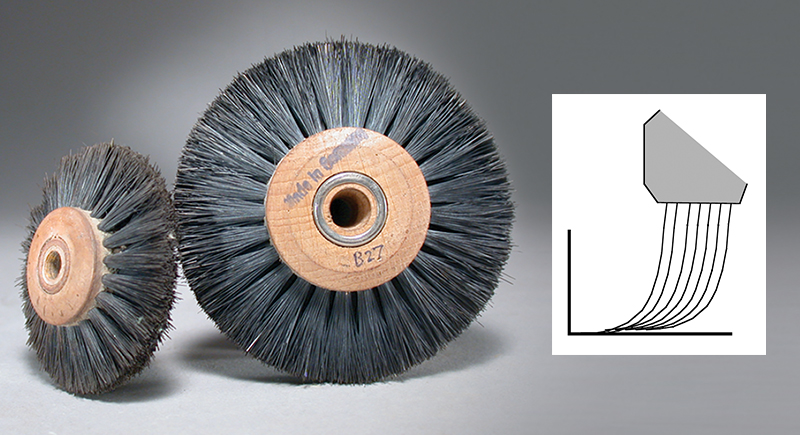
Bristle brushes are perfect for polishing right angles, with flexible bristles that reach into corners
other polishing tools can’t access.
Bristle brushes are also uniquely effective at reaching areas that other tools cannot. Lewton-Brain notes that they are the “only polishing tool that will get inside a right angle,” making them essential for certain designs.
“Bristle brushes are most effective with cutting compounds,” adds Lewton-Brain, which is the way he prefers to use them. “With the bristle brushes I can remove firescale from silver in five minutes or less without blunting or rounding an edge.”
While they’re most commonly used with cutting compounds, bristle brushes can also be paired with rouge for more detailed work, though this is less frequent. “I won’t use them on my high luster unless I need to get into crevices,” says Silvera.
An added benefit of bristle brushes is their ability to highlight imperfections. The matte finish they produce can make deeper scratches or areas of firescale more visible, allowing jewelers to address these flaws before moving on to the next stage. Additionally, bristle brushes do not pick up as much compound as muslin or felt buffs, resulting in less friction and heat buildup on the surface. This minimizes the risk of creating greasy smears, which can obscure the jeweler’s view of their progress.
Buffs
Once bristle brushes have done their job, jewelers turn to buffs—typically made from cotton muslin—for the next stages of polishing. As with bristle brushes, the size, hardness, and structure of the buff influence how aggressively it cuts. Stitched muslin buffs, for example, are harder than their unstitched counterparts. The number of stitching rows further determines their hardness, with six-row stitched buffs being firmer and more aggressive than those with only three rows.
Muslin buffs can be used with both cutting and coloring compounds, but it is important to keep them separate to avoid contamination. Using one set for tripoli or other cutting compounds and another for rouge ensures that the final polish is clean and reflective. It also doesn’t hurt to store buffs used for the final polish in closed containers to prevent airborne silica dust—which is harder than rouge—from accumulating on the surface and diminishing their effectiveness over time.
The pressure applied to a stitched buff also affects its performance. Applying firm pressure results in faster cutting, while a lighter touch keeps the “fluffy” part of the buff in contact with the jewelry, giving it a lighter polish. Unstitched muslin buffs, which are fluffier and less rigid, are often reserved for the final stages of polishing. With a light touch, they can achieve a high-gloss finish, and in some cases, they can even be used without any compound at all to achieve a gentle, final polish.
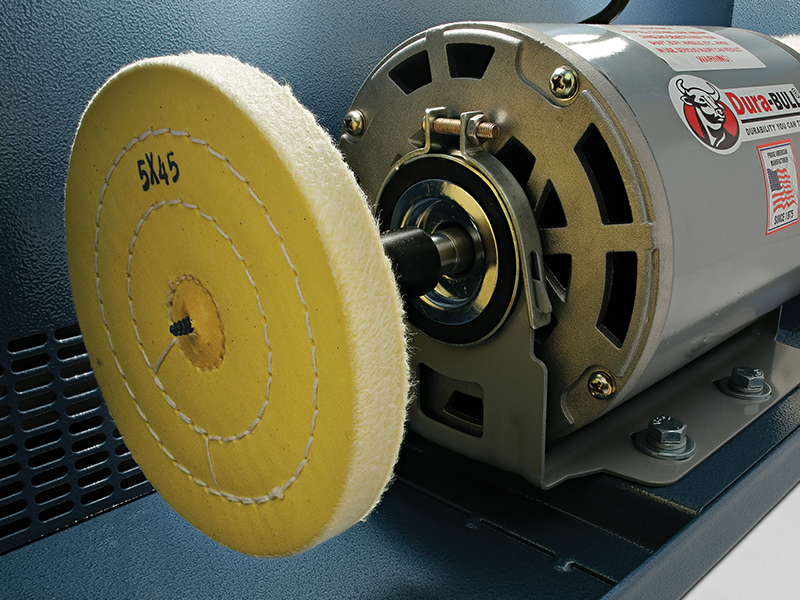
Mounted buffs provide fast, even polishing, with varying stiffness to control cutting and achieve desired finishes.
Felt buffs, which are denser and harder than muslin, require careful handling due to their aggressive cutting action. Lewton-Brain cautions that, because they cut so fast, felt buffs can leave deep indentations before you realize it. However, they can be handy, too, because they can be shaped with a file to fit specific contours, making them ideal for detailed work.
Which type of buff to use depends on the project at hand. “Whether you’re at the flex-shaft or at the buffing machine,” says Silvera, “what you’re looking at is how much flexibility and rigidity do you want? Muslin gives a bit of a softer finish. Because of the way the sheets are stitched together, you get a little bit of play. [The buff] tends to pull in and conform to the surface.” This makes them preferable when polishing a rounded form. Soft felt will work much the same way.
Neither may be the right choice if you’re going for a clean, crisp edge, he says. The softer buffs will knock those edges away because they’ll tend to (to use the technical term) “smoosh” over the edges. “If I have a lot of little faceted angles on [a piece], I’m going to do most of the work by hand, with sanding sticks,” says Silvera. “Then I’m going to do a final buff with a fairly hard felt wheel.”
Felt is a good choice when finishing castings, too, says Silvera. With a little bit of pressure, you get what amounts to a light burnishing. “I want to try to finish with a felt because that burnishing action helps to close fine porosity,” he says.
Polishing Compounds
Whatever buff or brush you use, says Lewton-Brain, don’t skimp on the compound, as this is what does the cutting. The compound—not the pressure of the tool—is responsible for the abrasion that refines the surface. In fact, some polishers apply the compound to the buff at the same time they’re holding the jewelry against the buff, ensuring consistent coverage and efficient material removal.
There is a wide range of branded polishing compounds on the market, each designed to address specific polishing challenges and materials. Talk to suppliers about the purposes of various compounds and the brushes or buffs they recommend for optimal use. For example, some compounds are designed for aggressive material removal, while others are formulated for delicate final polishing.
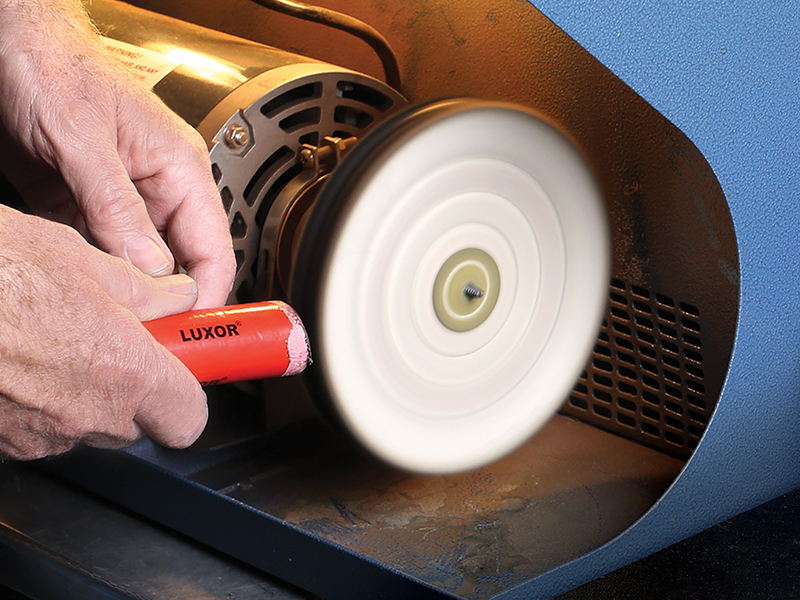
Loading the buffing wheel with polishing compound is key to precise material removal, reducing scratches and enhancing shine.
Regardless of the type of compound you’re using, it is very important to clean the jewelry between polishing stages. If residues from cutting compounds are not fully removed before moving on to the final polish, they can be dragged across the surface, leaving scratches and marring the finish. Thorough cleaning ensures that you achieve a high-gloss, flawless result.
To clean the piece, put it in an ultrasonic cleaner with a grease-cutting solution, such as a mixture of hot water, ammonia, and a splash of dish detergent. Alternatively, if you’re using water-soluble compounds, you can clean the jewelry by hand using hot water, soap, and a soft brush. Ensure that the piece is completely dry before proceeding to the final polish to prevent contamination and smudging.
Safety First
Polishing is not only one of the most important steps in jewelry manufacturing, but it’s also one of the most dangerous, as many of the tools and processes involved present potential hazards.
One of the most important factors is ensuring safety with proper ventilation. A well-functioning ventilation system should have the take-up point positioned just inches away from the polishing buffs, effectively capturing dust and debris as they are generated. When ventilation is adequate, respirators may not be necessary, though wearing a dust mask is always a good precaution.
Working with a buffing machine introduces additional risks, particularly with items that can fly out of your hands—a common occurrence when polishing small jewelry. To mitigate this risk, wearing both safety glasses and a face shield is essential. Smaller buffs, up to 4 inches in diameter, reduce the likelihood of accidents by exerting less force on the jewelry. “Six-inch buffs are aggressive,” warns Silvera. “They’ll just pull it right out of your hand if you’re not paying attention.”
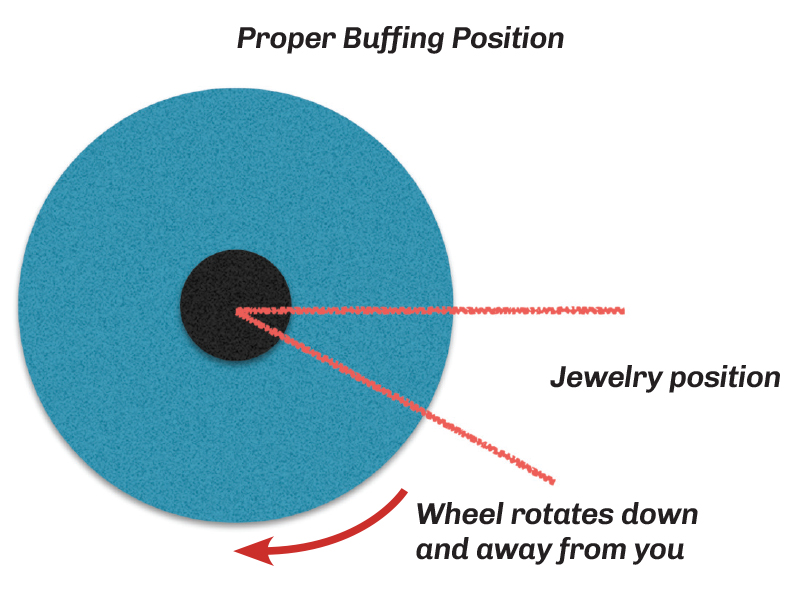
Proper positioning of the jewelry on the buffing wheel is another critical safety measure. The piece should be centered on the part of the buff closest to you or just slightly below that point. If you feel the buff starting to pull the piece out of your hands, let it go immediately. Don’t try to hang onto it, says Silvera. It’s easier to replace or fix the jewelry than the jeweler.
Personal safety also involves attention to attire and grooming. Long hair must always be securely tied back to prevent it from being caught in rotating machinery. Silvera warns that many jewelers have had hair torn out at the roots in a split second due to a moment of carelessness. Additionally, aprons should never be tied in the front, as the ties can get snagged on the wheel. Even ties knotted at the back can pose a danger if the buffing machine is still spinning when you turn away, so always turn off the machine before stepping back. Jewelry, such as long earrings, bracelets, or necklaces, should also be left at home, as they can easily get caught on the flex-shaft or buffing wheel.
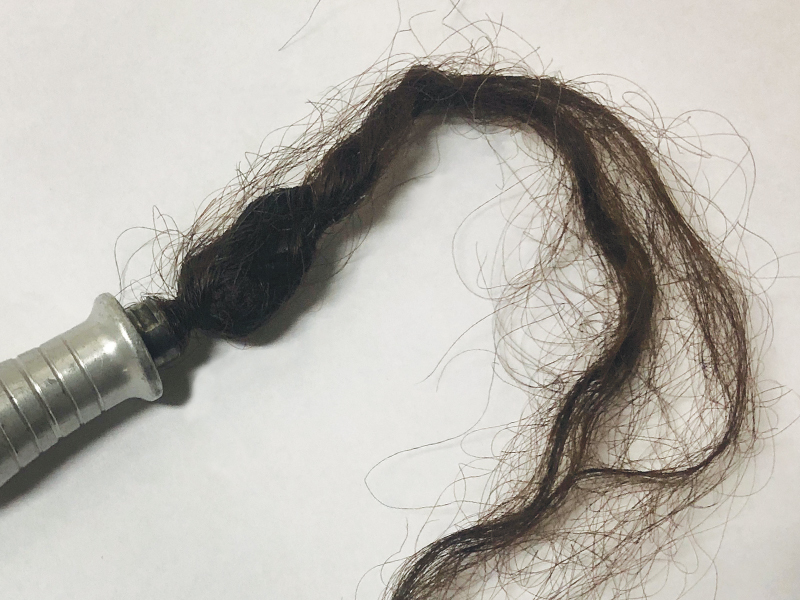
Loose hair can be a dangerous hazard—always tie it back before polishing.
Although it’s tempting to want to wear gloves to protect your fingers from the heat generated by the polishing wheel, don’t. While they might seem like a harmless safety measure, they are a major hazard. The rotating machinery can easily catch loose material, pulling the glove—and potentially your hand—into the wheel. To protect their fingers from the heat, some jewelers will cut the fingers off a pair of leather gloves and slip the loose tips over their fingers.
Polishing chains requires particular caution. Without proper training, you risk either breaking the chain or, worse, causing serious injury to your hands. Chains are prone to being snagged and whipped around by the buffing wheel, making them one of the most dangerous items to polish.
Dust control is another critical aspect of safety. Fine particles from polishing compounds and metal shavings can accumulate quickly, posing respiratory risks and creating a messy work environment. Wiping down all surfaces of equipment, benches, and counters at the end of each day, as well as vacuuming the workshop, can significantly reduce airborne dust and help maintain a clean, safe space for jewelry production.
Every jeweler develops a preferred polishing method over time, as each workshop and project present unique challenges. Experiment with a variety of compounds and application methods—sizes and types of bristle brushes available, as well as hard and soft felt buffs, and stitched, unstitched, treated, and untreated muslin buffs—until you find the combination that polishes your work to perfection.