

Testing the Agile Elite Rolling Mill
Let’s Roll
The Agile Elite combines thoughtful design and practical features
By Melissa Muir
(Originally Published by MJSA October 2024)
When it comes to setting up a top-notch jewelry studio, a rolling mill is often a prized addition. These versatile machines not only reduce sheet and wire stock, but they also imprint intricate textures and patterns onto metal, taking your designs to new levels of artistry. The new Agile Elite rolling mill, the latest addition to Durston Tools’ Agile series of rolling mills, offers a wonderful blend of features and enhancements that cater to both seasoned jewelers and newcomers alike.
About the Mill
The Agile Elite series includes four distinct models: the 110 Combo, 110 Flat, 140 Combo, and 140 Flat. The numbers in the model names indicate the roller width in millimeters, while the gear ratio differentiates the models’ ease of use. The 110 models feature a 4:1 gear ratio, meaning you turn the handle four times for one full revolution of the rollers. In contrast, the 140 models boast a 5:1 gear ratio, reducing manual effort significantly by requiring just five turns of the handle for each roller revolution.
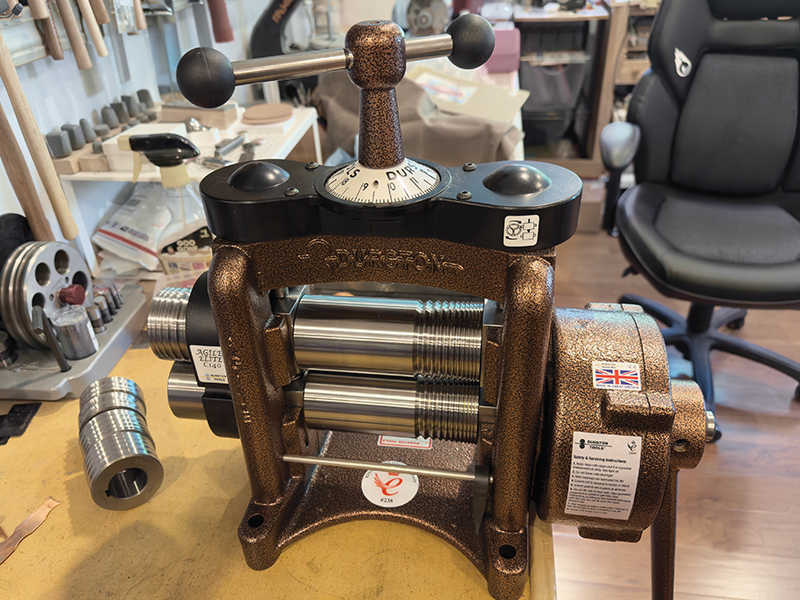
Durston’s Agile Elite rolling mills build on the success of its DRM and original Agile series. The DRM models feature a round adjustment wheel and optional side extension rollers, while the original Agile mills use a T-bar and lack extension rollers. The Agile Elite merges the best of both worlds, incorporating an adjustable T-bar for greater torque and control, and a set of versatile grooved extension rollers designed for half-round and comfort-fit wire profiles.
The 140 Combo model, as tested, includes extension rollers with a range of sizes for various wire profiles:
- #1 Roller: 5 mm, 4 mm, 3 mm,
- and 2 mm D Shape
- #2 Roller: 8 mm, 6 mm, and 3 mm D Shape
- #3 Roller: 10 mm and 7 mm D Shape
- Comfort-Fit Extension Range: 3 mm to 7 mm
Additionally, the Agile Elite’s wider roller—140 mm in total—features 50 mm dedicated to square wire grooves and 90 mm for pattern plate rolling. This expanded flat area is particularly useful for larger projects such as using pattern plates, making the mill a versatile tool for various jewelry-making techniques.
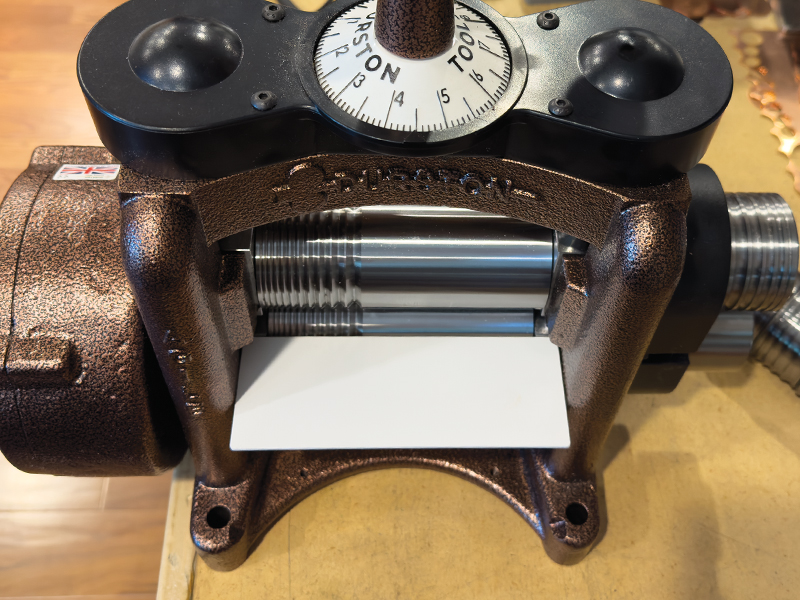
Rear catch tray
The Agile Elite Rolling Mill is presented as a special “King’s Celebration Edition” with a sleek powder-coated copper finish. This limited edition also includes a comprehensive set of accessories: a pattern plate, a rolling mill cover, circlips and pliers, and even a pair of gloves and a microfiber cloth for maintaining cleanliness and safety. The white rear catch tray is a thoughtful addition, making it easier to retrieve small pieces and keep track of your work.
How Well Does It Work?
Testing the Agile Elite rolling mill involved starting with a silver ingot I had poured myself from scrap metal. After forging the ingot down to approximately 6 mm and thoroughly annealing it, I began the process of reducing it into a sheet. Thanks to the mill’s 5:1 gear ratio, the task was manageable, though still somewhat labor-intensive. I completed about three passes, each time reducing the gap between the rollers by approximately three-quarters of a turn on the T-bar. Following each third pass or so, I annealed, pickled, and dried the metal before continuing. It’s crucial to reduce the gap gradually; attempting to do so too quickly can make it nearly impossible to continue rolling with your own strength. Additionally, when rolling sheet metal, maintain a consistent rolling direction until the metal is annealed. After annealing, you can change the direction, but try to roll in the same direction within each session.
For roll printing, getting the gap just right is key. My preferred method involves placing the annealed metal and pattern plate (or other pattern material) in the mill, adjusting the rollers to be just tight enough to hold the material without compressing it. After rolling the items back out, I tighten the rollers by about a quarter turn on the handle. I then add a piece of thick watercolor paper, cut to size, to create a sandwich around the metal, and roll the entire stack through. If it’s too easy to roll through, there isn’t enough pressure to create a good impression. Conversely, if you have to work a bit to get everything through, you’re more likely to achieve a deep, clean impression. Be cautious not to apply excessive pressure, as it can damage both the materials and the mill itself.

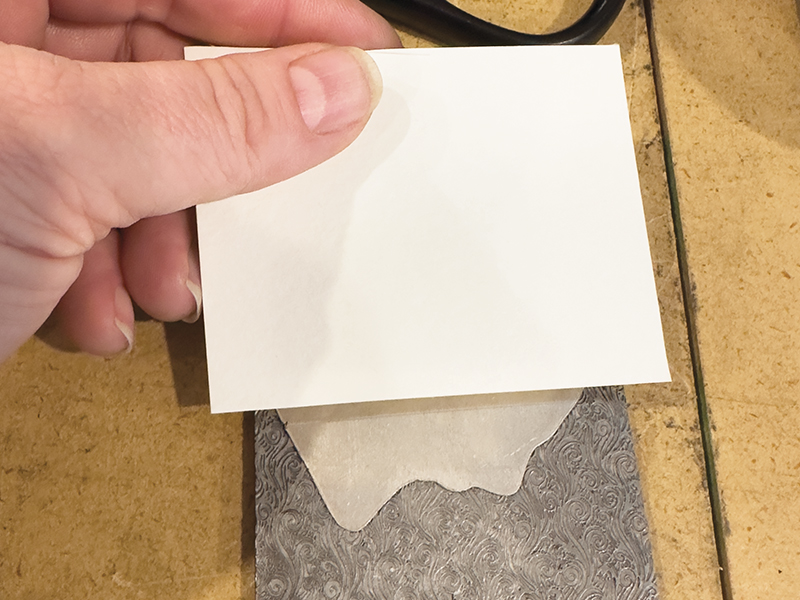
Roll printing with the Agile Elite mill requires precise spacing of the rollers to achieve clean, detailed impressions on metal sheets, ensuring accurate pressure for intricate textures.
In addition, there are times when you will not need to tighten the roller at all and may actually need to back it off just slightly. I find that happens more often when I am using metal pattern plates or items that have no give. You will be able to tell pretty easily what is needed as it will be difficult or impossible to roll the item through, indicating that you need to loosen up the rolls a bit.
When rolling wire, ensure the metal is properly annealed and select the appropriate groove size to avoid issues such as flanging. If the wire is too thick for a groove, it may result in unwanted side flanges. To address this, roll the wire through each groove two to three times, rotating it 90 degrees between passes. The rollers should be nearly closed on the final pass before moving to a smaller groove. Frequent annealing is essential to prevent cracking and fraying of the wire.
Troubleshooting and Tips
Even with a high-quality rolling mill, issues can arise during the rolling process. Common issues include cracking edges, which may indicate insufficient annealing or excessive reduction speed. Flaky or bubbly surfaces may result from cold ingot molds when pouring the ingot or excessive annealing. For wavy or bent wire, ensure adequate tension during the rolling process and avoid applying too much pressure. Materials used for imprinting should be dry. Do not use fresh flowers or similar materials to avoid getting moisture on the rolls, which can cause rust and pitting.
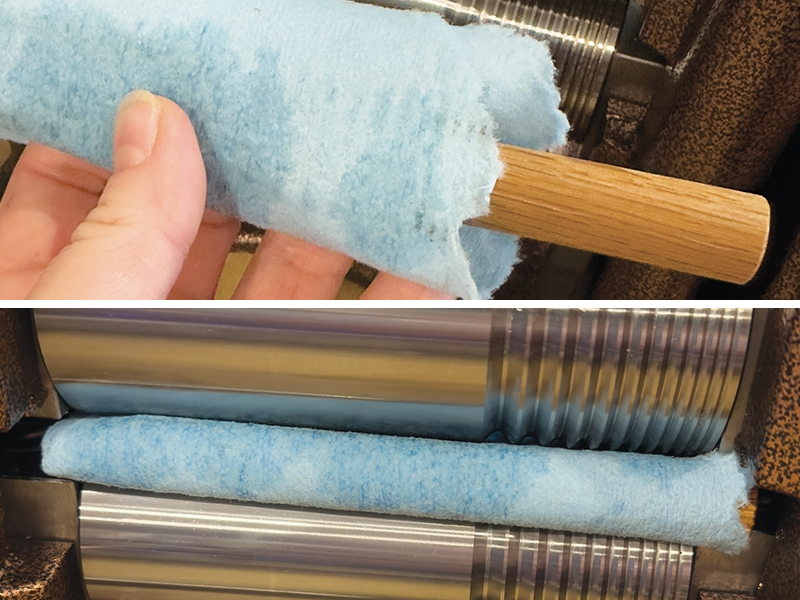
To maintain the mill, Muir applies a 3-in-1 oil to a paper towel that she wraps around a dowel and then feeds it into the mill. As she turns the handle, the oil is distributed across the rollers, removing dirt and debris and preventing rust.
While the Agile Elite is built to last, proper use and maintenance are essential. After using the rolling mill, it’s important to clean and protect it properly. I recommend wiping it down with a 3-in-1oil to remove any dirt and debris, and to prevent rust from atmospheric moisture. To do this, insert a wooden dowel wrapped in a paper towel into the rollers, similar to how you would feed metal through. The dowel will keep the paper towel from pulling through entirely. Avoid closing the rollers too tightly. As you turn the handle, apply the 3-in-1oil to the rollers and continue rolling. The paper towel will absorb the oil and evenly distribute it across the rollers, ensuring thorough protection and maintenance.
With its superior build quality, extensive range of features, and user-friendly design, the Agile Elite rolling mill stands out as a top choice for jewelers seeking a reliable and versatile rolling mill. Whether you are a seasoned professional or an enthusiastic beginner, the Agile Elite promises to be a valuable asset in your jewelry-making toolkit.
MJSA would like to thank Durston Tools for supplying the rolling mill for testing.