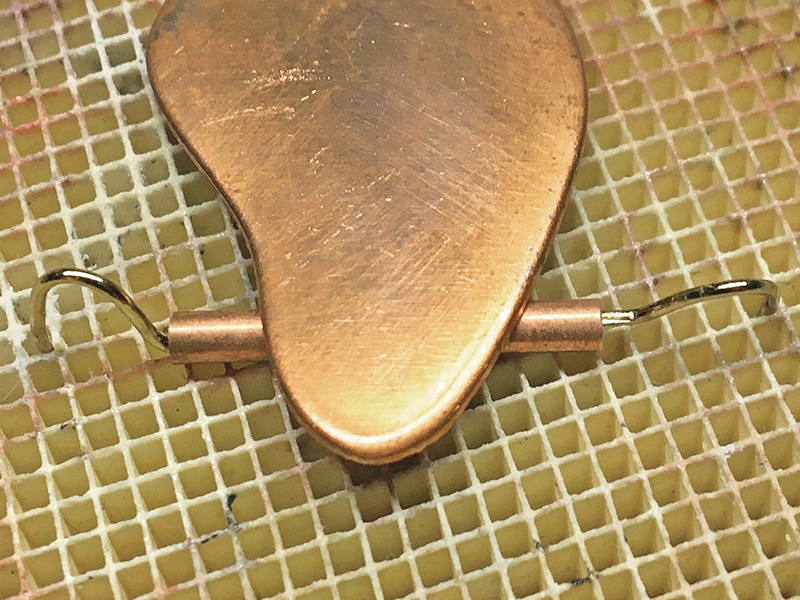
A solution for keeping tubing steady and straight when soldering
By Helen I. Driggs
(Originally Published by MJSA September 2024)
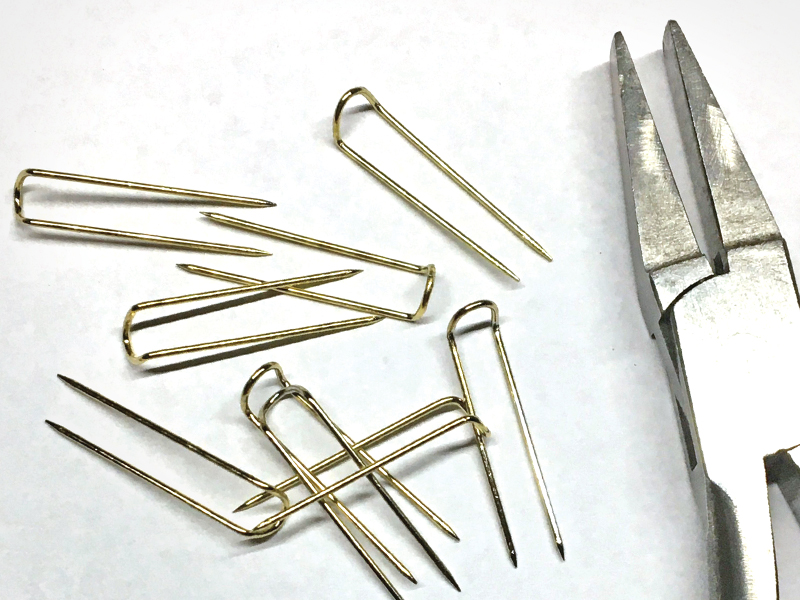
I’ve been making lots of brooches lately and sometimes have trouble keeping tubing steady and straight while I solder it on for the pin stem. Either the flux bubbles and moves that tiny tube around, or the torch itself nudges the tubing just enough to ruin my day. Binding wire wasn’t the answer because it was either too thick or too floppy to do the job. T-pins also weren’t going to help because they were also too thick, but I discovered that steel U-shaped display pins turned out to be the perfect solution.
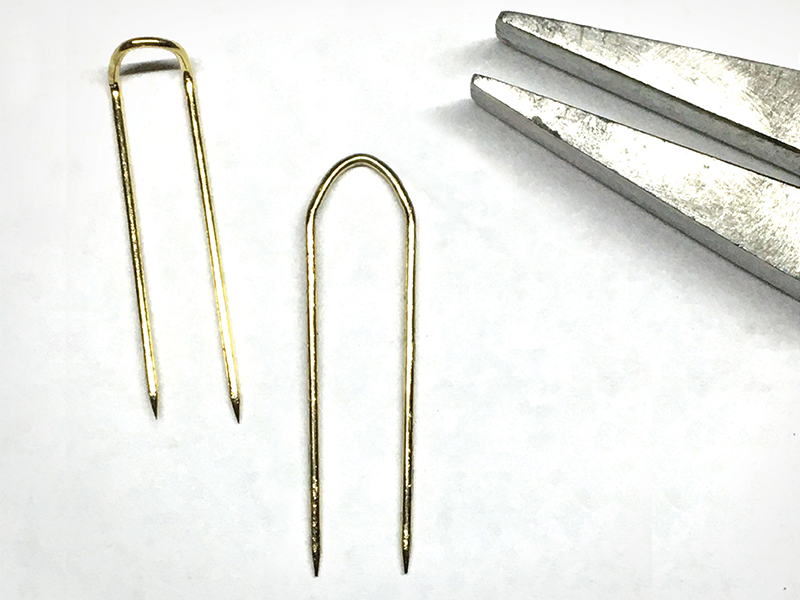
1. To try this at home, you’ll need two steel U-shaped display pins and a set of sturdy flat-nosed pliers.
2. If the curved part of the display pin is angled, flatten it with the pliers to create a U-shape that lies completely flat on the worktop.
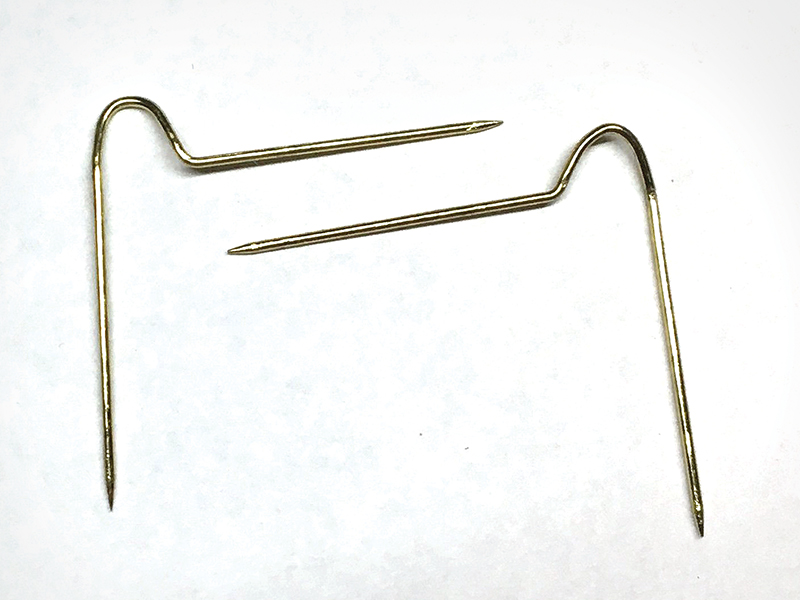
3. Bend one of the legs of the U out to 90 degrees and away from the other leg.
4. Repeat for the other display pin.
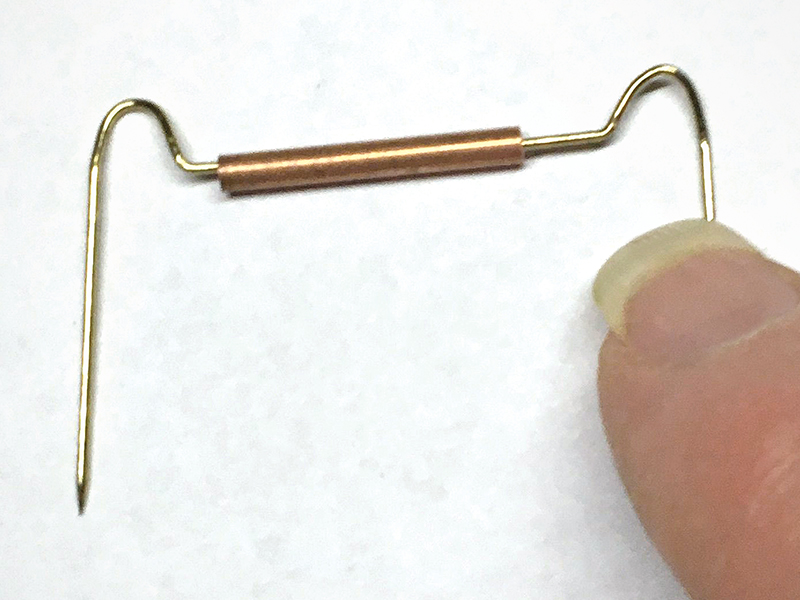
5. Verify that both pins will fit inside the tubing you intend to solder.
6. To set up for soldering, insert the legs of the pins into a honeycomb block. It’s easiest to do this with both pins inserted into the tubing to start. Then, position the piece under the tubing. The long legs of the display pins allow lots of wiggle room for thick pieces.
7. Alternatively, you can lay the work on top of the tubing, which is anchored where you want it by the pins and won’t roll around. This setup is useful for thicker works or for pieces that may have large bezels on the front or other areas that make the pieces difficult to balance on the honeycomb block.
Manage Consent
To provide the best experiences, we use technologies like cookies to store and/or access device information. Consenting to these technologies will allow us to process data such as browsing behavior or unique IDs on this site. Not consenting or withdrawing consent, may adversely affect certain features and functions.
Functional
Always active
The technical storage or access is strictly necessary for the legitimate purpose of enabling the use of a specific service explicitly requested by the subscriber or user, or for the sole purpose of carrying out the transmission of a communication over an electronic communications network.
Preferences
The technical storage or access is necessary for the legitimate purpose of storing preferences that are not requested by the subscriber or user.
Statistics
The technical storage or access that is used exclusively for statistical purposes.The technical storage or access that is used exclusively for anonymous statistical purposes. Without a subpoena, voluntary compliance on the part of your Internet Service Provider, or additional records from a third party, information stored or retrieved for this purpose alone cannot usually be used to identify you.
Marketing
The technical storage or access is required to create user profiles to send advertising, or to track the user on a website or across several websites for similar marketing purposes.
A Fresh Look. A New Website. A Stronger Membership.
We’re excited to unveil Jewelers of America’s refreshed brand and redesigned website, reflecting our growing community and continued commitment to the jewelry industry.
With JA and MJSA now united under one membership, we’re bringing together more resources, expertise and connections to support every facet of the jewelry industry.
Take a look around to see all that JA offers — members can login to access member-only content like benefits, the Knowledge Vault and Advocacy resources.
Questions? Contact us at members@jewelers.org or call/text (800) 223-0673.