Navigating the Challenges in Bead-Style Settings
Drawing a Bead
Patience, precision, and practice are the keys to better bead-style settings
By Shawna Kulpa
Why do bead-style settings—from classic single-row “bead and bright” cuts to multi-row pavé—make even seasoned jewelers take a thoughtful pause?
Let me count the reasons…
First, there’s the equipment and steps involved. When you’re setting a solitaire in a prong setting, you need only a few basic tools and the steps are short and clear: drill seat in prongs, seat stone, fold prongs over stone, and clean up. With bead settings, you need a drill, a beading tool, a range of burs, and different types of gravers to raise metal and create proper prongs.
There are also a number of steps involved, the first of which is most likely to trip up jewelers: the layout. You need to not only decide the best location of each stone, but also consider where and how you will form the beads to secure the stones.
“It has to be very precise,” says Scott Patrick, a member of the Tech Team at Rio Grande in Albuquerque, New Mexico. “You’re going to be working with stones very close to each other. If two stones rub together, you’ll wind up chipping them.”
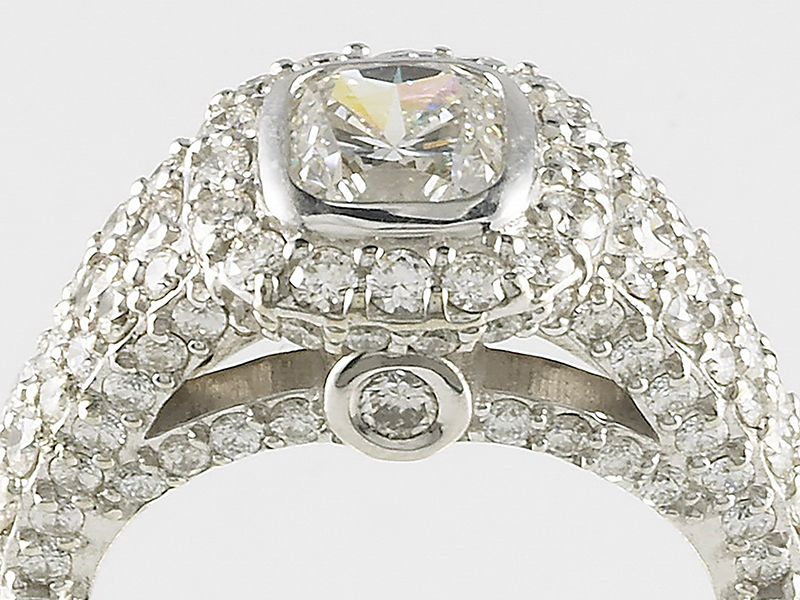
Unfortunately, you won’t often know if you messed up the layout until you’re about halfway done with the piece. If the stones are placed properly, “as you bring the diamonds down the ring shank, they should get closer together,” explains Joel McFadden of Joel McFadden Designs in Fuquay Varina, North Carolina. “If they’re too far apart, you’ll wind up with large gaps and you won’t be able to use one bead between the stones.”
In such an event, you’ll have to either make the bead large enough to cover both stones (and stand out noticeably from the other, smaller beads) or split it into two small beads, each of which will secure a stone (and again will stand out from the other beads).
Layout becomes an even bigger problem when you’re creating multi-row pavé. “You’re taking all the problems with single-row pavé and adding cobbled rows,” says McFadden. “You’ll have a center row, but the next row starts halfway over and now some prongs have to hold three stones. That’s where it becomes an incredibly complicated design.”
Obviously, any type of bead setting requires a careful blend of precision, patience, and careful attention to detail. But do it right—create the proper stone arrangements, ensure seamless spacing, and unravel the complexities—and the stones transform into a harmonious, sparkling composition.
So…how you do you overcome the challenges? McFadden and Patrick are two experienced stone setters, and they have some suggestions.
Know the Sizes of Your Stones
Before you can begin laying out the stones, you need to know the size of every one that you’ll be setting. Because the industry standard with gemstones allows for a couple tenths of a millimeter variation in size, the 1.5 mm stones you asked for can measure anywhere from 1.3 to 1.8 mm. Even if you rely on a long-trusted supplier that offers tighter tolerances (e.g., 1.4 to 1.6 mm), it doesn’t hurt to double-check.
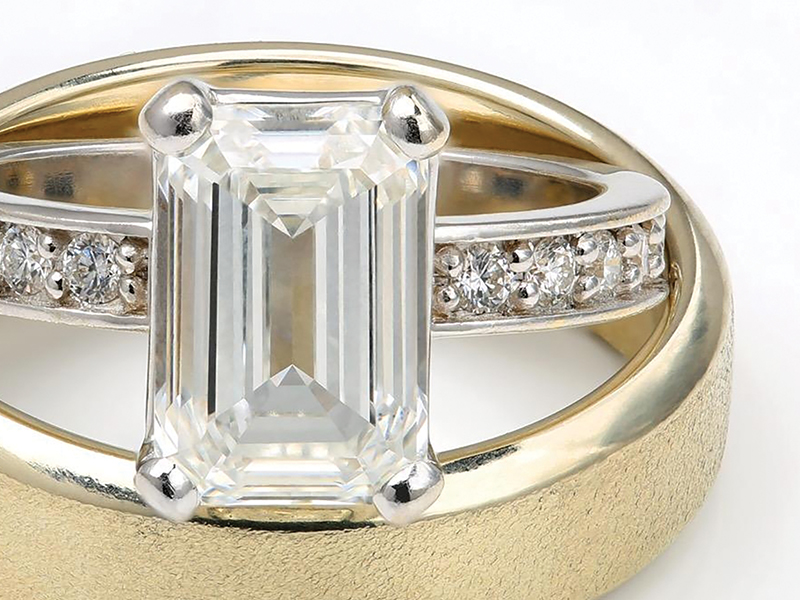
Requiring an assortment of tools and skills, bead settings demand meticulous planning and execution.
“It’s critical that you know the sizes of your stones,” Patrick says, due to the preciseness of this setting style. This is especially true if the design incorporates stones that taper in size. (“Doing the tapers will hurt your brain,” he says.) If you’re setting a large number of stones, Patrick recommends using stone sieves to quickly sort them.
Once you know the sizes of your stones, you can determine the best way to arrange them. Since they’re unlikely to all measure exactly 1.5 mm, McFadden recommends arranging them in a way that helps mitigate any size differences. Unless your plan is to taper them, “arrange them big, small, big, small,” he explains. Not only will this help with properly spacing out the layout, but it will also help to create a more cohesive look where all the diamonds appear to be the same size.
Arrange the Stones Well
While there are lots of times in life when it’s ok to wing it, this is not one of them. It’s critical to make sure that the spacing between the stones is consistent. “People aren’t going to perceive the variation of the diameter of the stones, but they will perceive any variation in the spacing,” says McFadden. That’s because the metal between the stones is more reflective than the stones, allowing it to call more attention to itself.
To better your chances of setting success, you’ll want to arrange the stones on the jewelry piece itself. When he’s laying out stones for a pavé setting, McFadden likes to smear beeswax along the jewelry piece. He then pushes each stone upside down into the wax, leaving a perfect circular impression from the girdle. After removing the stones, he nicks the center of each wax impression with a graver to mark the location of his pilot holes.
When he’s beginning a layout, Patrick likes to use a scribe to mark a fine line down the middle of the piece. This creates a visual that he can use to center the stones. He also recommends relying on a good set of dividers.
“You can do it with a ruler and calipers, but with a set of small sharp dividers you can make a mark, keep the tool on that mark, spin it around, and make the next mark. You get very accurate spacing that way,” Patrick says. However you decide to complete your layout, he adds a strict caution: “No eyeballing it!”
Another reason why you want to make sure you leave the same amount of metal between stones is to ensure you’ll be able to form prongs of the same size. “It’s one of the hardest parts of pavé setting—leaving the right amount of metal to have enough for the prongs,” says Patrick.
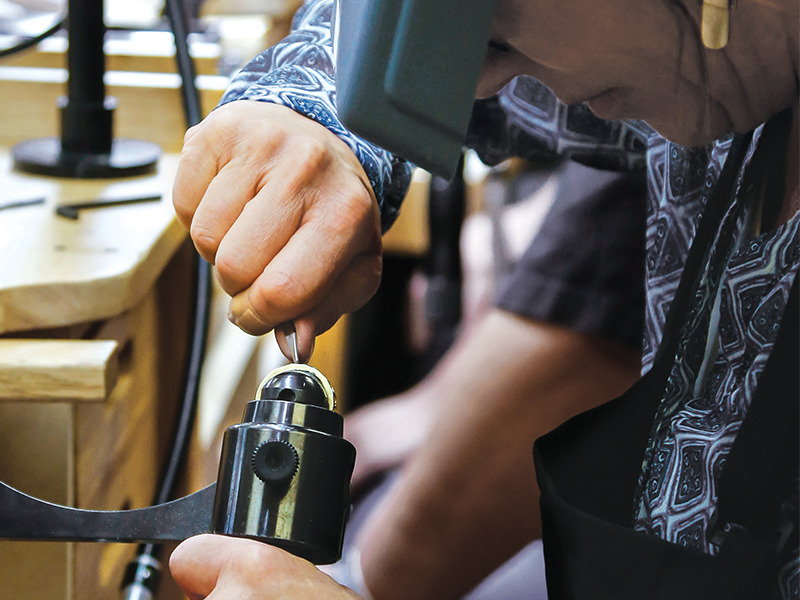
While there are lots of times in life when it’s ok to wing it, creating the layout for bead-set stones and ensuring the spacing between the stones is consistent is not one of them.
When beginning the layout, start in the center and then work your way outward, back and forth between the right and left, as this allows more room for error. “If you start having a problem and a measurement is off, you can make it manageable by adjusting both ends,” McFadden explains. “But it you start on one end, you’ll magnify any flaws all the way to the other end, creating a bigger problem.”
If the piece features a large center stone, Patrick recommends measuring from where the edge of the bright cut would be compared to the center stone. “Work from that end to the other end,” he says. The same applies if you’re working next to a design element—you want to start and make sure the first stone in the layout is where it needs to be and then adjust the others accordingly.
Other Areas of Concern
By taking the time to ensure the stones are properly arranged, you’ve won half the battle, but there are still areas that can trip up beginner and novice jewelers alike. Here are a few tips to overcome some of the additional challenges that lie ahead.
Watch Your Speed
When you’re ready to open the holes for the stones, McFadden and Patrick both caution to go slow.
“Some jewelers might force the drill to go fast, which can cause the bur to drift,” says McFadden. “It won’t cut straight down. Instead, it will go in another direction—usually away from the jeweler.” Drifting burs can screw up the spacing you worked so hard to perfect during the layout stage. “In every step, there’s a chance to screw things up,” he says.
Patrick recommends going no faster than 5,000 rpm when stone setting. “Going at a low speed gives you better control over the tool,” he says.

Dig Deep
Once the holes for the stones are opened to about 80 to 90 percent, the next step is to cut out the excess metal between the holes, which will become your prongs. There’s no formula for determining the best prong size to create. “It has to be big enough to touch the stones,” says McFadden.
There’s also no hard rule about the number of prongs that should secure each stone. Some stones may be held with three prongs, while others will be secured by two. “It depends on the size of what you’re working with,” says McFadden. “With pavé, every piece you do is going to be different. There’s no set rule that works all the time. You just have to learn the techniques, and then adjust them for every circumstance.”
That said, every stone should be held by at least two beads, with one on either side. “If those beads are holding it snug, it can’t rock in any direction or fall out,” says Patrick.
When he’s bead-setting small stones, Patrick uses a #51 round graver. His technique is to bring the tip of the graver back a little way from the stone, and then roll the graver back and forth as he’s pushing downward.

“The graver typically has a 45-degree angle at the tip,” he explains. “As you roll your hand, you don’t want to push forward so much as [push] down. [The metal] will move forward by itself because of the angle at the end of the graver.”
If you’re working with larger stones, Patrick recommends using a larger grav-er (such as a #53) because you’re going to need to move more metal to raise a larger bead to secure the stone. “While you would think it would be easier to work with bigger beads, it takes a lot more effort and bigger tools,” he says. Because it takes a lot more strength to move the metal, you may want to consider a power graver. You could also simply use more smaller beads, but Patrick doesn’t recommend it.
“It comes down to aesthetics,” he says. “You probably don’t want to have a lot of little beads around a larger stone. It also limits your design.”
If your early attempts to raise beads don’t go perfectly, don’t worry. “It takes practice to know where to start your graver to raise a bead,” he adds.
“I see people go too far, too close. If you start back too far, you might have too much cleanup, and depending on your technique, you may not have raised a good bead. That’s one of the trickiest parts.”
Don’t Push Your Luck
Once the stones are in their settings and the beads have been created, the final challenge is pushing the beads over the stones. McFadden likes to use a round bottom graver to hand-push the prongs into place, noting that care needs to be taken.
“You have to push so that the prong moves in a way that it doesn’t sheer off,” he cautions. “You can accidentally push too hard and smack those prongs off.”

If the worst-case scenario happens and you do pop off a prong, you’ll have to laser on a new one. To minimize the chances of that happening, McFadden recommends using a rocking motion to push the prong over the stones. “It’s a balance,” he says—you need to push hard enough to ensure the prong is tight against the stone, but not so hard that it snaps off.
Shape Up
If you’re prong-pushing efforts are successful, the final step is finishing each prong with a beading tool to shape it and clean it up. “At that point, you’re safe—well, as safe as you can be,” says McFadden.
To round off the prongs into perfect bead shapes, “it’s important to choose the right size beading tool,” says Patrick. If you select one that’s too small for the beads, it’ll cut into the bead, creating extra cleanup. If the tool is too large, it can go past the bead and hit the stone.
However, if the right size beading tool isn’t available, Patrick says it’s better to go slightly larger: “It’ll get the job done and you won’t have the marks to clean up.”
Add a Finishing Touch
Depending on the final look you’re trying to achieve, you may want to add bright, angled cuts along the outside of the beads, framing and enhancing them. (This specific setting style is generally known as bead and bright cutting.) While it’s a challenge, Patrick notes that it does have a benefit for jewelers: Those bright cuts can help cover any gouges you may have made to the beads when creating them.
While many jewelers typically use a knife for bright cutting, Patrick finds that they break too easily. Instead, he prefers using an onglette or flat graver. He holds it low as he guides it along the metal and around the stones.

“Depending on how good you are with a graver, the bright cuts can wind up wavy,” he says. To clean up any waves, he recommends using a sanding disc and a knife-edge rubber wheel to go in to make the cuts nice and even. Alternatively, you can use a burnisher to clean that area. “You can get down around the beads with a tool like that,” Patrick says.
Patience, Precision… and Practice
Whether it’s pavé or any other setting technique, precision is honed through repetition. “Practice, practice, practice,” advises Patrick. In the world of stone setting, skill evolves from a disciplined routine into an ingrained artistry—and each practice session becomes another step toward mastery.