

A Guide to Sketching Chains
The Missing Link
Simple ways to draw three common chain styles
By Rémy Rotenier
Quick Links: Chain Basics • Cable Chain • Wheat Chain • Paperclip Chain
When I was a young designer, I would sketch what I thought were very cool pendants, but drawing the chains that they were hanging from seemed much more complicated. I had to find ways to break down the movement of the chain, as well as the links or the elements that composed it.
Chains can enhance and become part of the design; they are essential to the modern jewelry designer. Choosing the right chain will complete the look. To help you visualize how your pendant designs will look on different chains, I will demonstrate simple ways to draw three chain styles.
For this project, you will need:
- 0.5 mm and 0.9 mm HB mechanical pencils
- A Tombow Mono 2.3 mm round eraser
- A kneaded eraser
- A 32 lb recycled ink jet copy paper
- A couple of sheets of 25 gram Canson tracing paper
- low tack artist tape
- A transparent plastic ruler
- #1 and #3 paper stumps
Chain Basics
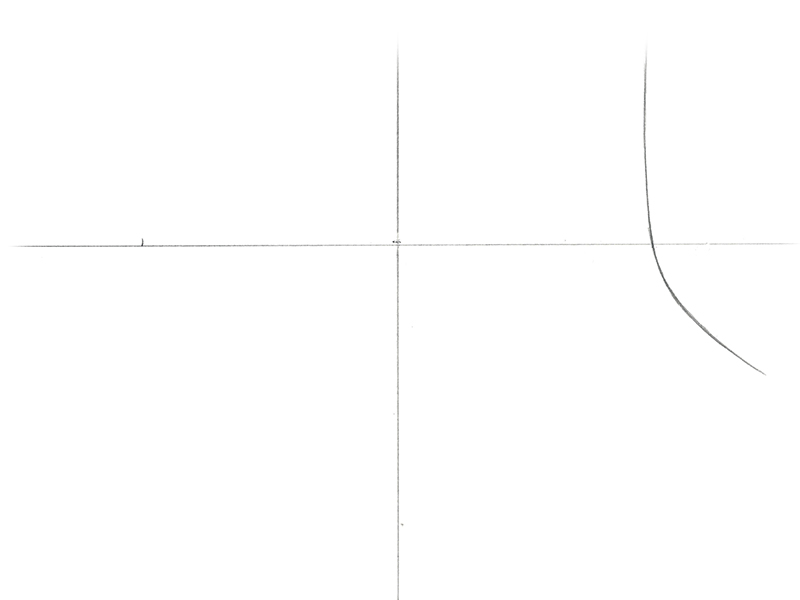
1. Begin by drawing a vertical line with the 0.5 mm pencil at the center of the page. To draw the line, mark a dot at 10.8 cm from the top left corner and one at 10.8 cm from the bottom left of the page and then connect them. Draw a horizontal line at 10 cm from the top of the page. Mark a dot on the horizontal line at 5.5 cm on either side of the intersection of the lines. This will give you an 11 cm width at the base of the neck.
2. Draw the right side of the neck. Start with the long, almost straight line of the neck; the little dot at 5.5 cm indicates where the line swoops down toward the shoulder.
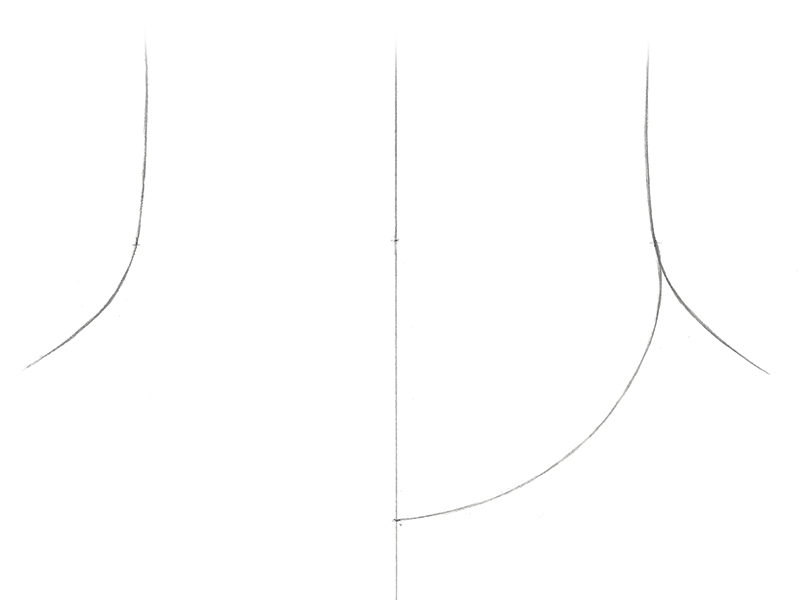
3. Place a piece of tracing paper over your page and tack it down with at least three small squares of low tack artist tape. Trace the neck form and give yourself a few points of reference. Flip the tracing paper and apply it to the left side of the neck. Tape it down and scratch the drawing of the neckline with the back of your mechanical pencil to transfer. Erase the horizontal line going across the neck design.
4. The best thing to do when drawing chains is to create a path in which the chains are contained, which will show their width and motion. This is achieved by drawing a line that will eventually be erased on the top and another one below. Doing this allows you to draw the links without losing the general movement of the chain. We are drawing a 16 inch chain so place a dot 6 cm below the 10 cm mark on the vertical line. Draw the top line on the right from the center up in a fluid motion all the way to the neck point (at 5.5 cm from the center line).
Tip: To avoid fuzzy lines, remember to hover with your pencil right above the paper to make sure your line is going in the right direction, then bring the pencil down to the paper and draw the line.
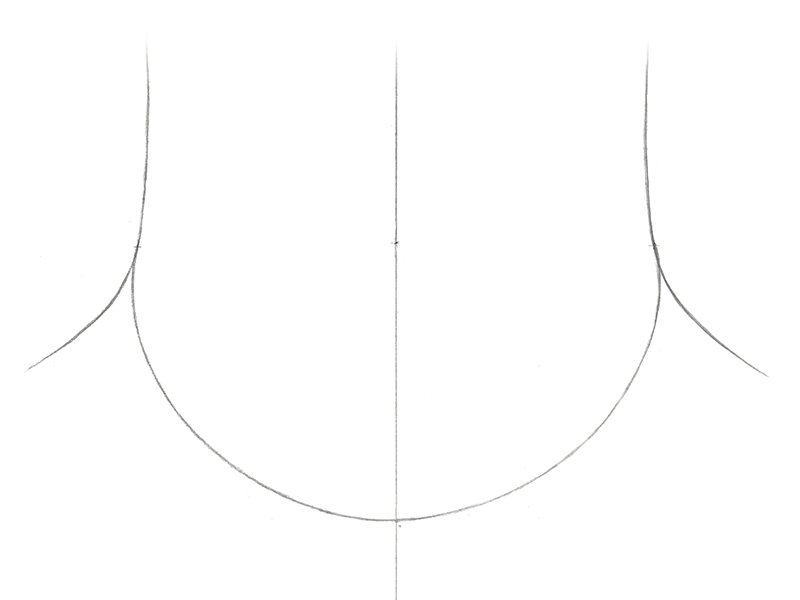
5. Just as we did in Step 3, trace that line, mark some reference points, and flip and transfer the line to the left side.
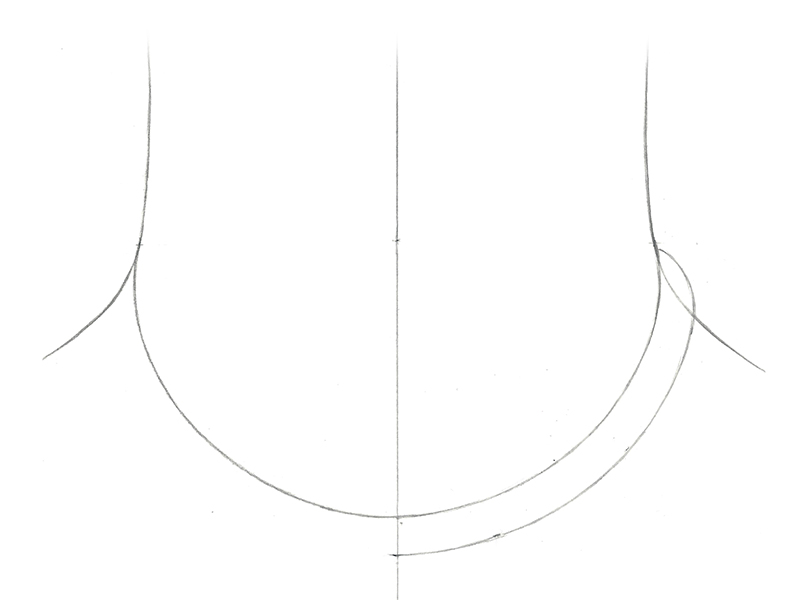
6. Draw a dot 8 mm below the top line, and then add three more dots below the top line going up toward the neck. Connect the dots to draw the bottom line, parallel to the top line, all the way up.
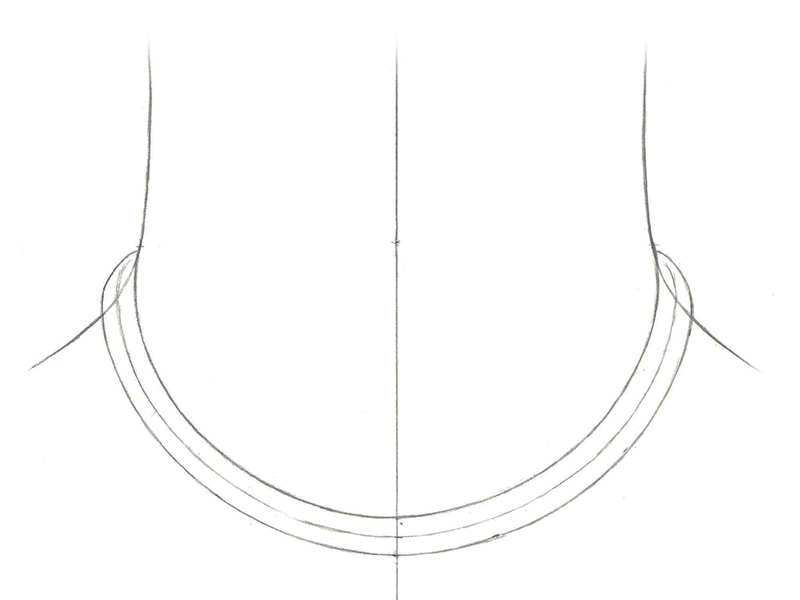
7. Trace, flip, and transfer the bottom line onto the left side of the necklace. The chain will be contained in this form, between the lines keeping everything together. Draw a light center line at 4 mm from either the top or the bottom line.
Cable Chain
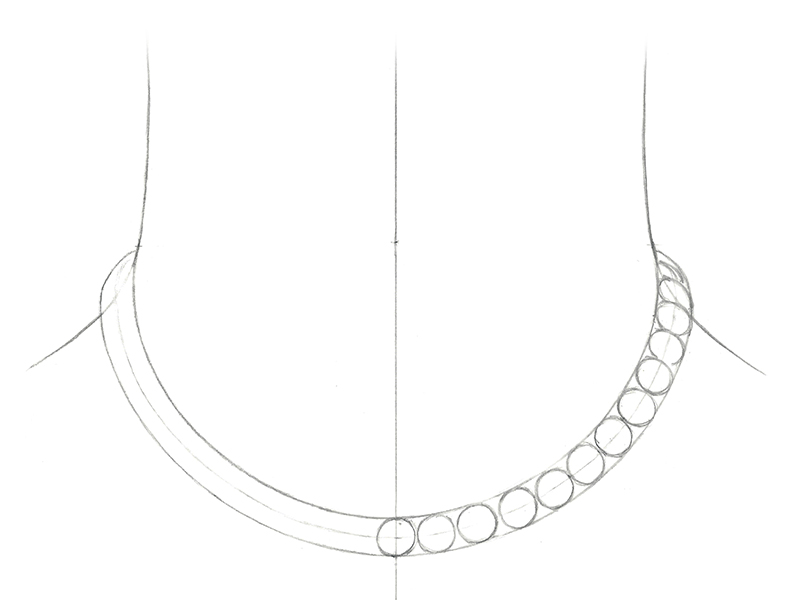
8. We will work on the right side first. Draw a circle in the center representing the cable link. From there, moving up, as you add more cable links the circle shapes start turning into ellipses. The further away we are from the center, the thinner the ellipse becomes. Also, keep an eye on the spacing between the links. It quickly vanishes and the links become increasingly covered by the one below.

9. Draw small circles inside the first ones. Just like the larger ones, they will be round in the middle and become ellipses as they climb up toward the neck.
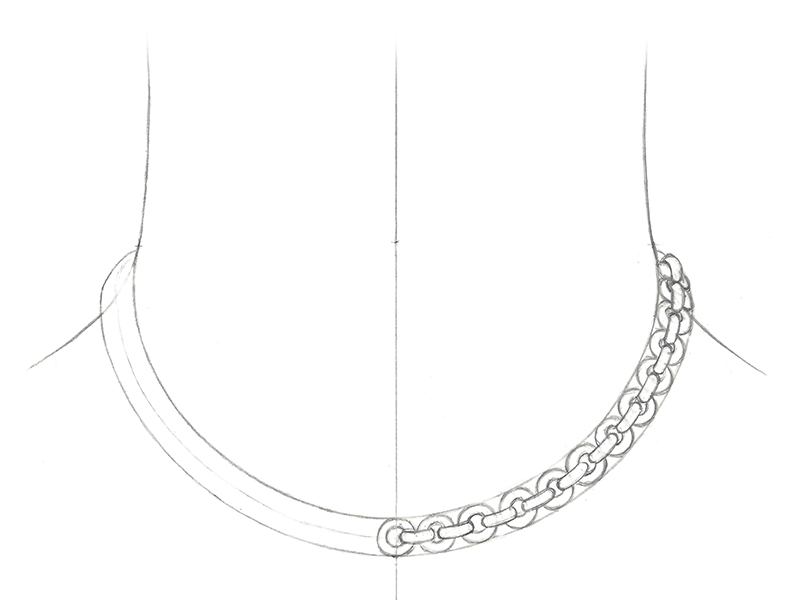
10. Erase the middle line, which will create the path for the links. Draw the horizontal links. They should be the same thickness and length as the first set. They should be drawn straight and as they go up, they will have a little bend, which also starts showing their underside. The links should gradually get smaller.
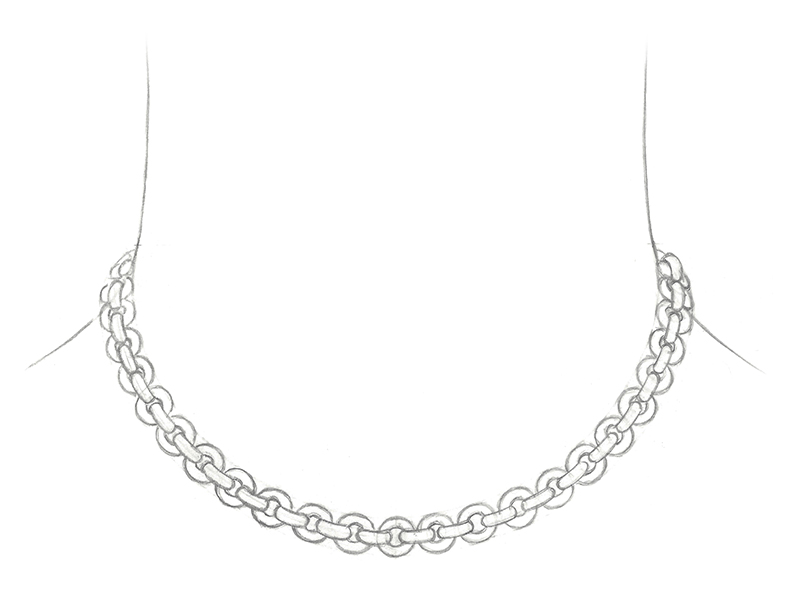
11. Tape down a piece of tracing paper over the right side and trace the chain. Make sure to mark some reference points before taking the tape off. Flip the drawing over the left side and tape it down were you want it to be (use those little markings). Transfer the design to the left by scratching it with the back of your mechanical pencil. Make sure to erase your construction lines.

12. With the convention that the light comes from the left at 45 degrees, render the links with light gray shadows. Those shaded areas will naturally be on the right side of the chain links. (Note the natural transition of the light toward the center as it moves from one side to the other.) To make the shadow look natural, first use the 0.9 mm pencil very lightly. Keep the pencil in one direction to “fatigue” the lead. Once the lead gets a bit rounded, it creates very even and soft looking shadows. Use the #1 paper stump to smooth out any thin lines in the shaded areas. To make the stump work best, press lightly (pressing hard creates marks I call “clouds”). If you get some of those, shape a piece of the kneaded eraser into a thin tube and flatten the bottom of it. Press down and pull it over the stump’s clouds, which will lift away some of the graphite. Also, only do “one-ways” with the stump. You can go, lift, go back, lift, etc. That gives you much more control of this smoothing tool.
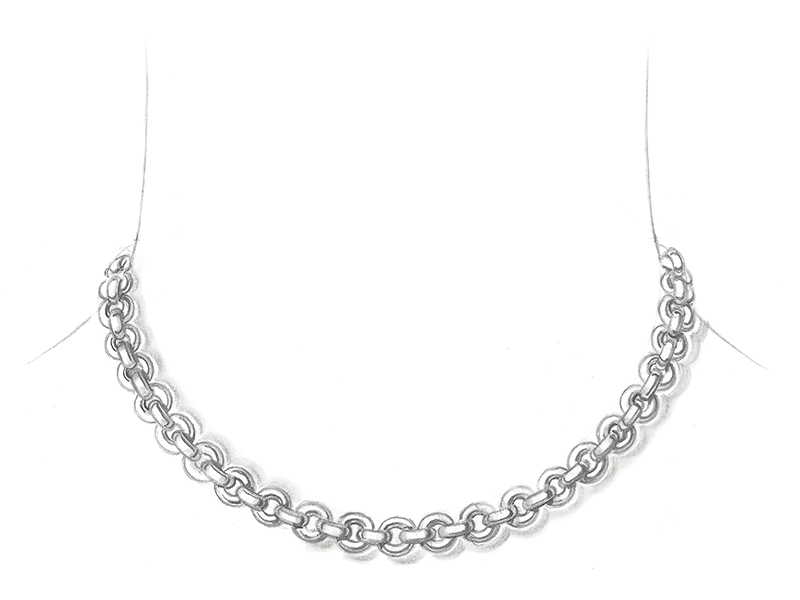
13. For a great metallic look, add some darker accents within the shaded areas. A good tip is to make those darker values with crisp edges (as opposed to fuzzy) and to stay away from the edge of the design. The light edges represent reflected light, which in metal, typically runs along the edge of the object. Add a little shadow around the chain using the 0.9 mm pencil lightly, followed by a bit of smoothing with the #3 paper stump.
Wheat Chain
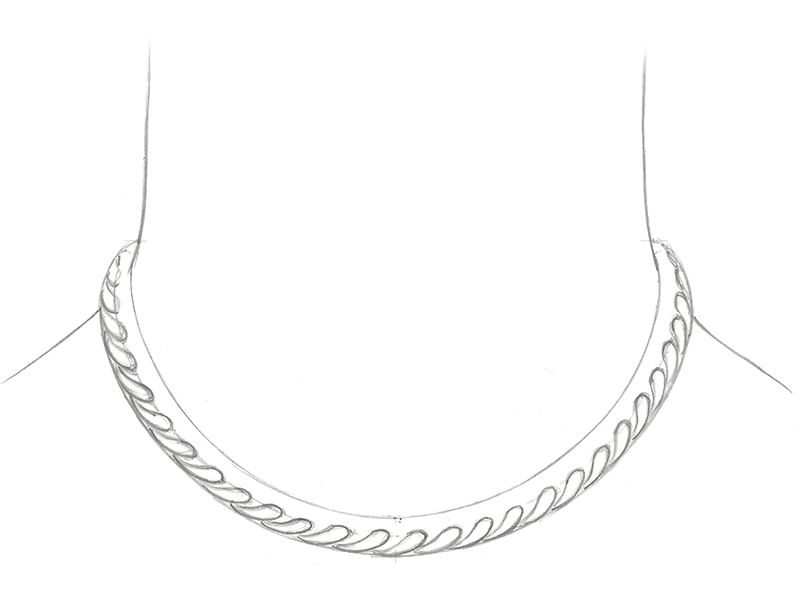
14. Starting again with Steps 1 through 7, you can build other chain styles. Next, we will create a wheat chain. After you have completed Step 7, begin by drawing the bottom part of the link in an S-shaped comma within the guard rails.
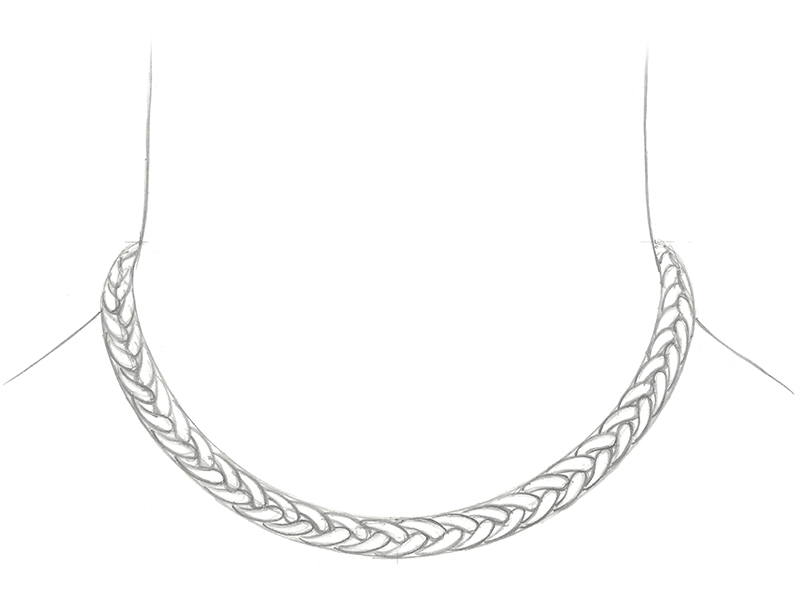
15. Add the same wave design on the top part to complete the wheat pattern.
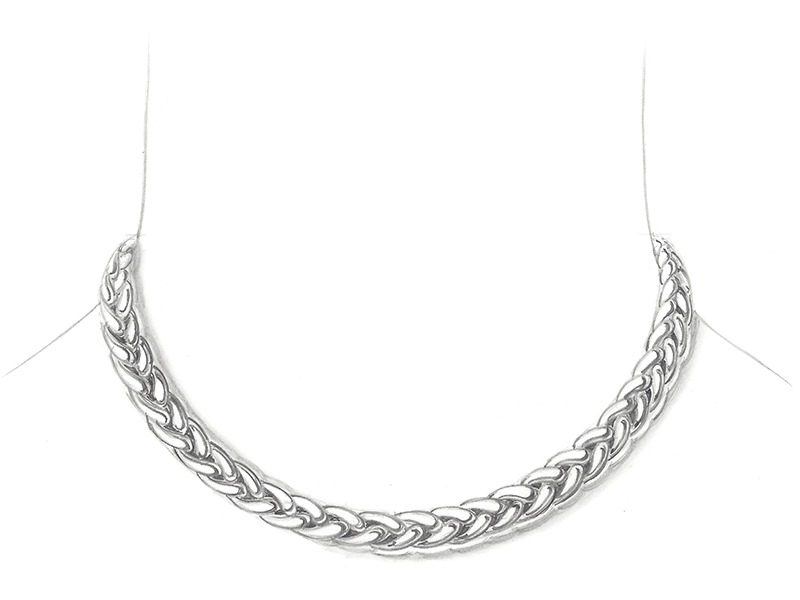
16. Use the two steps of shading (see Steps 12 and 13). First, the lighter shaded areas, which give you a good sense for the volume of the chain. Then, the darker values, staying clear of the edges. Use the #3 paper stump to add a shadow and note how it travels from one side to the other.
Paperclip Chain
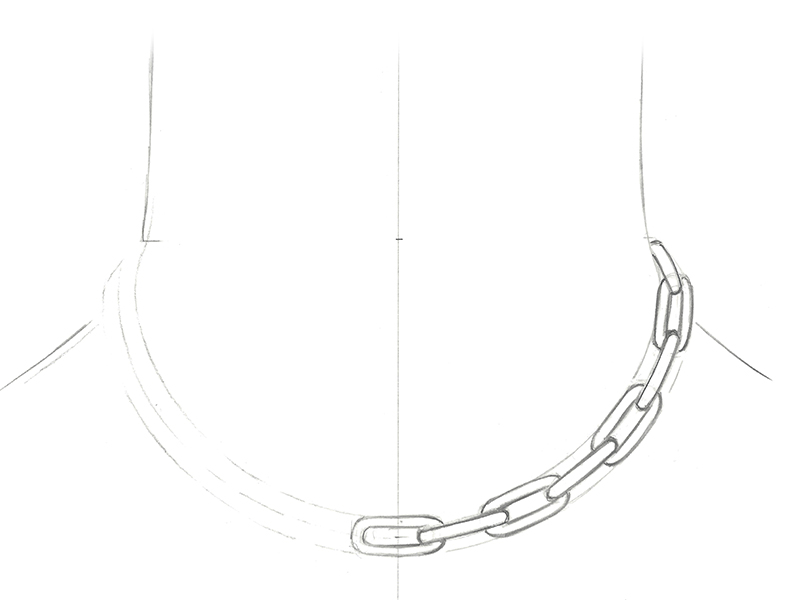
17. Next, we will sketch a paperclip chain, which is comprised of thin rectangular links with softer, rounded edges. Start by following Steps 1 through 7. Next, use the line in the center as a guide and draw a paperclip link in the center of the neck, and then add links up the neck. Keep going up and pay close attention to the chain as it turns behind the neck. The links should get gradually smaller as they depart from the center.
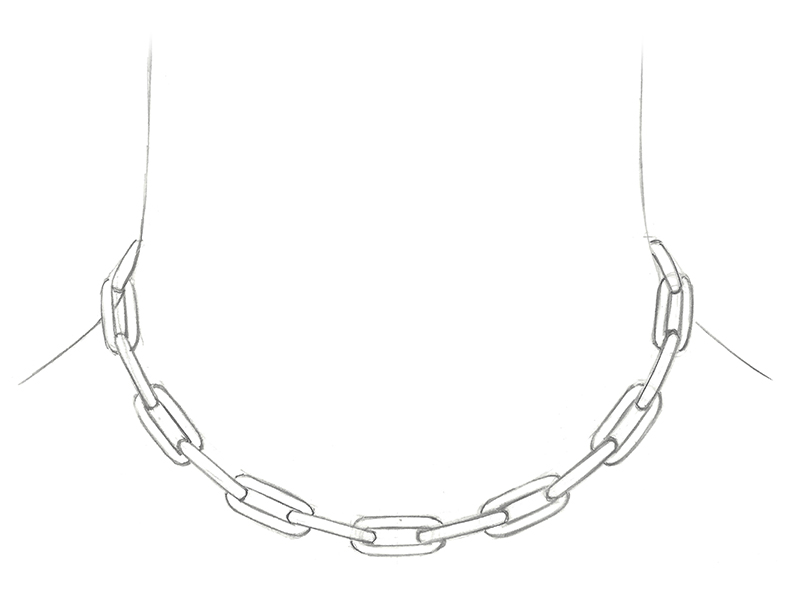
18. Apply a piece of tracing paper over the design, tape it, trace the links, and mark a few reference spots. Flip the traced design, tape it, and transfer the image to the left side. Remove the construction lines.
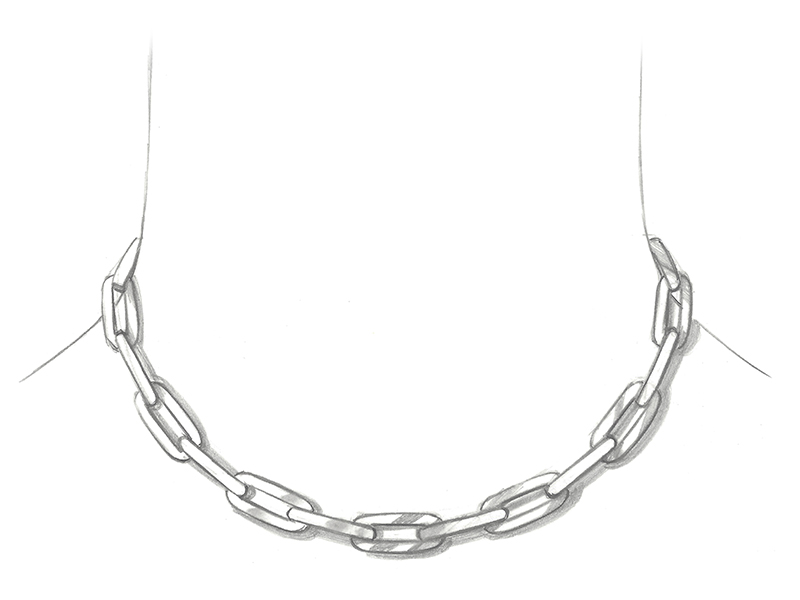
19. Gently use the 0.9 mm pencil and shade the links with light and medium gray shadows. Smooth out the shadows using the #1 stump. Once you build the darker values, the paperclip chain is done.