Get efficient and clean bends on earring heads for round and faceted stones
By Helen I. Driggs
(Originally Published by MJSA July 2023)
I had a pair of inexpensive, off-the-shelf setting pliers that were almost what I needed, but not perfect, so I decided to modify them to make them more useful. The issue I faced with this particular set of pliers was getting efficient and clean bends on the tiny, thin prongs of purchased earring heads for round and/or square faceted stones. These pliers had only two oval grooves on their jaws, and I couldn’t figure out a way to seat the earring and the post within their jaws without bending something I didn’t want bent. Below is the solution I found, which may also work for you.
1. The plier jaws met decently and the steel was pretty hard, so I decided a trip to my tool modification station was in order to bring them up to task.
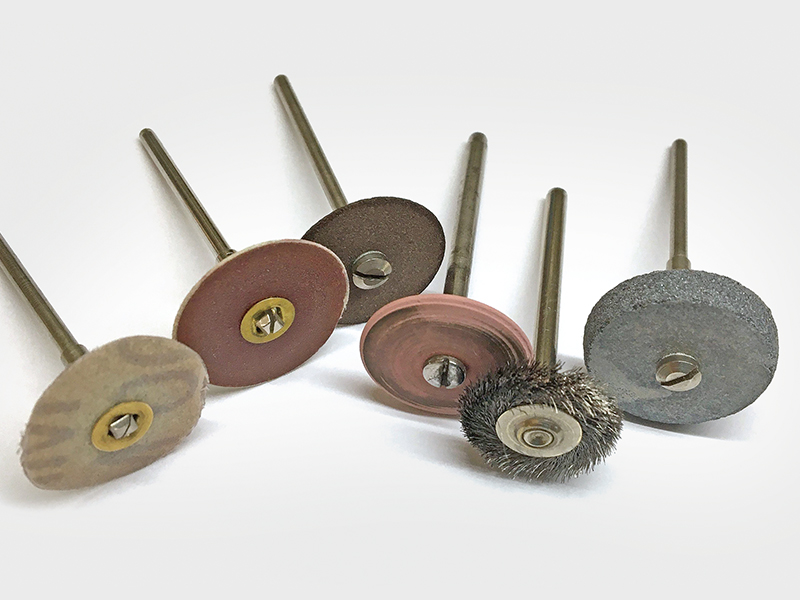
2. I have a kit of specific attachments I always use for steel tool modifications: Snap-On sanding discs in several grits, a Mizzy heatless grinding wheel, a steel bristle brush for burnishing, a separating disc, a few flexible silicon carbide abrasive discs, and, of course, safety goggles to protect my eyes.
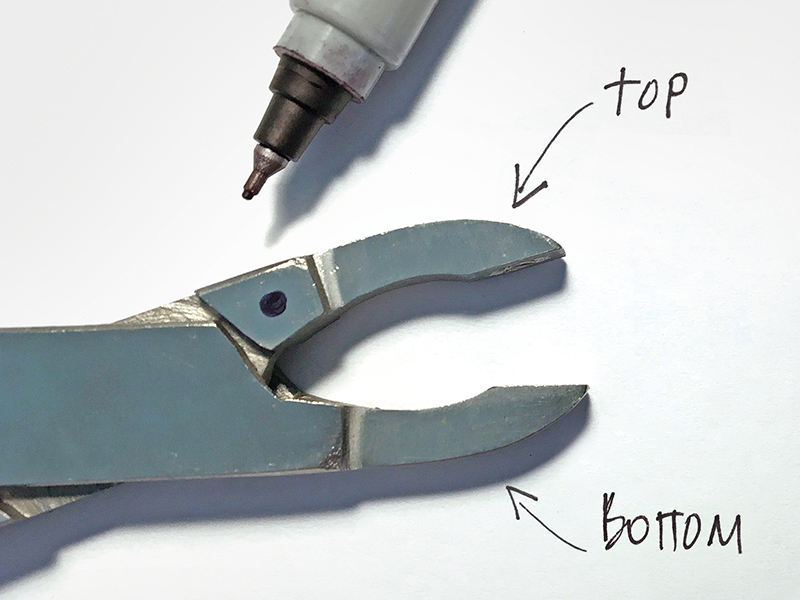
3. Since we’ll be working with both plier jaws, you’ll want to start by marking the top jaw. I used a Sharpie to put a dot on the top jaw.
4. The first task is to create a centered slot on the bottom plier jaw for the earring post to slide into. Use dividers and a permanent marker to indicate the position of the slot.
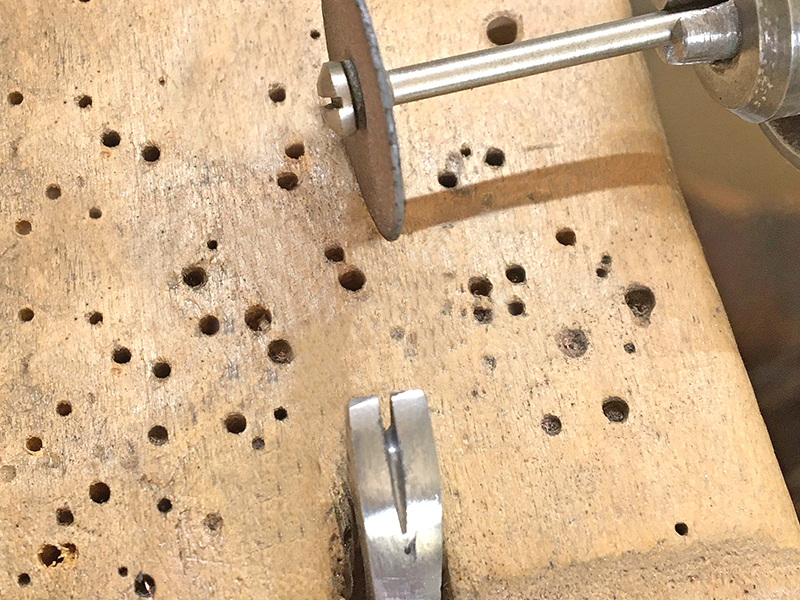
5. To use the separating disc safely, position the opened pliers in the V-slot of a bench pin with the cutting line facing out. Cut very slowly and use a bur lubricant on the separating disc to prevent shattering. Wear those goggles! Cut the slot wide enough for an earring post (about a 22 or 20 gauge wire diameter) to easily slide into. Sand the inside of the slot with a sanding disc.
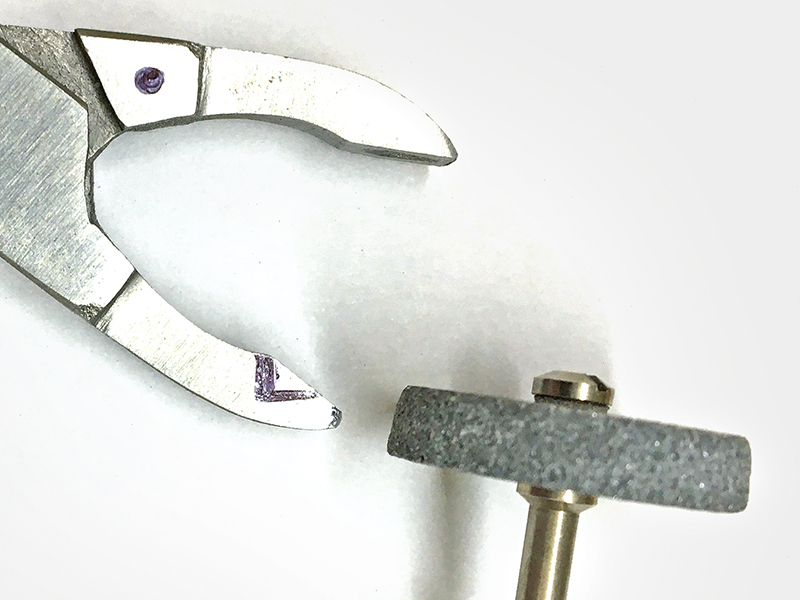
6. To create the seat on the bottom jaw that will allow the earring head to rest at about a 45-degree angle to the top jaw, indicate a notch with the Sharpie. Use the grinding wheel to gradually remove steel, testing the fit and angle against an earring as you work. Once you have created the notch, you might also need to lengthen the slot you cut first so it extends just past the point where the two angles meet at the base of the seat.
7. The oval groove on the top jaw of the pliers also needs to be extended to allow the prongs of the setting to contact the steel jaw as the pliers are closed during setting. Use the separating disc to extend and lengthen the groove.
8. Take your time and test the angles of an unset earring to ensure the plier jaws have good contact with the metal at the base of the setting, that the earring post sits at about a 45-degree angle in the closed pliers, and that the prong to be compressed is resting firmly within the slot of the upper plier jaw as well. Once all of these criteria are met, sand and burnish the steel to a high polish using the abrasive attachments and a steel bristle brush. Happy setting!
Manage Consent
To provide the best experiences, we use technologies like cookies to store and/or access device information. Consenting to these technologies will allow us to process data such as browsing behavior or unique IDs on this site. Not consenting or withdrawing consent, may adversely affect certain features and functions.
Functional
Always active
The technical storage or access is strictly necessary for the legitimate purpose of enabling the use of a specific service explicitly requested by the subscriber or user, or for the sole purpose of carrying out the transmission of a communication over an electronic communications network.
Preferences
The technical storage or access is necessary for the legitimate purpose of storing preferences that are not requested by the subscriber or user.
Statistics
The technical storage or access that is used exclusively for statistical purposes.The technical storage or access that is used exclusively for anonymous statistical purposes. Without a subpoena, voluntary compliance on the part of your Internet Service Provider, or additional records from a third party, information stored or retrieved for this purpose alone cannot usually be used to identify you.
Marketing
The technical storage or access is required to create user profiles to send advertising, or to track the user on a website or across several websites for similar marketing purposes.
A Fresh Look. A New Website. A Stronger Membership.
We’re excited to unveil Jewelers of America’s refreshed brand and redesigned website, reflecting our growing community and continued commitment to the jewelry industry.
With JA and MJSA now united under one membership, we’re bringing together more resources, expertise and connections to support every facet of the jewelry industry.
Take a look around to see all that JA offers — members can login to access member-only content like benefits, the Knowledge Vault and Advocacy resources.
Questions? Contact us at members@jewelers.org or call/text (800) 223-0673.