

Creating Common Prong Tips
Tip Tips
How to create round, tab, and claw prong tips
By Joel McFadden
(Originally Published by MJSA June 2023)
What exactly are prong tips? Tips are the parts of prongs that show on top of the table of a center stone. There are four primary types of prong tips: round, tab, claw, and petite claw. In some cases, the tip shape is determined by the length and shape of the prong, but different techniques can be used to alter those shapes. Prong tip choice is usually an aesthetic preference except with shorter prongs, which often require round tips be used due to not having enough metal to fold over and properly secure the stone.

Round Tips
Round tips, also known as bead tips, are the most common type of prong tips. These are created by finishing off the end of a prong with a cup bur, which will cut the excess length of the prong and leave a nice domed finish. To achieve this tip shape, place the cup bur over the end of the prong and, as it turns slowly in the flex-shaft, push it down with gentle pressure until the desired bead height is achieved.

There are different types of cup burs that can be used to create round tips. The go-to standard for many jewelers is the Busch concave cup bur. While this bur leaves a great finish on the tip, it doesn’t cut particularly fast and tends to become dull quickly. Busch also has a fast-cut cup bur that has deeper cuts, so it cuts faster than other burs. Offering a fairly new design concept, the Busch twincut cup bur features two cut-outs that make it cut very fast and smoothly. However, the twincut bur tends to leave a sharp point on the top of the prong.
Regardless of your preferred choice of bur, be careful to not let the bur touch the stone, as it can easily cut or chip it. Keep the cup vertical when cutting and don’t rock it. Using a bit of lube or beeswax can also help produce a cleaner finish.
Tab Tips
Offering an alternative to rounded and pointy prong ends, tab prong tips are created using a barrette needle file to square off the prong. It’s important to use a needle file with a safety edge that is finished to a very high polish, making it safe to use against gemstones. You can purchase a file with a safety edge, but you should still polish it to a bright finish.

If you don’t have a file with a safety edge, you can make your own using different abrasives to polish one edge of the file until it is very smooth and shiny. I like to use ceramic polishing wheels on my flex-shaft to easily create the safety edge. The polished side of the file rides over the gemstone as you shape the prong and will not scratch the stone. Simply use the file to shape and square off the prong ends.
Claw Tips
Claw prongs are one of the oldest prong tip designs. Historically, the methods used for crafting these tips were considered trade secrets that were passed down only to select apprentices so the best methods for creating them are not commonly known.
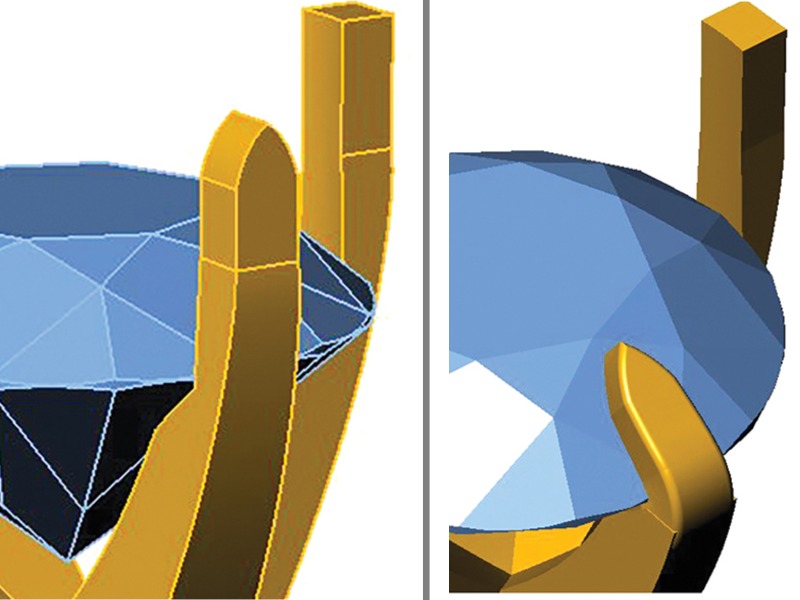
To create a claw tip, start with a prong that’s approximately 2 mm longer than a normal 4 mm long prong. The amount of extra prong length will determine if it is a petite or full claw prong. Next, cut a long, flat seat to ensure that there’s enough material for the prong; the seat will be longer than you would typically cut for a bead or tab tip. Once the seat is cut, drop the stone in place to check the fit. Make sure the stone sits straight and the prongs are all the same length. Now you can begin shaping the prong tips. Carefully file the prongs using a barrette file with a safety edge until they resemble spikes. Be sure to keep the safety edge against the stone while filing. Once all the prongs are uniformly filed into spikes, fold them over the stone. Check to make certain that the pointed tips are secure against the stone.
Regardless of the style of prong tips you use, it’s important that the prong tips are secure. They should be tight against the stone’s crown to prevent them from catching on fabrics or allowing the stone to become loose.