

How to Make a Set of Guards for Your Vise
On Guard!
Stop the unintentional marring of jewelry metals in your vise
By Helen I. Driggs
It’s inevitable that every tool you own will eventually need to be modified. Pliers, anvils, blocks, dies, punches, and hammers—basically anything steel—will at some point produce unintended marks on jewelry metal that will need to be removed, and you’ll hate the wasted time spent removing them. There are so many ways to prevent unintentional marks on metal, and a little time spent doing that beforehand always pays off in the long run. The obvious way is to sand off those sharp steel corners, but with a little bit of scrap leather and copper sheet, you can easily make a set of guards to cover the edges of both hand and shop tools.
My personal favorites are vise guards. Whether you own an inexpensive import from the discount store or a nice, old, hardened steel vise, chances are it will have earned a lifetime of nicks, gouges, dents, or worse—and possibly have teeth to boot. Either way, every self-respecting vise needs a set of copper guards to protect precious and soft metals gripped in the jaws. Here’s how to make a set of guards for your vise.
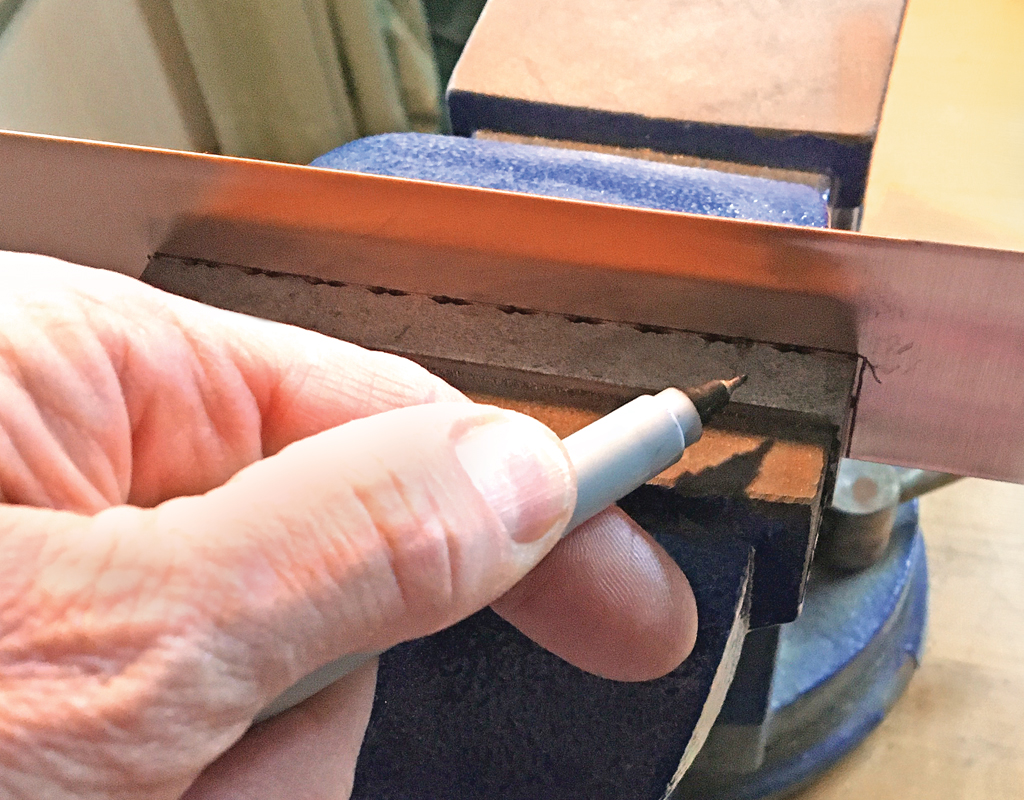
1. Cut two strips of 20 gauge or thinner copper sheet to 1.5 times the width of your vise jaws. For example, for my 4 inch vise, I cut the copper 6 inches wide. To calculate the height for the strip, measure the top surface of the vise jaw, add the measurement for the inner jaw surface, and then add an extra quarter of an inch. For the vise shown here, I wound up with 1 3/4 inches. Position the copper in the vise with one edge at the base of the inner jaw. Close the vise and, using a Sharpie marker, mark the perimeter and the fold line where the top of the jaw meets the inner jaw.
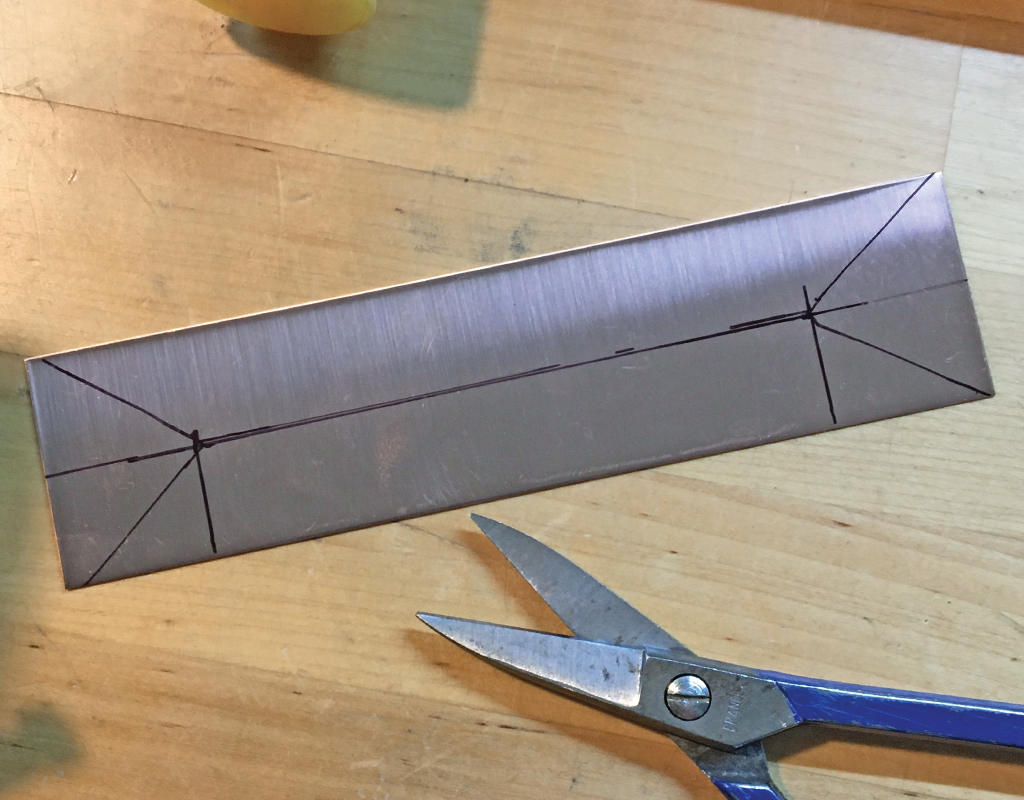
2. Indicate the trim lines by connecting the upper corner by marking in to meet the fold line and then out from the fold line to meet the lower corner. Repeat for the other side. The marks should result in approximately a 45-degree angle.

3. Using metal shears, carefully snip the triangle of metal away—from the corners into the center meet point at the fold line. To fold the metal cleanly, score it at the fold line before putting it back into the vise and closing the jaws. Bend the metal down with a plastic or hide mallet, or push the upper portion over with your thumbs.
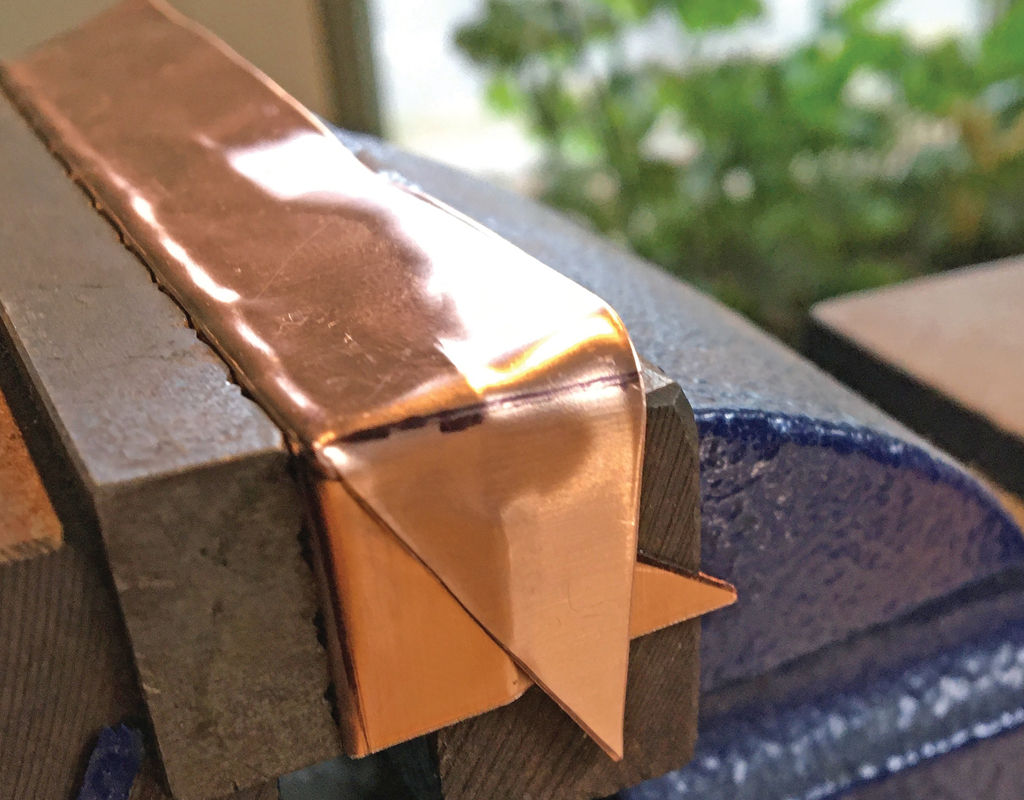
4. Carefully conform the copper to the vise jaws to create a snug fit, smoothing folds and cleaning corners. I envision “hospital corners” like when making a bed as I create the fold at the meet point.
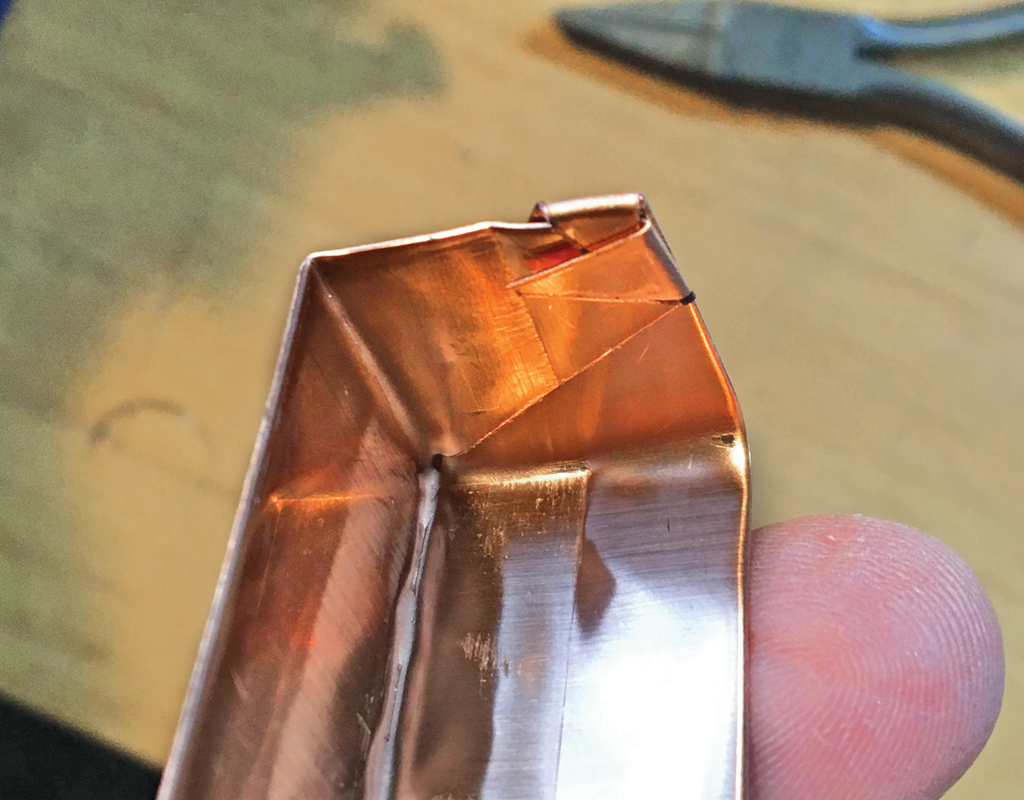
5. Carefully remove the guard and bend in the overhanging sharp corners using a set of flat-nosed pliers. Compress the metal tightly to prevent the shield from coming apart. Repeat these steps for the other side of the guard and for the opposite vise guard. Verify the fit and gently adjust with a mallet.

6. At this point, you have the option of using the guards as they are or adding an additional layer of leather to those copper sleeves.
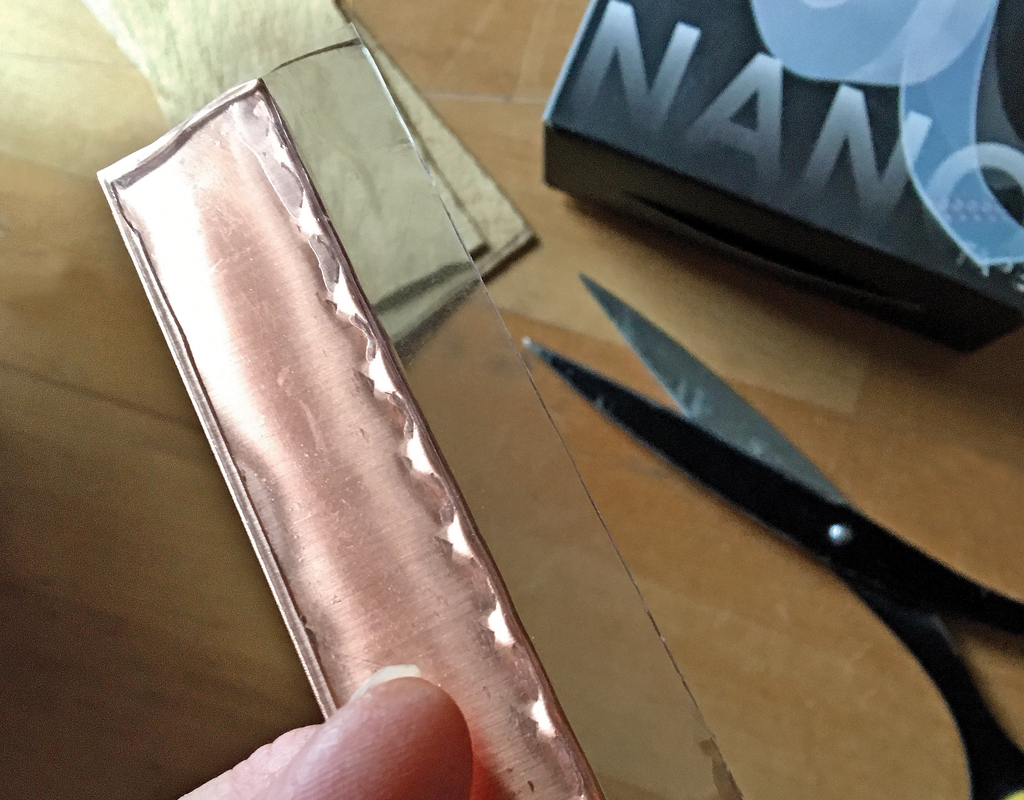
7. My favorite method for attaching the leather is with a strip of Nano tape, which is a clear, extremely sticky, thick, and cushioned adhesive product that leaves no residue when removed and absolutely stays where you put it. Cut a strip of Nano tape and attach it to the copper along the inside edge first, before removing the protective film from the tape. You might need two strips of Nano to cover both the upper and inner surfaces of the jaw guard.
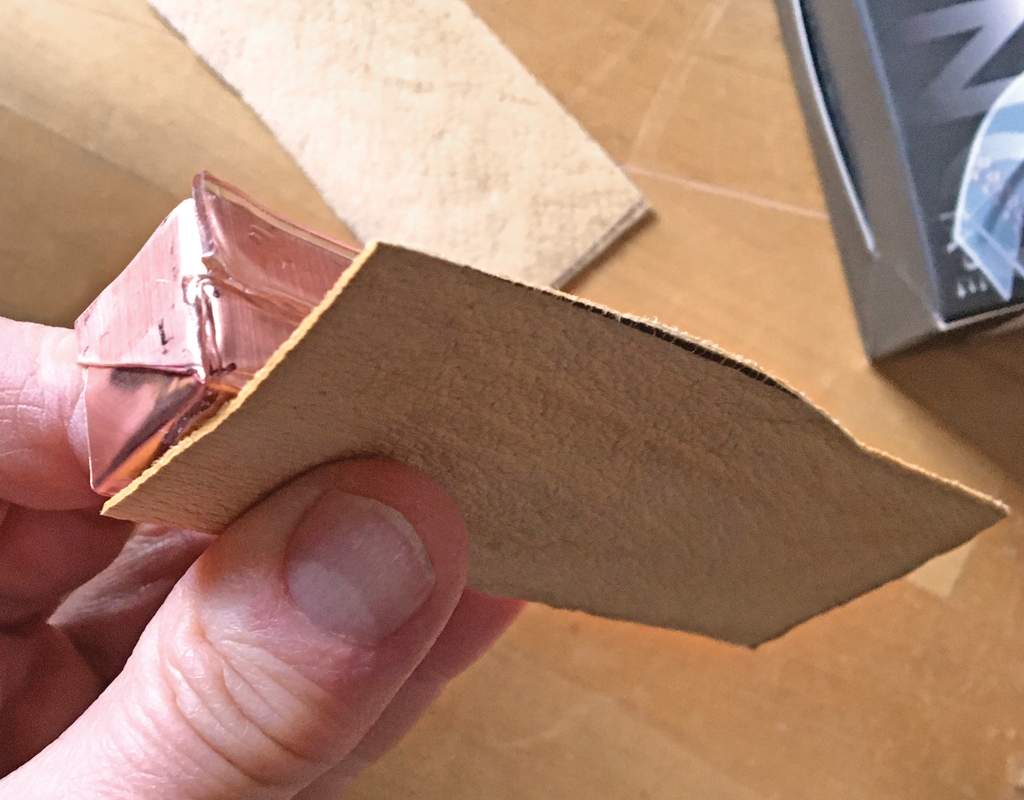
8. Cut two rectangles of leather, suede, or chamois to fit the copper sleeves. Adhere the leather to the Nano tape after peeling off the tape’s protective film. Alternatively, you can attach the leather with coats of contact cement on the back of the leather and the front of the copper. Let the cement dry completely on all surfaces before bonding them.
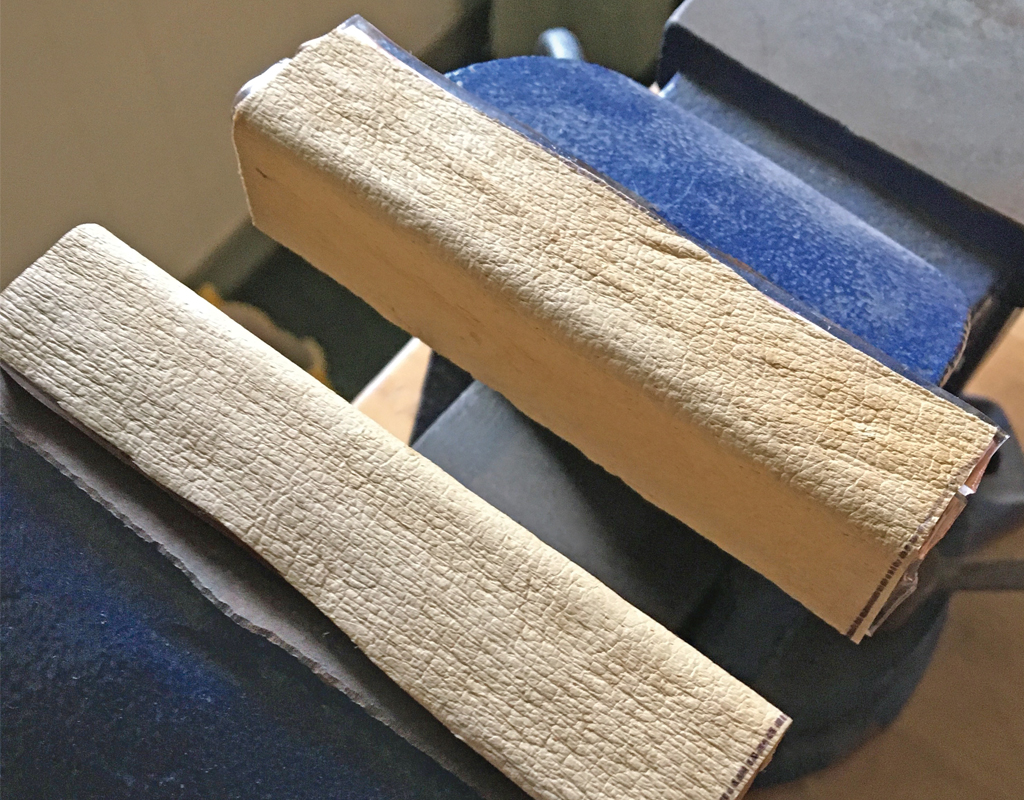
9. After attaching the leather to the guards, close the vise jaws, place a heavy book or steel block on the top, and let the guards sit for a few hours to ensure good adhesion. These vise guards have the advantage of being completely removable to allow you to use the bare vise if you wish, and the Nano tape makes it easy to remove the leather if it becomes torn, worn, or dirty.