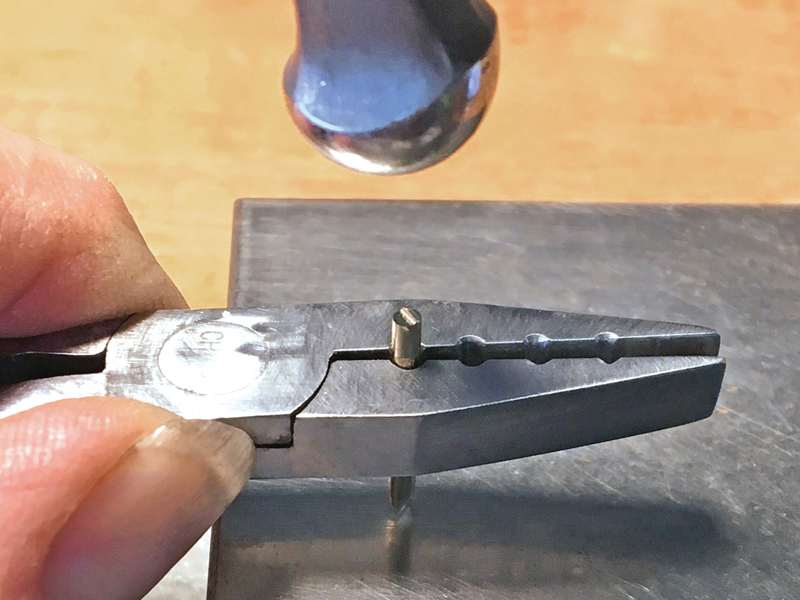
Modify Pliers to Securely Hold Short Wire Sections
Wire Minders
Repurpose old pliers to create sturdy wire holders
By Helen I. Driggs
Gripping short sections of wire to file the sharp or deformed ends caused by nippers can be a real chore. I regularly use 12-, 14-, 16-, and 18-gauge wire and rod for hinge pins and rivets in my cold-connected work, so I repurposed a rusty-but-trusty set of my dad’s old Sears pliers to create these sturdy wire holders—and I haven’t lost or bent one piece of wire since.
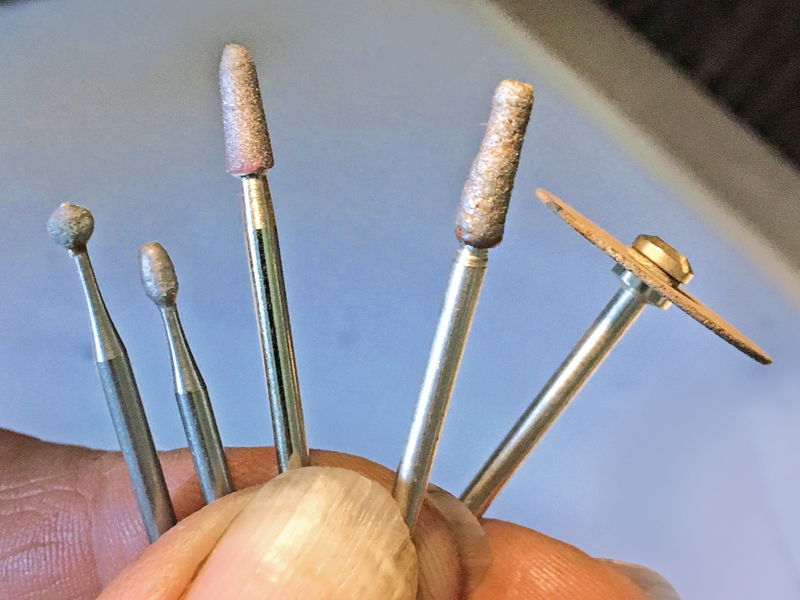
To create your own set of wire-minder pliers, you’ll need an old set of flat-nose pliers that open wide; some steel bristle brushes and abrasives if they are really rusty like mine were; a separating disc; some grinding bits; a good, slippery lubricant (preferably oil-based for steel); some drill bits or ball burs; and a ruler.
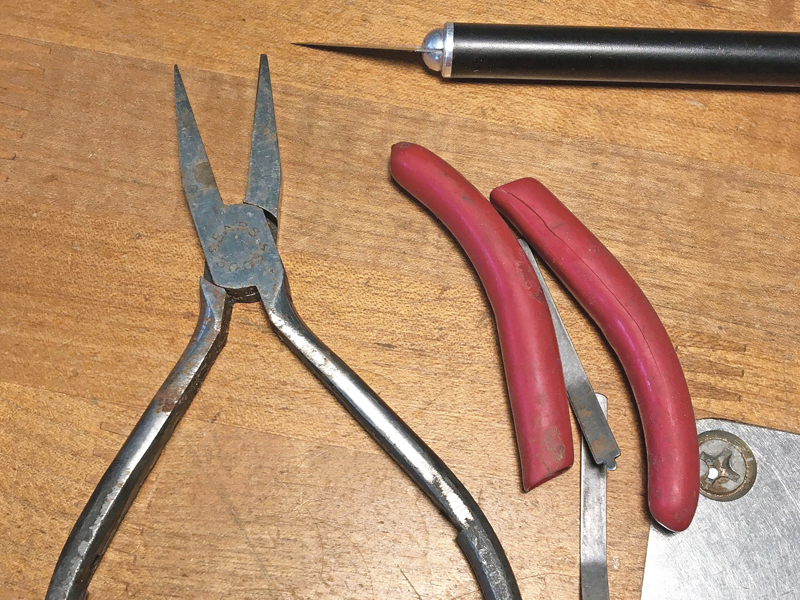
1. Strip off the plastic grips and remove the springs so you can gain maximum access to the inner surfaces of the plier jaws. This will also help reveal all the rust spots to clean off.
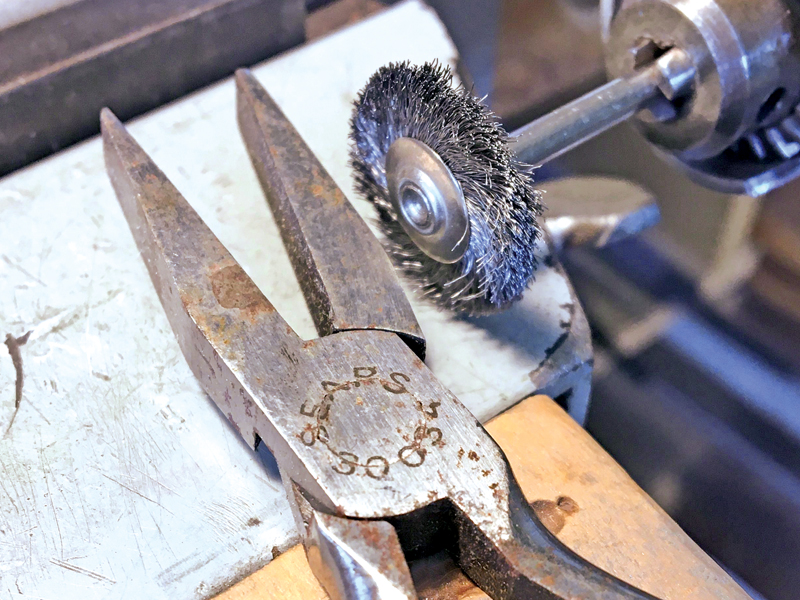
2. Remove all the rust spots and clean the steel’s surface with a steel bristle brush and some flexible abrasives. This will allow you to better see what you’re doing in the next steps.
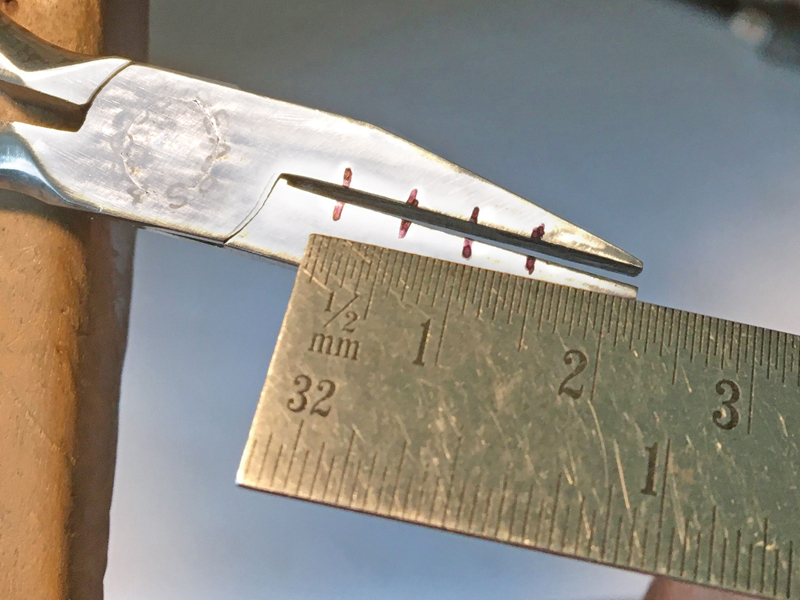
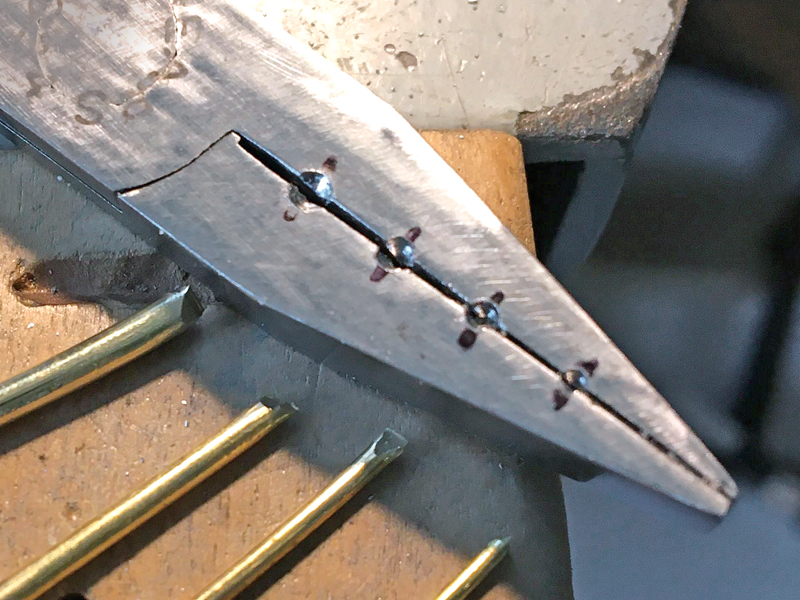
3. Using a Sharpie, mark wire bays along one side of the plier jaws. Here, I marked four wire bays that correspond with the wire gauges I use most often for rivets and pins, marking their locations every 5 mm.
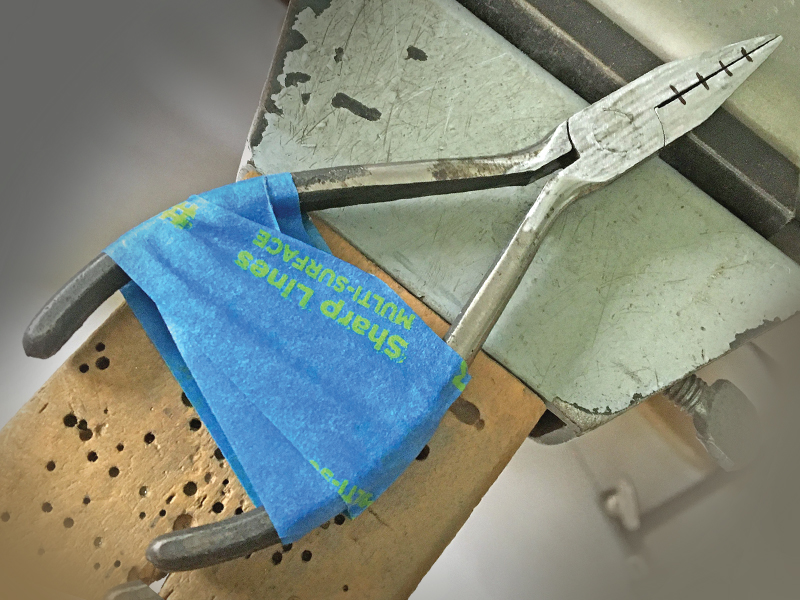
4. Use painter’s tape to lock the pliers closed for drilling or burring them.
5. Next, use drill bits to drill shallow divots where the two sides of the jaws come together and at the locations of the bays. I chose a #45 for the 12 gauge, #52 for the 14 gauge, #55 for the 16 gauge, and #59 for the 18 gauge. If you don’t have drill bits, there is no reason ball burs won’t work—just try to match diameters with your chosen wire sizes. Use a good, oily or very slippery lubricant to avoid dulling your drill bits or burs on the steel.
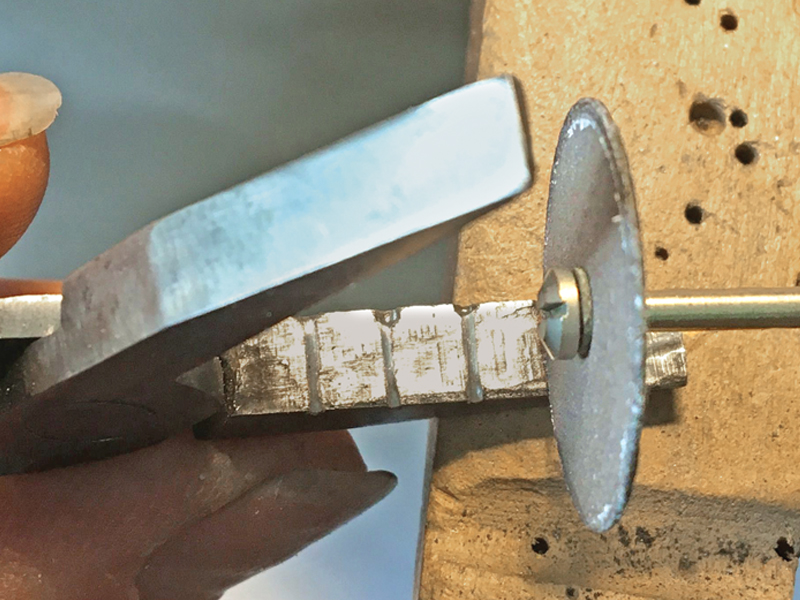
6. After marking the locations of the bays, remove the tape and open the pliers wide. Mark straight lines on the inside of both plier jaws to connect to the drilled or burred divots you started at the edges. Use a separating disc to cut a straight groove on each marked line and on both plier jaws.
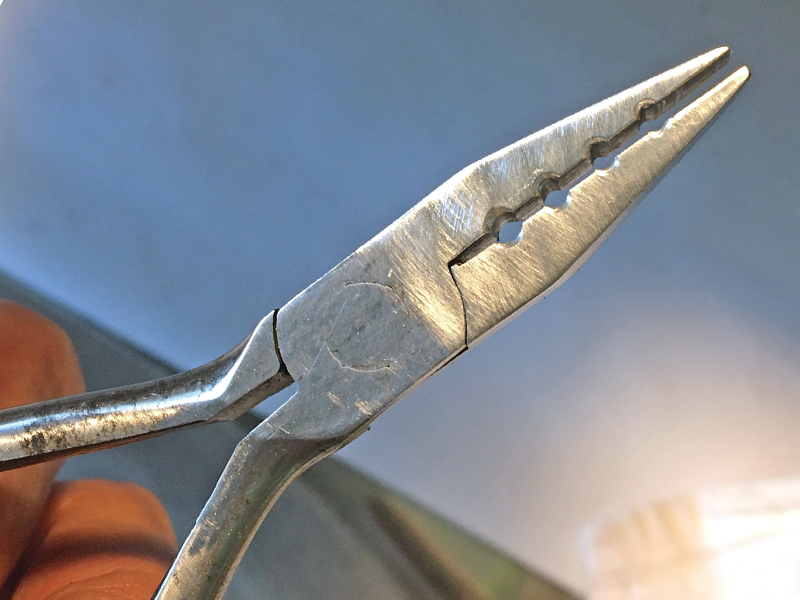
7. Carve the bays where the starting grooves are located using whatever grinding tips you prefer. I used rigid abrasive stones with an oil-based lubricant and tested the diameters of the bays as I progressed with each of the wires to ensure the ground surfaces perfectly matched the wire gauges.
8. Once the wire bays are ground, sand all the surfaces of the plier jaws with 400-grit abrasive paper for a final time.
9. To use the pliers, insert the wire sections into the corresponding bay and squeeze the jaws shut. The wire will remain straight, securely held, and ready to upset, file, sand, or sharpen without slipping, twisting, or bending.
Manage Consent
To provide the best experiences, we use technologies like cookies to store and/or access device information. Consenting to these technologies will allow us to process data such as browsing behavior or unique IDs on this site. Not consenting or withdrawing consent, may adversely affect certain features and functions.
Functional
Always active
The technical storage or access is strictly necessary for the legitimate purpose of enabling the use of a specific service explicitly requested by the subscriber or user, or for the sole purpose of carrying out the transmission of a communication over an electronic communications network.
Preferences
The technical storage or access is necessary for the legitimate purpose of storing preferences that are not requested by the subscriber or user.
Statistics
The technical storage or access that is used exclusively for statistical purposes.The technical storage or access that is used exclusively for anonymous statistical purposes. Without a subpoena, voluntary compliance on the part of your Internet Service Provider, or additional records from a third party, information stored or retrieved for this purpose alone cannot usually be used to identify you.
Marketing
The technical storage or access is required to create user profiles to send advertising, or to track the user on a website or across several websites for similar marketing purposes.
A Fresh Look. A New Website. A Stronger Membership.
We’re excited to unveil Jewelers of America’s refreshed brand and redesigned website, reflecting our growing community and continued commitment to the jewelry industry.
With JA and MJSA now united under one membership, we’re bringing together more resources, expertise and connections to support every facet of the jewelry industry.
Take a look around to see all that JA offers — members can login to access member-only content like benefits, the Knowledge Vault and Advocacy resources.
Questions? Contact us at members@jewelers.org or call/text (800) 223-0673.