A guide to setting baguette stones into multidimensional curved surfaces
By Joel McFadden
Setting a baguette stone into a multidimensional curved surface such as a domed band can be a challenging process. How do you make the setting look smooth? Here I’ll demonstrate the technique I use that’s similar to channel setting in that it relies on having the stone held inside grooves along two sides of the setting.
1. Begin by deciding where you want to set the stone on the band and then glue the stone there upside down using Super Glue. Once the glue is cured, use an X-Acto knife to carefully mark the edges of the stone. Make sure the blade is vertical and the scribe marks are as close to the actual size of the stone as possible. Once you’ve clearly marked where the stone should sit, put the ring in an ultrasonic cleaner and the Super Glue will release the stone. (This technique works best for setting diamonds, sapphires, and rubies, as all three stones hold up well against both Super Glue and the ultrasonic.)
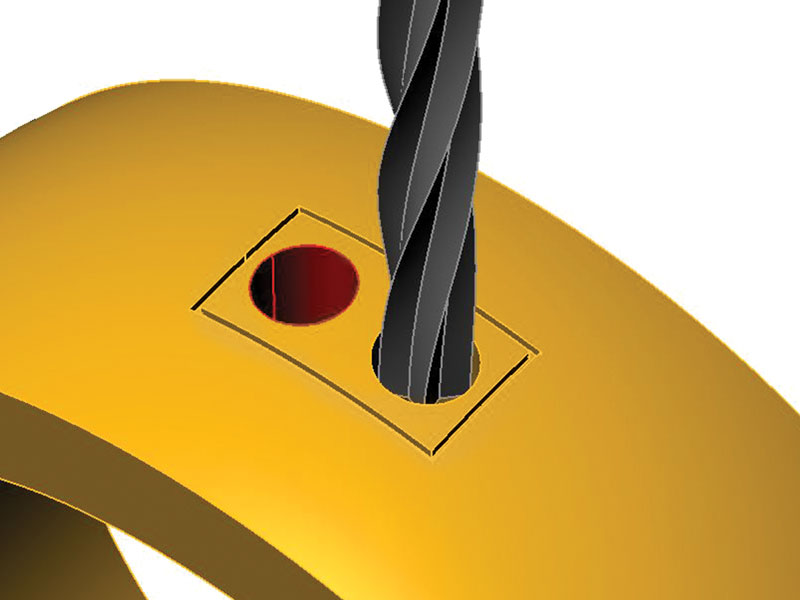
2. Drill two holes within the scribe marks to start to remove metal from the ring. I like to use drill bits that are not quite as wide as the narrow part of the stone. Drill all the way through the back of the band.
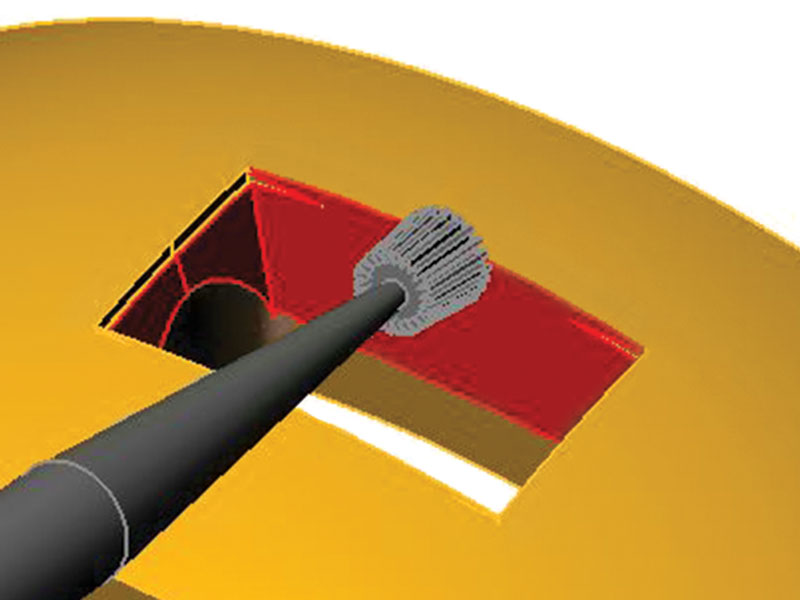
3. Gently stir around the inside of the cutout with a 1 mm Krause bur to combine the two drill holes and remove some of the excess metal.
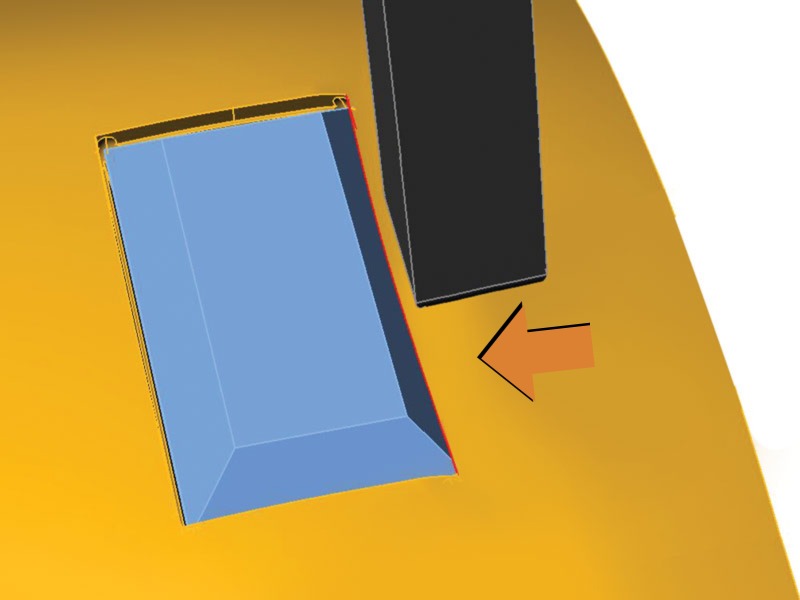
4. Next, use the end of a 0.6 mm inverted cone bur to cut and clean up the seat. I focus on cutting an almost vertical wall all the way through and getting crisp corners. Once the seat is clean, I test fit the baguette and continue to trim the seat with the inverted cone until the stone drops in properly. You will know that the seat is close when the girdle of the stone drops below the surface but the table is just above the dome of the band.
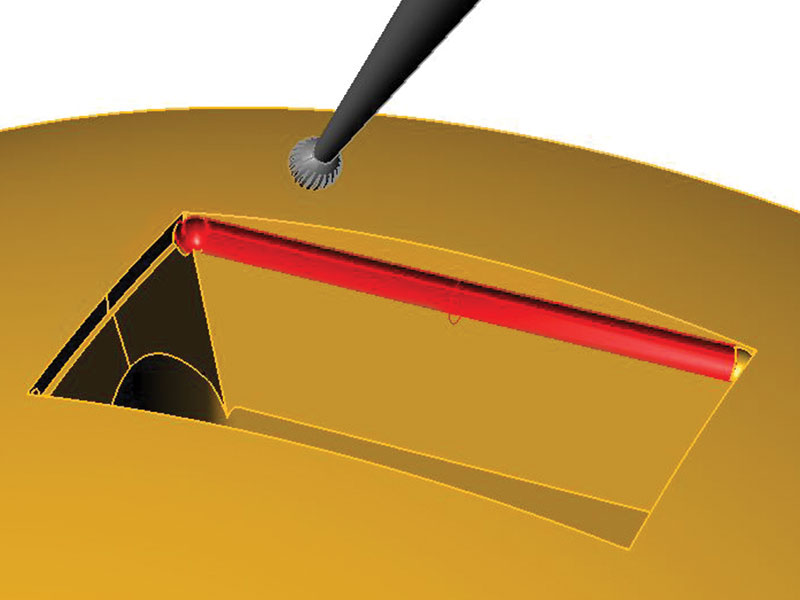
5. Take a 0.5 mm ball bur and cut four pockets in the corners of the seat where the corners of the baguette will go. You want to keep the stone’s points protected from any metal. Then cut a very slight groove across the long sides for the girdle of the stone to sit. This is the final detailing of the seat. Leave the short ends of the stone floating.
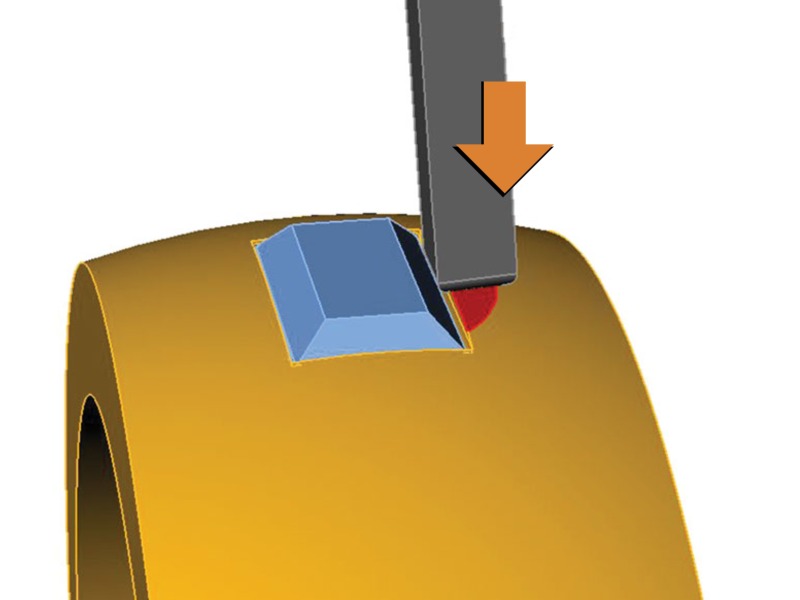
6b. Drop the stone into the setting and push it down gently with a soft tool, such as a brass pusher, thumbnail, or even a wooden chopstick, until the girdle fits tightly into the grooves. Next, use a flat punch to tap down on the metal along the long sides of the baguette.
6b. Drop the stone into the setting and push it down gently with a soft tool, such as a brass pusher, thumbnail, or even a wooden chopstick, until the girdle fits tightly into the grooves. Next, use a flat punch to tap down on the metal along the long sides of the baguette. Tap straight down on the band, moving the punch along both long sides until the stone is tight. As you tap down, the metal will spread inward over the sides of the stone, securing it similarly to a channel setting.
7. You should now have a baguette securely flush set in the domed band. The final step is to polish the ring as you normally would.
To provide the best experiences, we use technologies like cookies to store and/or access device information. Consenting to these technologies will allow us to process data such as browsing behavior or unique IDs on this site. Not consenting or withdrawing consent, may adversely affect certain features and functions.
Functional
Always active
The technical storage or access is strictly necessary for the legitimate purpose of enabling the use of a specific service explicitly requested by the subscriber or user, or for the sole purpose of carrying out the transmission of a communication over an electronic communications network.
Preferences
The technical storage or access is necessary for the legitimate purpose of storing preferences that are not requested by the subscriber or user.
Statistics
The technical storage or access that is used exclusively for statistical purposes.The technical storage or access that is used exclusively for anonymous statistical purposes. Without a subpoena, voluntary compliance on the part of your Internet Service Provider, or additional records from a third party, information stored or retrieved for this purpose alone cannot usually be used to identify you.
Marketing
The technical storage or access is required to create user profiles to send advertising, or to track the user on a website or across several websites for similar marketing purposes.
A Fresh Look. A New Website. A Stronger Membership.
We’re excited to unveil Jewelers of America’s refreshed brand and redesigned website, reflecting our growing community and continued commitment to the jewelry industry.
With JA and MJSA now united under one membership, we’re bringing together more resources, expertise and connections to support every facet of the jewelry industry.
Take a look around to see all that JA offers — members can login to access member-only content like benefits, the Knowledge Vault and Advocacy resources.
Questions? Contact us at members@jewelers.org or call/text (800) 223-0673.