

So…You Want to Get Into Casting
A guide to taking the plunge into casting
Sponsored by:
By Sharon Elaine Thompson
You’ve done it. You’ve mastered the art of designing in CAD and brought your designs to life with CAM. Now you want to bring production in-house by learning to cast.
Theoretically, the process of casting is simple: create a hollow mold of your wax or resin model, fill it with molten metal, and voilà: cast pieces of jewelry. But successful casting requires looking at your work in new ways to maximize your chance of casting success in addition to mastering the equipment. Automated casting machines remove much of the guesswork, but their higher price points may be beyond the budget of a jeweler just getting started.
To help you make sense of what’s needed to master casting, we spoke with casting experts within the industry for their best advice.
Does It Make Sense for You?
Before you run out and buy a casting machine, consider whether it makes sense for your business.
First, how many pieces do you cast? If you produce only a few pieces a week, it may be more cost effective to send your casting out, says Bob Romanoff, CEO of Romanoff International Supply Corp. in Amityville, New York. That’s because of the cost involved in casting in-house, which, in addition to casting equipment, can include investment in infrastructure, such as improved ventilation to remove dust and fumes; the space commitment for casting equipment; and the need to purchase and store casting supplies.
There is also the expense of stocking metal. Casting requires not only the metal necessary to create the jewelry, but also additional metal to fill the sprues and to create the button on the casting tree. Though you can reuse that extra metal, you’ll have to add fresh metal each time, and clean the metal thoroughly before the next use. If you offer jewelry in a variety of metals, you’ll need to stock them all: platinum, 18k and 14k gold in white and yellow, and sterling silver, says Gary Dawson, principal at Gary Dawson Designs in Eugene, Oregon. That’s a lot of cash tied up in metal.

Jewelry casting takes time, attention to detail, some specialized skills, and the right equipment but if it makes sense for your business, mastering the process can be worth the effort.
This is why designers, such as Lee Krombholz, owner of Krombholz Jewelers in Cincinnati, still send their work to commercial casters. Outsourcing his casting gives Krombholz the freedom to focus on his CAD and stone setting skills rather than being a “jack of all trades and master of none.” The small, specialty caster he uses has “spent the time to really get good at what he does. He takes care of any problems, and always delivers on time.” Using an outside caster also keeps the heat and fumes of casting out of his store.
But there are things to be said for doing your own casting, too.
If you’re casting more pieces, and the amount you are paying for casting services is the same as or more than you’d pay for a monthly lease on a casting machine, it might make sense to bring the process in-house, says Romanoff.
Casting your own pieces also helps prevent your unique designs from being copied.
Most casting houses and jewelers follow ethical practices, but illegal copies do happen. While copyright infringement can be pursued in court, it’s often very difficult to prove—and costly. That’s why some designers prefer to keep their files, mold making, and casting firmly in their own hands.
Casting in-house gives you total control of the process, too. There’s a growing demand for what Dennis Busby, co-casting director at Stuller Inc. in Lafayette, Louisiana, calls “life-and-death jewelry sales.” For example, a groom-to-be has a spectacular, special destination engagement ring presentation planned, but he didn’t leave enough time to have the ring made. Suddenly he’s in a panic, and he wants you to make up the delay.
Commercial casters sometimes need several days for spruing, casting, and clean up. To produce on demand, they might charge you expediting or other fees. Then there is the shipping time. “When you do your own casting,” says Romanoff, “you can set up in the afternoon, burn out overnight, and in the morning you cast and are ready to clean up. You can, conceivably, have the product for your customer the next day.”
Lastly, doing your own casting can be a valuable part of your brand, as it is for Dawson. His customers appreciate knowing that he is the person who handles everything, from the initial sketch to handing them the final piece.
Jewelry casting takes time, attention to detail, a few specialized skills, the right equipment, proper venting, some space, and a willingness to deal with hot metal, messy and potentially dangerous investment, and (to some) smelly fumes. But if you’re up for the challenge, and it’s right for your business, it can be worth the effort.
Spruing
If you’ve been having your carved waxes or printed resin models cast by a professional casting house, you may be unfamiliar with one of the most important factors in successful casting: spruing.
Spruing is the process of attaching wax wires to the model that create the passages that will carry the molten metal to the far reaches of your models. If sprues are not placed right, the molten metal won’t flow and solidify correctly and may leave places in the mold empty. You may end up with porosity, missing prongs, partial shanks, aborted filigree, and half-filled details. This is why spruing remains one of casting’s “black arts,” says Alban D’Halluin, CEO of Prodways Tech, a French producer of industrial 3-D printers and resins, and the parent company of Solidscape Inc.
There is a formula to use when spruing, however, explains Romanoff. “The diameter of the sprue should be at least fifty percent bigger than the heaviest section of your casting.” (If your heaviest section is 2 mm thick, the sprue diameter should be at least 3 mm and feed directly into that heavy section.)
However, not every piece of jewelry is simple enough to allow the metal to flow from the heaviest section to the thinnest section. Most jewelry contains changes in thickness, large open areas, or fine details. They require more than one sprue to ensure the metal flows smoothly.
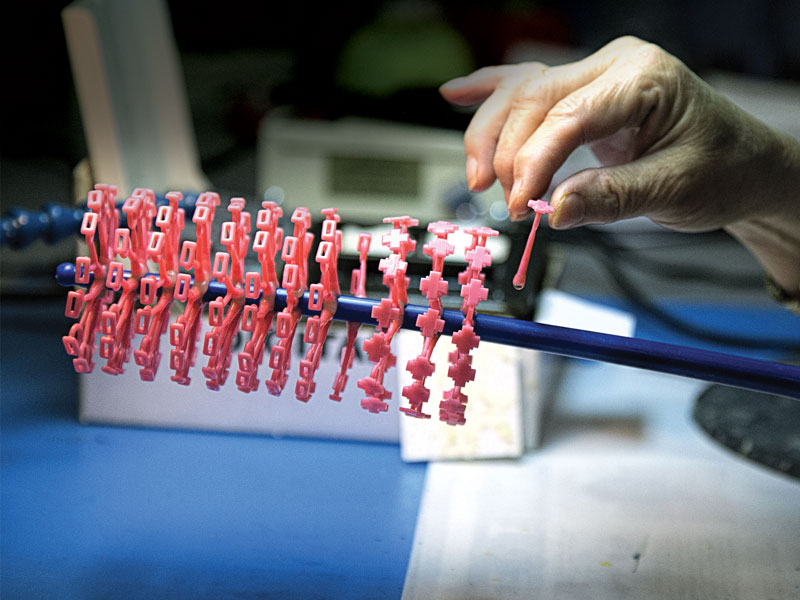
Spruing is an important step when casting. If sprues aren’t placed right, the molten metal won’t flow and solidify correctly and may leave voids in the mold.
At the same time, you don’t want to have more sprues than you need. The more sprues you have, the more metal you need to fill them. And once you’ve cast, the sprues must be cut away and the stubs filed off, which takes time and wastes metal. There also may be more time necessary to detail or retexture the areas where the sprues were attached.
When spruing, says Joel McFadden, principal at Jewelry by Joel McFadden, it’s best to think like water. “People have to remember that the metal moves like a liquid. Think about a stream. If you put a rock in a stream, or a 90-degree turn, you’ll create turbulence.” When you sprue a piece, or multiple pieces in a tree, “you want smooth flow, no sharp edges or bubbles, and no sharp angles.”
While you’re thinking like water, “if you follow that [50 percent larger] rule the best you can,” says Romanoff, “you can minimize shrinkage porosity.”
Shrinkage porosity, which creates “wormholes” under the surface of the metal, occurs when the molten precious metal, which expands when heated, begins to cool and shrink to its original volume. As it does so, it draws still-molten metal from the heaviest part of the jewelry/sprue complex to fill in the thinner areas.
Good spruing is planned so that the metal is fed to the jewelry from the sprue, the sprue is fed from the tree trunk (where individual sprues are attached), and the tree trunk is fed from the base (or button). This kind of “progressive solidification,” says Romanoff, lets the shrinkage (and porosity) settle in the heavy sections away from the jewelry.
Investing
Once the wax or resin model has been sprued, it must be “invested,” or encased in a high-temperature plaster formulated to withstand the high heat of burnout and casting. The plaster powder is mixed with water, or in the case of some platinum investments, with a binder as well, then poured into a stainless steel flask into which the jewelry model and sprue have been mounted.
You must use the right investment for the work you are doing. Standard silica-based investments are used for silver and gold. Some jewelers use these for casting resin models as well, while others prefer investments formulated specifically for resin model casting. For platinum, you use either a phosphate-bonded or acid-bonded investment, which is stronger and can take the higher heat needed to cast the metal. You’ll want to try different brands of investment and see which works best for your needs.
Mixing investment is straightforward, but it cannot be hurried. You cannot take shortcuts. You cannot guess at the amounts of water and investment powder. You can’t shorten or lengthen the mixing time. While most standard investments used for gold and silver have a working time of 8 minutes—from mixing to setting aside to harden—and gloss off or fully set in about 11 minutes, some platinum investments take up to 2 hours to mix and up to 15 hours to set up. The manufacturers provide precise instructions on how to store, use, and mix their products. Follow them exactly. Be organized and concentrate.

When mixing investment, you can’t take shortcuts, guess at the amounts of water and investment powder, or shorten or lengthen the mixing time.
Once the investment is mixed to manufacturer’s instructions, it is slowly poured into the flask until the sprue/jewelry tree is covered. During mixing and pouring, air bubbles can be trapped against the surface of the wax model, becoming bumps of metal on the finished piece that have to be removed. To eliminate air bubbles, many casters first vacuum the bowl of investment, then the filled flask. Dipping the model into a debubblizer—a surfactant—can also help eliminate surface bubbles.
Smooth investing will take practice. Run through the process until you have a workflow that moves seamlessly from measuring, to mixing, to pouring, to vacuuming. It helps to have a dedicated space where there is water and a counter to work, and a place to let the flasks rest undisturbed for an hour before starting burnout. Be sure that when you are investing you are not interrupted.
Finally, it’s vital to remember that the silica in investment powders can lead to deadly silicosis if inhaled over time. Use good ventilation when investing, with a fan that pulls the dust particles away from your face. It’s also recommended to wear an OSHA-approved mask or respirator.
The Burnout
Burning the wax model out of the investment is also straightforward: Put the flasks in a cold oven, bring them slowly up to temperature, keep them there for a while, and then ramp the temperature down to casting temperature.
For example, for a small flask, a five-hour wax burnout cycle might be taken in three steps: bring the flask up to 750°F for an hour, then up to 1,000°F and 1,350°F for two hours each. Then the temperature is brought down to between 900°F to 1,150°F to cast. (The flask temperature at casting will vary depending on the metal you are casting and the delicacy of the pieces in the flask. Jewelry with fine details is cast at a higher flask temperature to give molten metal the time it needs to fully fill those details. Platinum is cast at more than 3,200°F so the flasks must be correspondingly hotter.)
Most standard investments for gold and silver are designed for an overnight, or 8 to 10 hour burnout, but they are “very forgiving,” says Dawson. “I can do a three-hour burnout and…I don’t feel I’m suffering a loss of resolution or a degradation of the cast object.” (Always follow manufacturers’ recommendations and master the casting process before tweaking your burnout schedule.)
While wax burnout cycles have a lot of leeway, says Scott Bradford, who is part of the Jewelry Tech Team at Rio Grande in Albuquerque, New Mexico, “with resins, you have to be a bit more precise.”
Resins have come a long way in the last 10 to 15 years and present fewer of the original casting challenges, partly due to the growing level of wax incorporated into many of the materials. But although these newer resins burn out cleaner and require the same equipment as traditional lost-wax casting, they’re still “a tricky thing to cast,” says Bradford. In fact, the trickiness of resin casting is why some jewelers who use CAD continue to send their files to experienced casting houses rather than cast them in-house.
What makes them so tricky? The biggest issue is what happens inside the flask.
While wax melts during burnout, resin actually burns. It’s critical to adhere to manufacturers’ recommended 10 to 14 hour burnout cycle burnout. If the necessary time required for resin is shortened or altered, the resin won’t completely burn and you’ll run into casting issues.
According to Dawson, resin goes through thermal expansion during casting. At the interface between the model and the investment, the investment begins to break down. “[Resin] goes through a very tarry, sticky phase before it begins to burn. That can pull weakened investment apart.” Those broken bits of investment then get surrounded or included in the cast metal.
This is particularly hard on “high mass [objects] with tiny details on the surface,” says Dawson, such as a Super Bowl ring. That’s why he recommends milling or carving waxes that have high mass and fine detail.
Photopolymers usually require ultraviolet light curing and/or heat treatment to cure the resin prior to investing. But when the model comes from the printer, it’s covered in a sheen of sticky liquid plastic. To remove that, it must first be bathed in a 99 percent alcohol solution before it’s put into a curing chamber.
But you can have too much of a good thing. If the model is left too long in an alcohol bath, the alcohol can attack the resin, says Doug Kerns, director of the North American Jewelry division at EnvisionTEC in Dearborn, Michigan. It can create a “sand-like” surface on the finished jewelry.
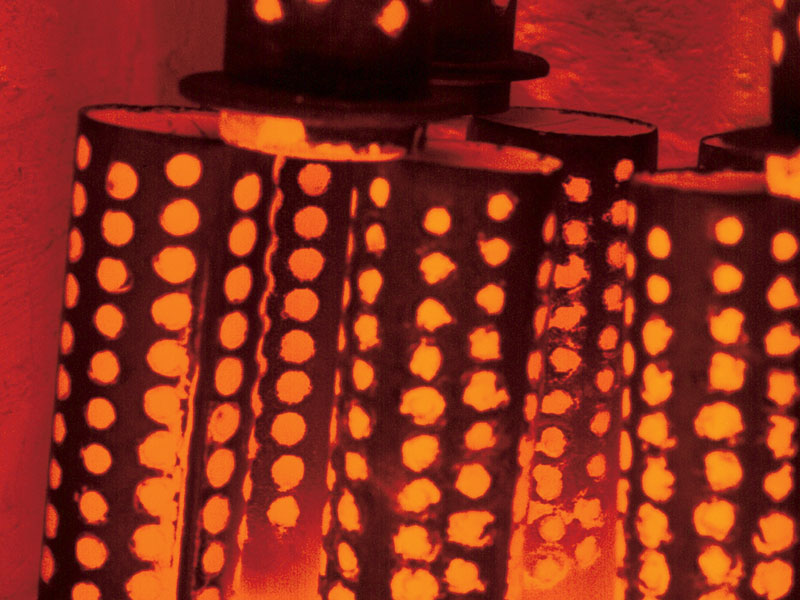
Burnout is a straightforward process when it comes to casting wax models but additional steps must be taken to successfully burn out photopolymer resin models.
Curing times in the UV light chamber vary depending on the mass of the model being cured—a heavy man’s ring will take longer to cure than a plain, thin wedding band, for example. It’s important to get this right. If the model is not completely cured, during burnout, the uncured, highly acidic resin bleeds from the model and attacks the investment binder causing the mold cavity surface to decompose. The heavy molten metal flowing into the mold then pushes the light fragments of decomposed investment to the outside of the mold cavity where it is trapped, becoming investment inclusions in the metal. When the casting is polished, these inclusions show up as pits on the surface, if they are not already visible on the casting.
“The chemical reaction can be solved by using a higher wax content resin or some kind of special coating [on the resin model], like a Teflon coating,” says Bradford. This is why many resin manufacturers add wax to their resins.
Oxygen can also inhibit curing. Some experts recommend that, rather than curing the resin model in air, as many jewelers do, resin models be cured in a borosilicate glass container of curing gel or even just distilled water.
Just as important as curing is what happens after. Even when cured long enough, if a model sits on a shelf or bench between printing and the weekly or bi-weekly casting run, it can reabsorb moisture, causing a faulty surface. After curing, the model should be sealed in a plastic bag, or post-cured again in a UV light chamber before casting. “You can’t over dry them,” says Kerns.
None of these issues are insurmountable. Being aware of the potential pitfalls, being willing to experiment with different designs and resins, talking to other jewelers using the same processes, and keeping track of what you discover can help you cast resins with confidence. But be aware that all resins post-process and cast differently. What you learn from one resin may or may not translate to a different resin.
Casting
Once you’ve burned the model out cleanly and completely, you’re ready to cast. There are two ways to cast: centrifugally and by vacuum. You can do this manually or with an automated system.
For decades, manual systems using spring-driven, “broken-arm” centrifugal casters or vacuum casting machines have been the most popular—and affordable—methods of casting for those starting up. They are still the casting method of choice for some small shops doing mostly one-of-a-kind custom work.
“Those are the kinds of environments that typically work well with broken-arm or standard vacuum casting,” says Bradford.
When done correctly, manual casting results in a complete, highly detailed, and solid piece of jewelry. However, it depends a lot on “touch and feel and judging by eye,” as Busby says. As a result, these methods can be challenging to learn and just as challenging to get consistent results. If you plan to use them, be prepared for a steep learning curve as you work to get consistent results.
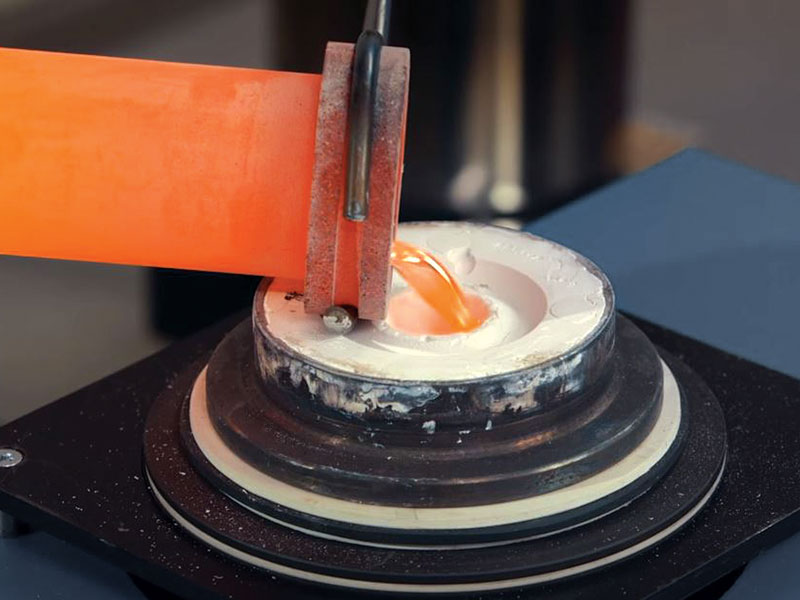
One of the most critical steps in casting is pouring the metal at just the right temperature: too cool, and it may solidify too quickly; too hot, and you risk shrinkage porosity.
Since, as Bradford says, “consistency is the holy grail of casting,” many jewelers and designers are choosing to invest in automated casting machines, especially if they are looking toward doing production lines.
Newer, automated, computer-controlled casting machines eliminate many of the variables of casting, such as metal temperature, flask temperature, centrifugal spin speed, and metal oxidation that can lead to porosity or partially filled castings. Once you have these machines set for your metal and styles of jewelry, it’s largely a push-button operation.
The first variable these systems control is metal casting temperature. Precious metals generally are cast at 50 to 100 degrees above melting point. This temperature can be judged by eye, (the metal “forms a single ball that rolls around the bottom of the crucible like mercury would roll around in your hand,” says Dawson), but it’s not precise. Too cool, the metal solidifies before filling the cavity completely and the jewelry piece will be incomplete. Too hot, and the risk of shrinkage porosity increases.
Many sophisticated casting machines use induction melting, which can have metal fluid and ready to cast in as little as 60 to 120 seconds. Induction melting is necessary to reach temperatures of more than 3,000°F required to melt and cast platinum alloys; a resistance heating coil will not go that high.
In addition, a thermocouple inserted directly into the crucible monitors the metal temperature so the cast occurs at precisely the right heat for the metal. “The correct metal temperature along with the correct flask temperature and correct spruing determines the quality of casting and will affect the amount of shrinkage porosity you have,” explains Romanoff.
Second, when metal is torch-heated in the presence of air, it oxidizes. When cast, those oxides can cause gases inside the cavity, which can create gas porosity, giving a spongy appearance to the metal. Because computer-controlled environments are sealed, a vacuum is used to remove the oxygen to prevent oxides being formed and incorporated into the metal.
Third, there is the complexity of precious jewelry metals. All precious metals are alloyed with other metals to change their color, workability, and castability. Not all of the constituent metals melt at the same temperature as the precious component. For example, says Romanoff, zinc, a necessary component in yellow gold alloys, starts to burn off at 700°F to 800°F, well below the necessary casting temperature.
“As you are melting the gold, you are vaporizing the zinc,” says Romanoff.
Torch melting can overheat metal, burning more alloys off and making the metal difficult to cast or brittle. You can also end up with less alloy and more gold in the mix—so 14k could actually cast as 15k.
Automated machines, after removing most of the oxygen in the environment, reduce the vacuum and introduce an inert gas, such as argon or nitrogen, which lays like a blanket over the metal. Because it is introduced when the metal temperature is still fairly low, the gas blanket not only protects the zinc from vaporizing, it further prevents oxidation.
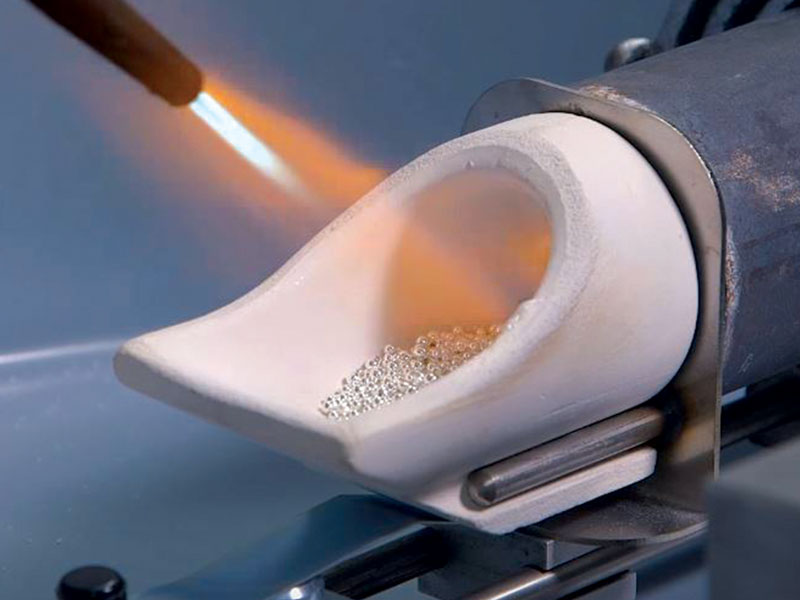
Deciding between the two types of casting machines often comes down to whether you are casting primarily platinum (centrifugal casters, as seen above) or gold and silver (vacuum casters).
There are two types of automated casting systems: vacuum and centrifugal with a vacuum assist. Which you choose depends on whether you are casting primarily platinum or gold and silver, says Romanoff.
Platinum casting requires a centrifugal caster because the metal’s high melting and casting temperatures mean that as soon as you take the heat away, the metal immediately beings to cool and solidify.
“The idea of a good centrifugal machine is to get the platinum into the investment as quickly as possible before it loses any significant heat,” says Romanoff. A computer-controlled centrifugal machine goes to maximum rpm immediately and maintains the force of the spin until the metal has completely solidified (unlike a manual machine, which immediately begins to slow down).
A machine with a rotating coil will also maintain the heat on the crucible while the casting arm is spinning, so that it is not necessary to “overheat” the platinum or gold to compensate for the loss of heat when the coil drops, explains Romanoff.
If less than 10 percent of your work is done in platinum, Romanoff recommends a vacuum casting machine. “It will give you the best results for gold and silver.” Though these metals can be cast with a centrifugal caster, the quality will not be as good because the spin of the centrifugal arm creates a certain amount of turbulence in the metal, which affects the quality of the casting. A vacuum caster, puts the metal into the investment “more gently.”
The vacuum is accompanied by pressure and sometimes vibration. “Vibration, overpressure, gravity, and vacuum all pulling on the flask at the lowest possible temperature gives you a dense casting and minimizes the risk of shrinkage and gas porosity,” explains Romanoff.
Quenching
The last step in the casting process is the release of the freshly cast model from the investment mold. Breaking the model free might seem like a chore, but it usually isn’t.
For many gold and silver alloys, jewelers use the same technique old hard-rock miners used when they heated mountain faces with fires, then hosed them down with cold water: thermal shock. When the flasks are removed from the casting machine, they are plunged into a metal bucket of cold water. The thermal shock shatters the investment, releasing the model, which is then cleaned up.
Certain alloys don’t respond well to quenching and need to be air cooled, such as 18k rose gold, which can become brittle to the point of shattering if quenched. Always consult your metal supplier for quenching recommendations.
Quenching doesn’t work with platinum investments, which become hard and glass-like during burnout. “You can’t quench it away,” says Bradford. It may have to be removed with a combination of high-pressure water, wet-bead blasting, and/or hydrofluoric acid, which is used by large manufacturers.
Although the quenching process is used widely in the jewelry industry, it can be very dangerous. The dramatic burst of steam created by the hot flask hitting the cold water can be laden with microscopic silica particles. Yet many jewelers stand over the bucket or pull the flask out of the water while it is still bubbling and steaming to inspect the release process.
“That is the single most hazardous thing you can do,” says Dawson. “That steam coming off the flask contains silica, and steam penetrates deeply into your lungs. That can cause silicosis. The single most important thing you can do when working with investment is, when you quench, put the flask under water and leave it there until it’s cool enough to reach in and grab with your hand.” Wearing a mask when quenching or using a fan that pulls the steam away from your face are other safety precautions.
With platinum devesting, use extra care with hydrofluoric acid and be sure to follow all the recommended manufacturers’ safety precautions; use protective clothing, eyewear, and a respirator; and be sure to have an emergency kit on hand in case of spills or exposure. If you are a small shop, ask your supplier for safer substitutes and follow their recommendations.
Finally, don’t put any water with investment in it down sinks or toilets. Follow the disposal instructions from the investment’s manufacturer.
Keeping Records
As noted earlier, consistency is key in casting, so experts recommend keeping a record of your process when doing your own casting—even when you’ve worked out (or thought you’ve worked out) all the kinks. Not only will accurate and consistent records help you troubleshoot failed castings, they will also help you fine tune the casting process.
Even experienced casters keep handwritten records of every flask they cast. “We started with yellow legal pads and now have a process register that documents every flask,” says Busby, who notes that they record everything: which casting machine was used, what the oven temperature was, who invested the flask, using what investment. If a casting fails, he can tell if it was a machine or the operator that caused the error and it can be corrected.
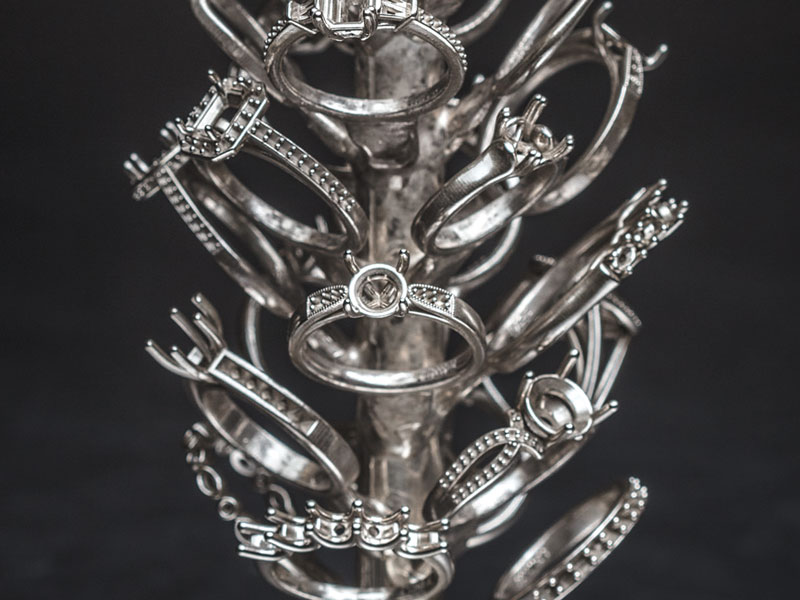
Casting in-house can offer cost savings, help protect your designs from copying, and become a valuable and unique part of your brand.
Accurate records can help you find that sweet spot for each of the metals you use for the types of jewelry you usually cast. Romanoff recommends keeping track of the type of jewelry in the flask (for example, a ladies ring), the metal you’re casting, the casting temperature you choose for that metal and that style, as well as the flask temperature, the strength of the vacuum, and the amount of overpressure. When the casting comes out, evaluate the quality of the casting on a scale from one to ten, with anything below eight not being a good quality casting.
“Anyone with a sophisticated machine should do that to arrive at the optimum temperatures and parameters for the types of pieces they’ll be casting,” he says.
The Costs of Casting
Basic casting equipment is relatively low tech and comparatively inexpensive. The least expensive choice is to vacuum cast with a machine that allows you to both vacuum the investment and cast; these systems usually between $1,100 and $1,500. These are perfect for silver and gold but can’t be used for platinum. You’ll also need a torch or melting furnace, a kiln, and ancillary supplies, such as flasks, tongs, gloves, crucibles, and gas tanks.
Platinum requires the high speed delivered by a centrifugal casting machine, which can also be used for silver and gold. The standard set up, for gold and silver, with a vacuum machine for investing and the casting machine as well as other equipment, will cost roughly between $3,000 and $6,000. Platinum casting requires additional and separate equipment and supplies: eye protection, special investment, a special crucible, and a hydrogen/oxygen torch set up, which may run another $1,000 or more.
There may also be infrastructure costs to consider, such as ventilation to pull out fumes from melting wax and hot metal, and to capture the dust from investing and quenching. If you use natural gas to power your torch, you may want to have it plumbed in. You may have to add special piping to keep oxygen and hydrogen tanks at a distance from the high heat of platinum melting torches.
Computer-controlled equipment, which offers a lower learning curve, consistent results, and a faster speed, comes at a higher cost. These machines can run from around $7,000 for a machine with a heating coil that will cast gold and silver, to $15,000 to $25,000 for machines with induction melting capabilities suitable for casting all jewelry metals including platinum, to upward of $32,000 or more, depending on the capabilities of the machine.
If you’ve determined that a computer-controlled machine would best fit your needs, don’t be put off by the initial high cost. Some suppliers allow customers to finance their purchase over several years, reducing the cost to as much as a few hundred dollars a month.
“The savings in not having to repair or re-cast bad castings more than covers the cost of your lease,” says Romanoff.
In addition, these machines can not only handle your current workflow, but also allow you to scale up your business easily, says Bradford. Or you can take on larger projects, or ramp up to do light production. And once you’re comfortable with the machine and your casting procedures, you could even offer casting services to other jewelers.
Regardless of what equipment you use, bringing casting in house will take time and a financial commitment. But the results could be well worth it.