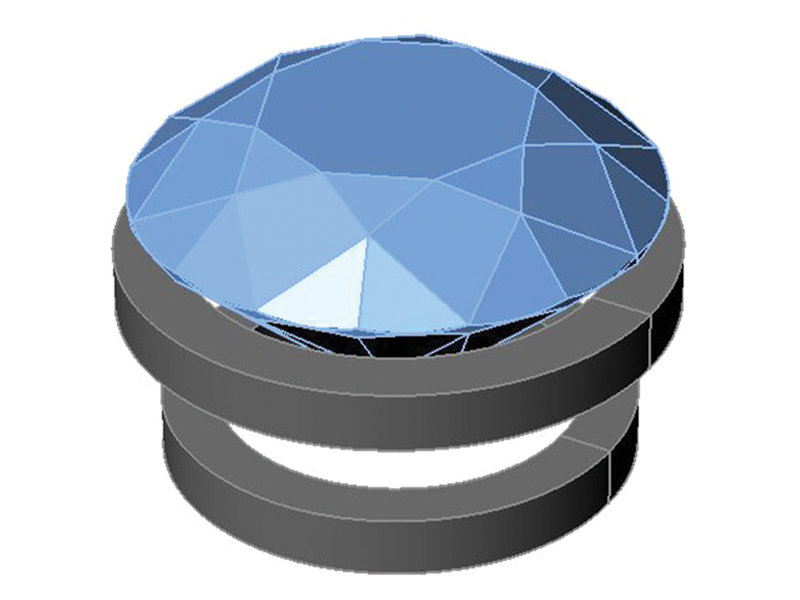
Although industry suppliers have made it easy to order pre-manufactured heads and have them delivered the next day, sometimes you can’t find the right shape or size for an uncalibrated gemstone. Luckily, creating your own custom head for the stone can be easily accomplished.
1. The first step is to create the main gallery for the stone. You can use round wire or square stock to create the gallery, which needs to be the same diameter and shape of the stone you’re setting. Take the wire and wrap it around a mandrel that is the same size as the stone you’re setting; in a pinch, you can also use a pencil or dowel. If the stone is an odd shape, you’ll need to manipulate the wire to the proper shape of the stone. In those cases, I usually start with a circle and then shape it with pliers. Once the wire is the right size and shape, solder it closed.
2. To create the bottom gallery, use the wire to form the same stock shape but make it smaller than the main gallery. The difference in size will affect the angle of your prongs: The larger the size difference, the more the prongs will flare. Getting the right amount of flare is also an issue of design. For example, if you’re creating a three-stone ring, you want the prongs to appear to flare out from the center of the ring.
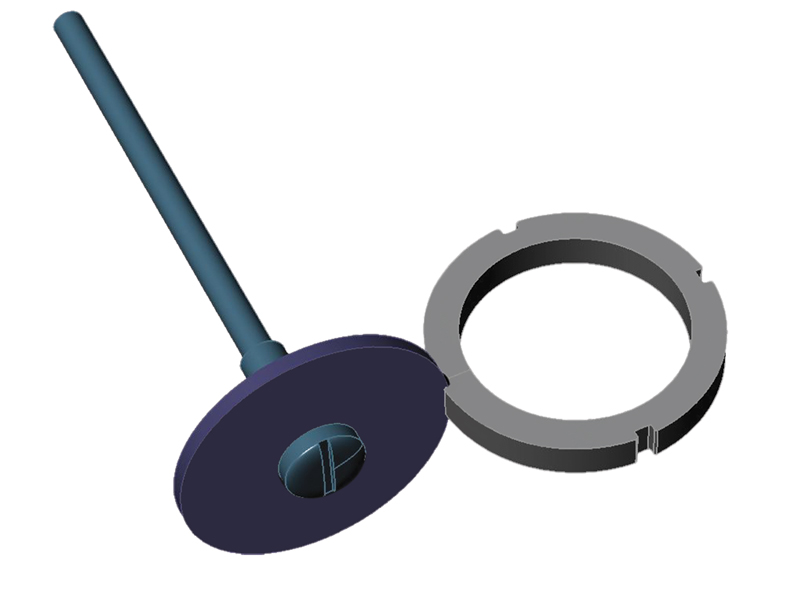
3. Now it’s time to decide where the prongs will be placed. Do you want them centered or offset? Placement will vary with every stone. One of the best ways to get prong placement correct is to lay the stone on graph paper and draw radial lines from a center point. You can use this as a guide for both galleries. Once you’ve decided on the placement, mark and notch the spots where the prongs will lay against both the lower and upper galleries. I use a separating disc but a kraus bur or ball bur will also work.
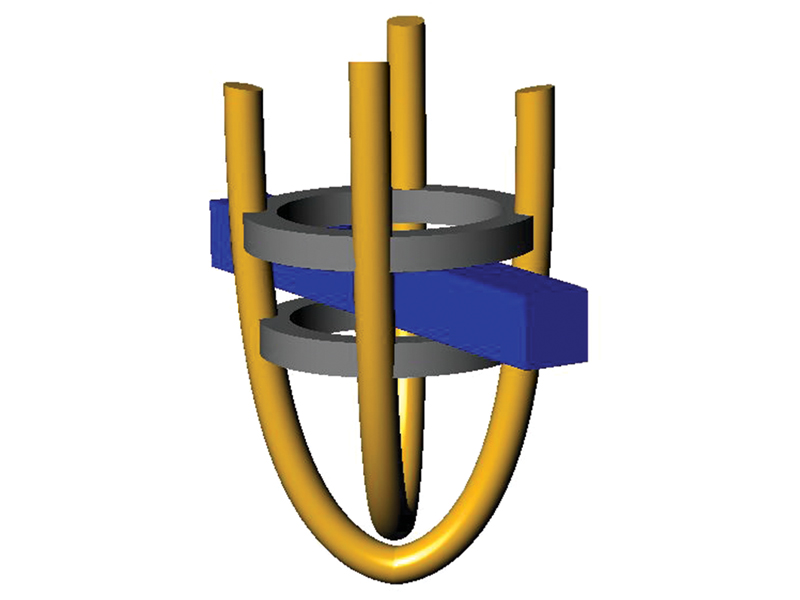
4. Bend two wires into U shapes and solder them to the notches marked on the lower gallery. (Don’t worry about the overlap at the bottom; we’ll be removing the excess.) The tension in the U bend should allow the prongs to snap into the notches, keeping them aligned and holding them in place as you solder.
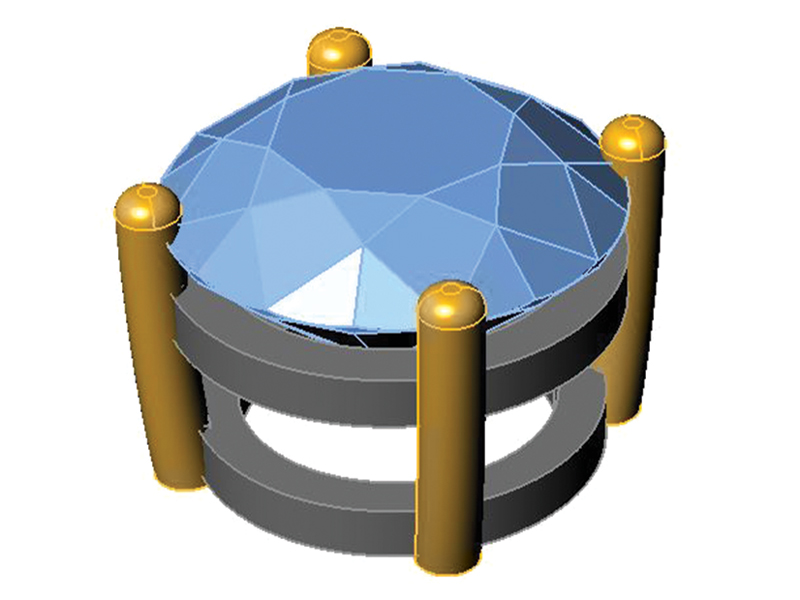
5. Fit the top gallery in place and be sure the spacing between the galleries is what you want. I often wedge a piece of scrap stock between the two galleries to secure the spacing temporarily while I solder the top in. Test fit the stone to be sure its culet won’t poke past the lower gallery where it could be damaged or cut the customer’s finger. Make sure to bend in the prongs so they fit in the notches snugly; the tighter the fit, the easier the prongs will be to solder.
6. Trim the excess prong wire so it’s flush with the bottom gallery and then polish.
7. Finally, cut the seat and set the stone.
Manage Consent
To provide the best experiences, we use technologies like cookies to store and/or access device information. Consenting to these technologies will allow us to process data such as browsing behavior or unique IDs on this site. Not consenting or withdrawing consent, may adversely affect certain features and functions.
Functional
Always active
The technical storage or access is strictly necessary for the legitimate purpose of enabling the use of a specific service explicitly requested by the subscriber or user, or for the sole purpose of carrying out the transmission of a communication over an electronic communications network.
Preferences
The technical storage or access is necessary for the legitimate purpose of storing preferences that are not requested by the subscriber or user.
Statistics
The technical storage or access that is used exclusively for statistical purposes.The technical storage or access that is used exclusively for anonymous statistical purposes. Without a subpoena, voluntary compliance on the part of your Internet Service Provider, or additional records from a third party, information stored or retrieved for this purpose alone cannot usually be used to identify you.
Marketing
The technical storage or access is required to create user profiles to send advertising, or to track the user on a website or across several websites for similar marketing purposes.
A Fresh Look. A New Website. A Stronger Membership.
We’re excited to unveil Jewelers of America’s refreshed brand and redesigned website, reflecting our growing community and continued commitment to the jewelry industry.
With JA and MJSA now united under one membership, we’re bringing together more resources, expertise and connections to support every facet of the jewelry industry.
Take a look around to see all that JA offers — members can login to access member-only content like benefits, the Knowledge Vault and Advocacy resources.
Questions? Contact us at members@jewelers.org or call/text (800) 223-0673.