

Bench Envy: Jim Grahl
Bench Envy
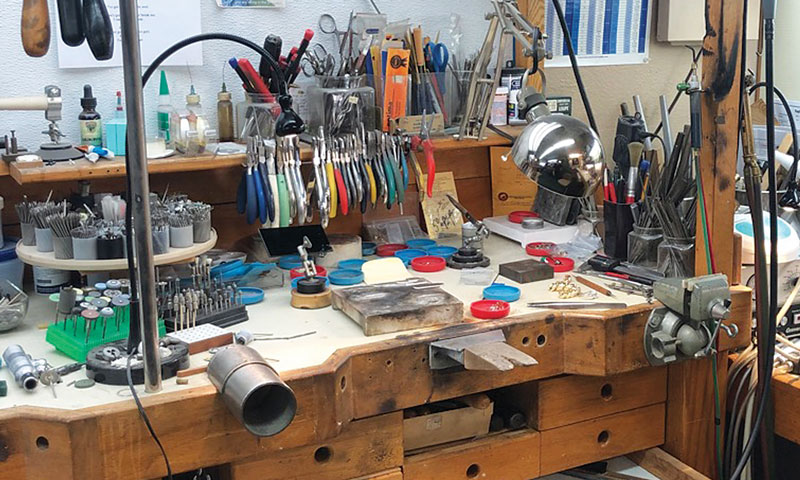
Jim Grahl’s studio is a mix of old meets new
By Jim Grahl
Editor’s Note: While Jim Grahl of J. Grahl Design in Balboa Island, California, loves technological developments that have made certain tasks in jewelry making easier, he sees no need to replace the trusty older tools and equipment that fill his 1,500- square foot studio.
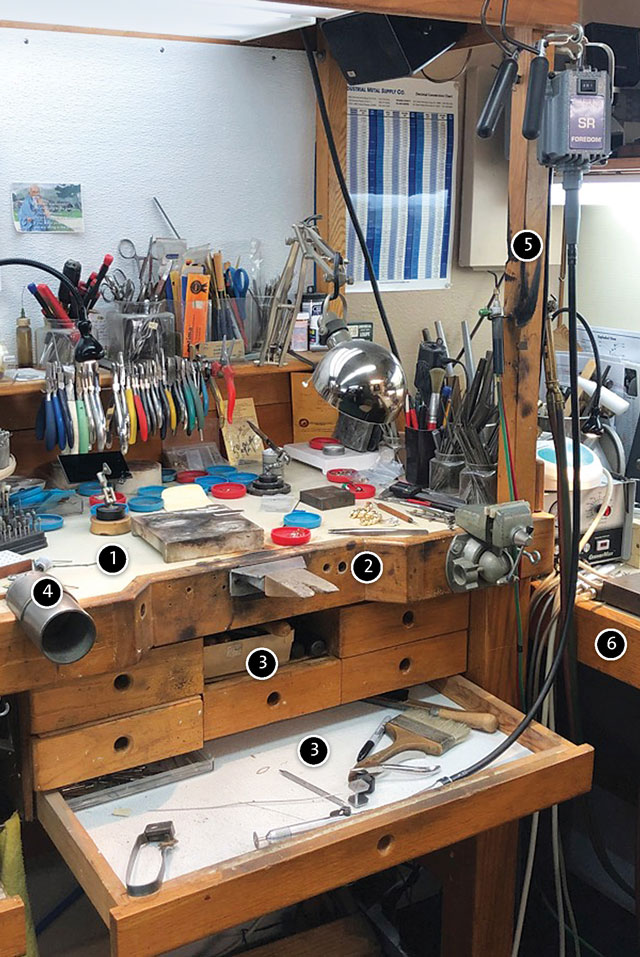
1. I worked with a master woodworker to create all of the benches in the studio. These were made about 40 years ago, and they have a lot of mileage on them. They’re made from solid oak and each weighs about 500 to 550 pounds—weight is to your advantage in jewelry work. They’re built at standing height so they can be used standing or while sitting on a high stool. The bench top is comprised of five sheets of three-quarter inch particleboard with a layer of Formica on top. They’re designed to take a lot of abuse, and they’ve held up pretty darn well.
2. The benches are designed with a shallow cutout, which works best for me. Rather than round off the cutout, it’s designed with angles that allow me to lay something in one if I’m hammering on a mandrel. I also drilled holes in the cutout area to hold mandrels. Sometimes the bench designs you, and sometimes you design the bench.
3. The bottom drawer of the bench acts as the catch tray. The smaller drawers contain an assortment of tools that I have a tendency to use all of the time and want to keep easy to reach and grab—pliers, gravers, sanding media, ring clamps, etc. In the center section I have a cutout area that has a container for files. In lieu of drawer pulls, I kept it simple with finger pulls and the drawers move readily.
4. Although it looks like it was built into the bench top, I have a large diameter stainless steel forming mandrel to the left of my bench pin. I originally built it for one specific piece but it wound up being such a common size for certain things that I fixed it in place on the bench using a single long bolt.
5. I keep my torch secured to the post to the right of my bench, which keeps it out of the way. Years ago I used a hydrogen torch. It had a transparent flame that could be easy to miss, which is why you can see some burn marks on the bench post.
6. To the immediate right of this main bench is another bench where I do a lot of forming as well as layout work. The close proximity allows me to easily turn from one workspace to the other. The layout harkens back to early European workspaces where the idea was to have things as convenient as possible. If you’re trying to hold things together, you don’t want to have to get up and move around—you want to be parked. It’s a convenient layout, especially if you need to be able to shift gears pretty quickly.
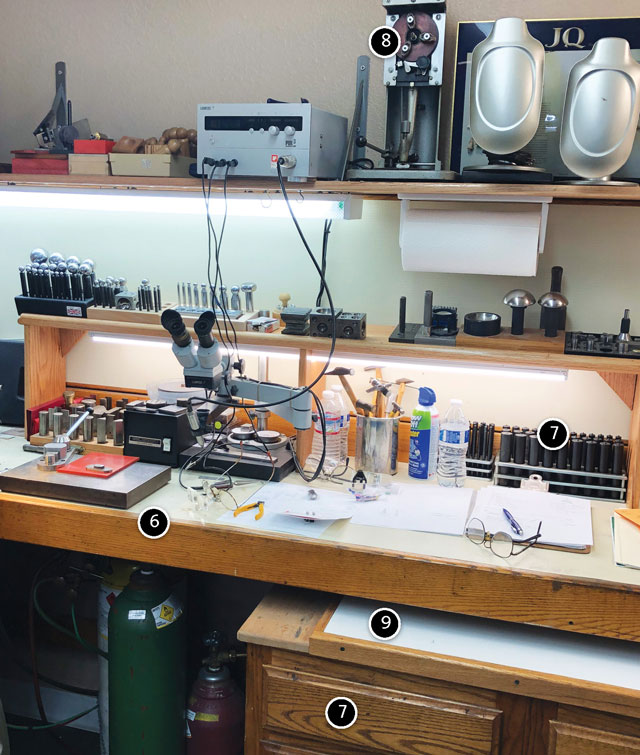
7. Because this space is intended as a layout area, it’s kept pretty clean, with tools tucked away until needed. An assortment of mandrels are stored along the back of the bench, keeping them close at end but also out of the way. Many more are stored in the cabinet under this workspace. I likely have about 1,000 mandrels in the studio, as there are many times when a mandrel is needed that is not commercially available and I make one for the specific project on hand.
8. We don’t do laser engraving so when the inside of a ring needs to be engraved, I rely on this inside ring engraver. It’s about 40 years old and it does what it’s supposed to do impeccably. Although I love and use technology, sometimes it makes it easy for us to overlook older tools that are just as viable (and don’t need a lot of maintenance).
9. If additional layout space is needed for a project, this whiteboard slides out to create another large, clean work surface. It’s on drawer slides and comes in and out easily.
10. In the middle of this area of the shop is a forming bench island where much of the heavy duty hammering happens. It has solid oak legs and a 2 inch thick butcher block top. I wanted an area where you could hammer without knocking other stuff down.
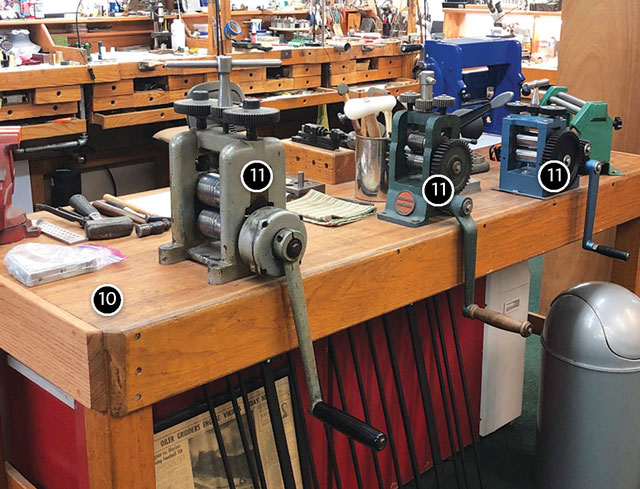
11. I have three different mills attached to the island. The gray one on the left is a heavy-duty model used for stock mill. I pulled the rollers out of the center mill and re-machined them for specific shapes. The small blue mill on the right was very inexpensive but it has beautifully polished rollers that leave an impeccable surface.
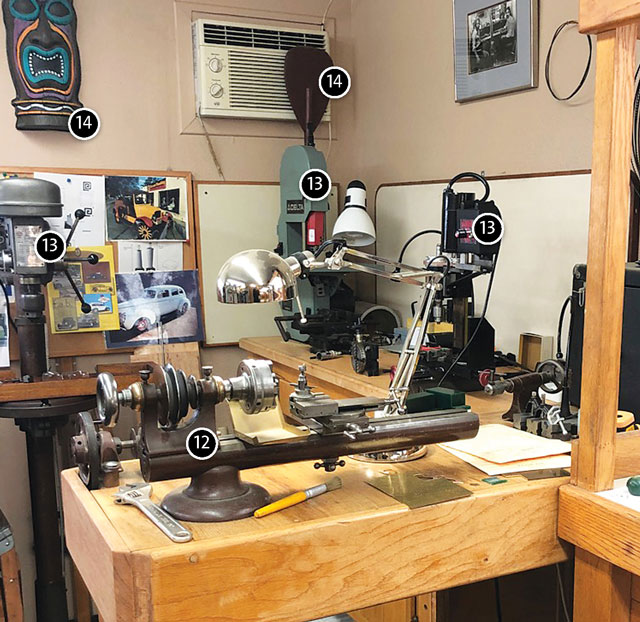
12. To the left of the jewelers’ benches is another workstation to hold additional equipment. This lathe is one of several I have in the shop. It’s a very rare watchmaker’s lathe from 1895 and it is a true workhorse.
13. Other large pieces of equipment occupy this corner of the shop, including a micro mill, a band saw, and a drill press.
14. This is a private studio, but when I do bring clients into it, I have found that they want to be visually entertained. Clients come in and ask the same questions: What’s this for? How do you do this? But they’ll also ask about the miscellaneous stuff around the shop so it’s nice to have things designed to capture their interest. I have a tiki mask because I surf as well as a 110-year-old canoe paddle. I don’t need to keep pictures of jewelry in my studio—people can google that. I want clients to be engaged and to ask questions.