

At the Bench: Waste Not, Want Not
Waste Not, Want Not
Recycling bench scraps to create ingots
By Christine Dhein
Clean filings and scrap can be recycled in the workshop rather than being sent to a refiner. This saves money by eliminating shipping costs and refining fees, and conserves the resources required by the refining process.
Regularly brush the sweeps drawer and put the scraps and dust in well-sealing containers, carefully separating alloys. When you have sufficient quantity, such as 15 to 20 grams, sort the pieces from the dust, either by using a strainer screen or by picking out pieces with tweezers. To avoid impurities in the melt, send used jewelry and precious metal dust to a refiner to be reclaimed. The remaining clean, precious metal scraps can be cast into an ingot in order to create sheet and wire. There are several ways to create ingots using your scrap metal. Let’s take a look at two of them.
Making a Rod Ingot
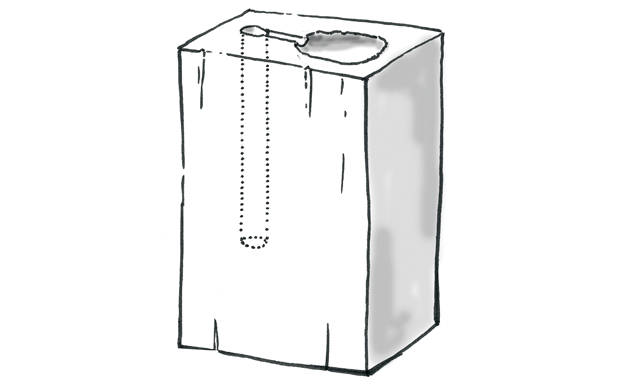
1. Drill a hole in a charcoal block. The depth depends on the metal on hand and the diameter of the hole.
2. Carve a depression a short distance from the hole that’s large enough to hold the silver or gold to be melted.
3. Carve a trench that will allow the metal to flow from the depression into the hole.
4. Place the metal scraps in the depression and heat with a torch until melted, adding a sprinkle of borax powder in the process.
5. When the surface of the metal appears to spin, tip the charcoal gently, allowing the molten metal to flow into the hole.
6. Allow the metal to cool, and then grab it with pliers and pull it out. From here, the rod can be forged, rolled, or drawn into wire.
Making a Flat Ingot
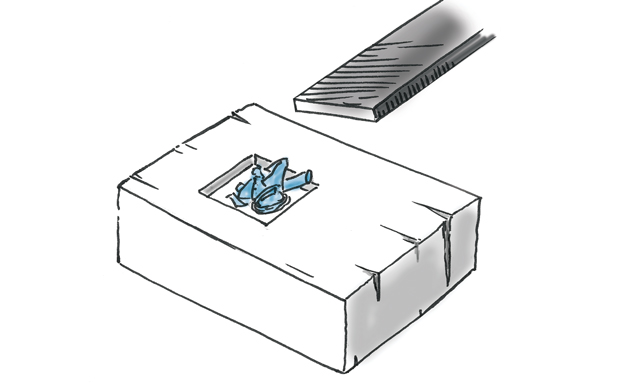
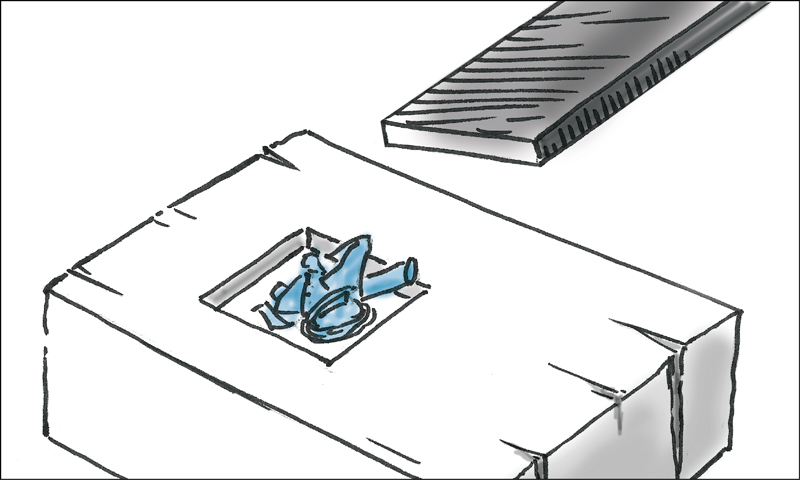
1. Carve a depression (usually a square or rectangle) in a charcoal block.
2. Set the metal scraps into the depression and melt them with a torch, adding borax powder once or twice during the melting process.
3. When the metal is molten and the surface spins, move the torch away. Pause for one beat and then gently press on the molten blob with a piece of steel, such as a hammer face or discarded file. (If using a file, make sure it is clean of other metals to avoid contamination.)
4. Allow the ingot to cool, and then pull it from the mold with pliers. From here, the block can be forged or thinned in a rolling mill to make sheet.
Once you’ve created an ingot, you’ll need to render it into a sheet or a wire form for use at the bench.
Creating Sheet
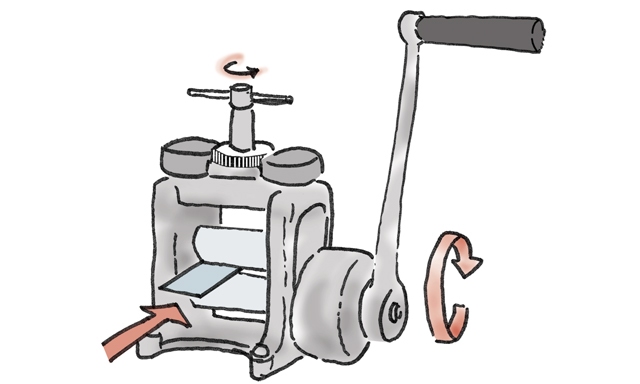
The easiest way to create sheet is with a rolling mill. The gap between the two hardened steel rollers can be opened or closed in small increments depending on how thick or thin you want the sheet to be. If the rollers are smooth and polished, the surface of the rolled metal will be rendered smooth and polished too. To turn an ingot into a metal sheet, follow these steps:
- 1. To avoid causing the mill to rust, always ensure the metal being rolled is completely clean and dry.
2. Open the rollers until the ingot will fit between them. Then take the metal away and bring the rollers slightly closer together. It is better to take many passes in tiny increments than to attempt large reductions from one pass to the next.
3. Insert the metal and turn the handle to pull the metal through. Close the gap slightly and repeat, always feeding the metal through the rollers in the same direction.
4. After a few passes through the mill, the rolling becomes noticeably more difficult, indicating that the metal has work hardened.
5. Anneal, dry, and repeat as needed until reaching the desired thickness. If the piece needs to be turned so it stretches in more than one direction, rotate only after annealing.
Creating Wire
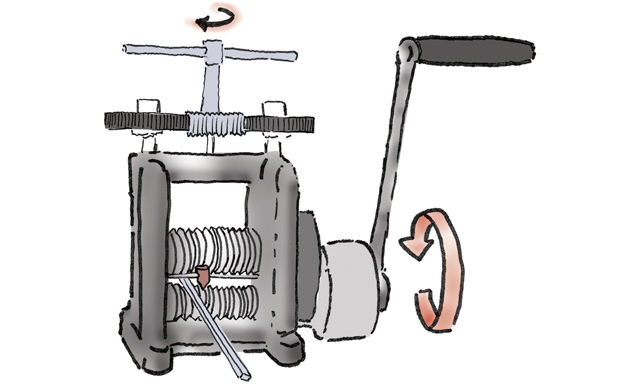
There are two techniques that can be used to turn an ingot into wire. The first involves using a rolling mill. Some rolling mills have grooved rollers designed to reduce bars or rods. The process is similar to that described earlier but with the following exceptions:
• Even when the goal is round wire, the early reduction is done on square material. When the size approaches the intended dimension, transition to a drawplate for the final cross section.
• With some mills, it is not necessary to close the gap be-tween rollings. The triangular grooves on the rollers are made in graduated sizes so the process is simply to move step by step along the rollers. A pointer is provided to indicate the last groove used so you don’t lose your place. With other brands, you’ll need to adjust the gap between each pass.
• It is best to keep tension on the wire as it exits the mill, especially when working with thin wire. This will help keep it straight.
If a rolling mill isn’t an option, drawplates can also be used to create wire. A drawplate is a bar of hardened steel pierced with graduated holes that are slightly tapered. To use a drawplate:
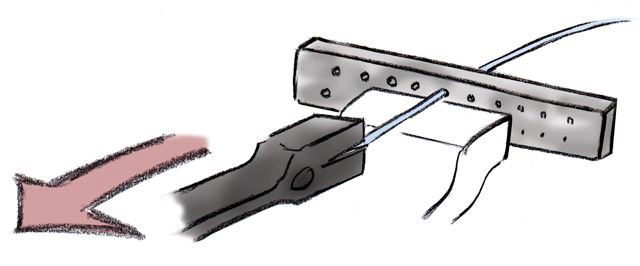
1. File or roll the end of the wire to be drawn to create a taper. This should be about a 0.5 inch (10 mm) long—enough to allow the wire to project from a hole enough to get a good grip.
2. Secure the drawplate in a vise mounted to a sturdy table so that the holes being used are close to the vise.
3. Feed the taper through the holes until you find the first one that it cannot pass through. Grip the wire with draw tongs, and pull it through that hole.
4. Progress systematically through increasingly smaller holes, stopping to anneal the wire as needed. If the filed tip breaks, re-file the taper and continue pulling the wire until you reach the desired size.