

Step It Up
Tips for improving casting quality
Compiled by Tina Wojtkielo Snyder
(Originally Published by MJSA August 2011)
Editor’s Note: Every jewelry caster has his or her own set of procedures and guidelines for turning a model into a precious metal casting. The routine in your shop might involve a combination of tried-and-true practices, passed down through generations, and high-tech tools that aid accuracy and efficiency. Bridging the gap between tradition and technology are the tricks of the trade—the stuff you learned through trial and error, in-depth research, a seminar, or a conversation with your grandfather decades ago.
In this article, a group of top-notch trade casters share the tricks they use to ensure the best possible results. Below you’ll find practical tips that you can add to your shop’s routine to step up casting quality.
Keep It Uniform
Linus Drogs
Au Enterprises, Berkley, Michigan
To increase speed, casters sometimes take shortcuts that might not seem like a big deal, but they end up wreaking havoc. Here’s a scenario that happens all the time:
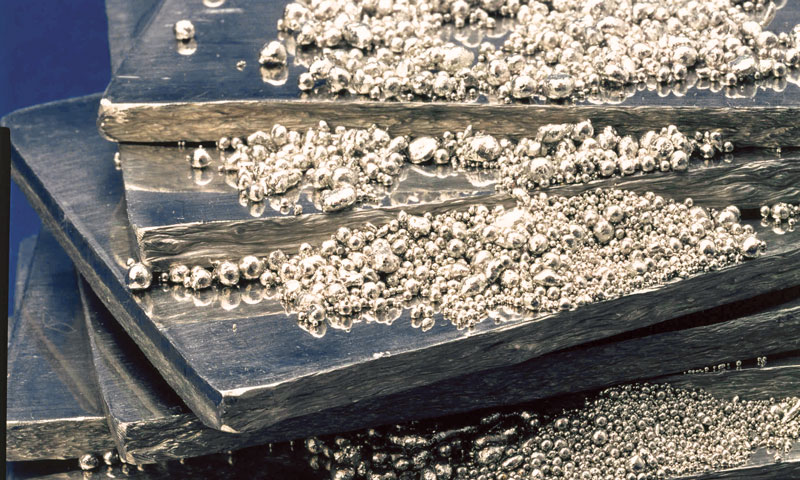
The manufacturer is casting 14k yellow gold rings. First thing in the morning he mixes fine gold with his master alloy and puts it through a graining cycle. After he casts the first tree, he cleans it up, cuts off the salable parts, and tosses what is left of the tree into the next melt with more casting grain. Crucial mistake! The casting grain will melt much faster than the tree, so the molten metal will percolate while the tree is trying to come up to temperature. All of the “secret ingredients” that make the alloy cast better will burn off, resulting in increased porosity and diminishing the metal’s reusability.
While the manufacturer may have saved time by tossing that tree in with fresh grain, he just caused himself some big headaches down the line. For the best results, always start with uniform metal charges when melting.
In addition, it’s always best to pre-grain your material prior to casting—don’t grain and cast in one operation. Graining requires a slight increase in superheat that casting doesn’t, so if you do both in the same operation you end up casting with too much heat, which could lead to increased porosity.
Invest Wisely
Andy Andrews
Best Cast, River Edge, New Jersey
When it comes to mixing investment, most people will advise you to follow the investment manufacturer’s instructions for optimum results. In most cases, that advice is well-founded—but not always. For instance, when it comes to the new rapid prototype (RP) materials on the market today, the given instructions may need a little tweaking.
During some recent experiments, we determined that our RP models needed a stronger investment at the beginning of the burnout cycle to withstand the expansion of the resin. And the only way to get the strength needed was by making some changes in our mixing procedures. By tweaking the recommended mixing instructions—slowing our mixing speed to lower than 100 rpm, increasing our bench dry time from 1 to 2 hours to 3 hours, and changing the water-to-powder ratio from 39/100 to 38/100—we recorded a significant increase in the strength of our investment molds. And that was the first step to better casting quality.
Had we continued to blindly follow the investment mixing instructions to a tee, we would never have discovered the potential to do this. The lesson here is, if you take the time to carefully analyze each step of your casting process, sometimes subtle tweaks like these can make a big difference in end results.
Clean Up
Teresa Fryé
Techform Advanced Casting, Portland, Oregon
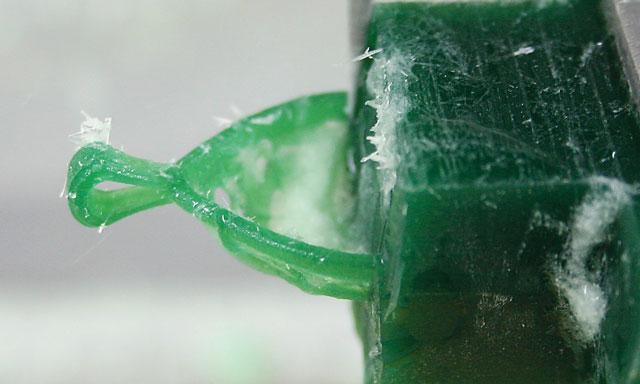
Before you sprue a milled or hand-carved wax, it’s important to make sure the wax is as clean as possible. As a contract caster, we have waxes coming in daily covered with flash or bench dirt from customers who expect to get back perfect castings. While most casters will do some degree of cleanup, it may take 20 to 30 minutes to do a proper cleaning job on designs with intricate features. If all you do is a quick cleaning, the result is a casting that requires a lot more cleanup time at the bench—and obviously, metal is not as simple to remove as wax. That wasted metal is also expensive. With the prices of precious metals these days, you can’t afford to cast sloppy waxes.
Editor’s Note: To clean off the pesky bits of wax that get trapped in the nooks and crannies of milled wax models, Kate Wolf of Wolf Designs and Wolf Tools in Portland, Maine, uses a natural bristle artist’s paintbrush—preferably a short-haired, compact Filbert brush with a slightly curved tip. She uses a stabbing motion to help break away the extra wax. An even better tool for this task, she says, is the Micro Pressure Washer ($80) from Otto Frei. This tool produces a fine, high-pressure stream of water that blasts away the wax debris.
Know When to Hold ’Em
J. Tyler Teague
JETT Research, Johnson City, Tennessee
When it comes to burnout, most casters follow the same general regimen for gold and platinum:
- Hold at the starting temperature (generally between 250°F/121°C and 300°F/149°C) for 2 to 5 hours, depending on oven load.
- Ramp up in increments of 4 to 5 degrees per minute to the top temperature of the burnout—1,350°F/732°C for gypsum-bonded investment and about 1,600°F/871°C for phosphate-bonded investment.
- Hold at the top temperature for about 2 to 4 hours to help eliminate carbon residue. Having leftover carbon in a flask is bad for any metal casting, and for platinum it can be a train wreck, often leading to cracking.
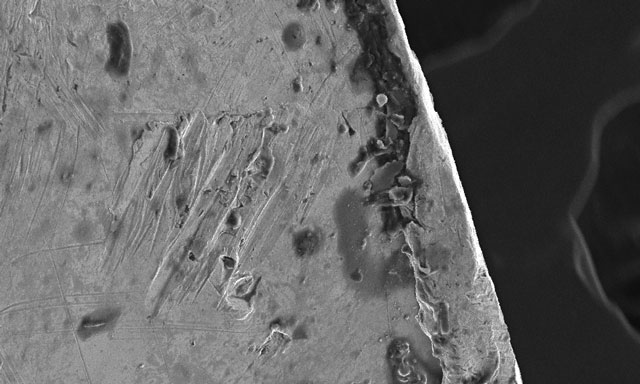
Carbon embedded in a platinum casting, causing failure in the prongs of a platinum diamond setting.
I have found that the last step of this routine burnout process, holding at top temperature, is terribly ineffective at eliminating carbon. But you’ll need to understand some science to see why.
First, oxygen, which makes up only 20 to 21 percent of air, is required to burn carbon. The density (mass per unit of volume) of air at room temperature is about 0.75 lbs/ft3. At the first temperature used for most burnouts, the density of air is about 0.0556 lbs/ft3. At 1,350°F/732°C, it’s about 0.02192 lbs/ft3, and it drops to 0.019259 lbs/ft3 at 1,600°F/871°C. From these figures we can deduce that the most oxygen is available at lower burnout temperatures. However, since the flash point of most injection wax—i.e., that point when the wax catches fire, forming carbon dioxide—is about 450°F/232°C, it doesn’t really matter how much oxygen is available until then.
Next, you must factor in that the cristobalite (quartz sand) present in both types of investment goes through a significant phase transformation (growth spurt) at about 518°F/270° to offset water loss during drying, and again at 1,063°F/573°C. It is best to go through these phases slowly to reduce stress, which could crack the mold. This has been the premise of the 4 to 5 degree per minute ramp for all these years.
So considering the flash point of wax, the density of air at various temperatures, and the first phase change of cristobalite, wouldn’t it make sense to hold the burnout at around 500°F/260°C for an hour or more instead of waiting until the top temperature is reached? This would give the carbon and oxygen the best shot at meeting up when the wax is ready to melt and a higher density of air/oxygen is available—in addition to giving the cristobalite the easiest time it could have during its phase change.
I’ve tried it—and it works! (Note: This is suggested not as a replacement for the hold at top temperatures, but as a supplement to it.) Holding at 500°F/260°C for about 2 hours gives the carbon and the oxygen the opportunity to have a love fest, reducing the chance of any nasty carbon-related failures, such as the one pictured above, in your castings.
Seal of Approval
J. Tyler Teague
JETT Research, Johnson City, Tennessee
Every caster has seen his or her fair share of investment inclusions. You’ll be polishing a casting when suddenly a hole will pop up with a bit of investment inside. You then have to dig out the investment and fill in the hole with wire, using a laser welder. It’s time consuming—not to mention an inferior product.
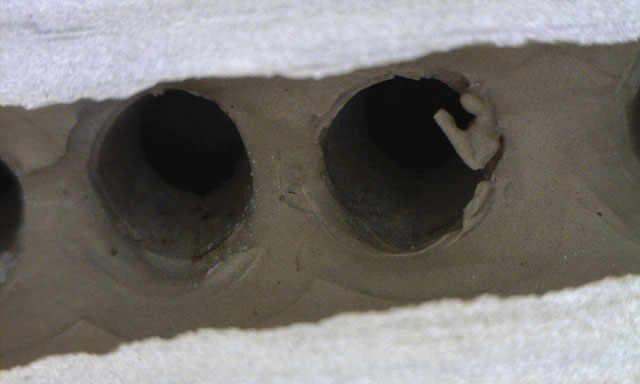
During some recent experiments that I was conducting on burnouts, I captured an investment inclusion in the making. It occurred when I was cutting platinum flasks down the middle to study various stages of burnout. The photo above is a cutaway view of a flask, showing the investment after the wax has been mostly removed with a partial burnout cycle. You can see at the opening—the junctions of the feed sprues and the main sprue—tiny pieces of investment hanging off the sides. When a centrifugal casting machine shoots molten metal into that hole at high velocity, the investment will break off and become a problematic inclusion.
Avoiding the number one cause of this problem is a simple fix: Take care to seal and create a fillet between the feed sprues and the main sprue in your casting tree. Spending a little more time on the front end will avoid nasty surprises on the back end.
Start From Scratch
Joel Weiss
Carrera Casting, New York City
Sometimes the answer to a problem is so simple that no one does it. The best advice that I can offer to any caster who is having a production problem is to simply start over. Most of the time, when you get a bad cast you tend to analyze the problem and make a change in an attempt to fix it. After that change doesn’t work, you make another. Then another. After enough changes, you can’t get back on track.
Whenever I have a casting problem, I start from scratch. I personally check the model, wax, spruing, investment, and burnout, and then proceed with fresh metal. If you take the time to look at the entire process with your own eyes, you will see where you are going wrong. It sounds so basic, but it’s often the only way to eliminate the problem.