

Repairing Jewelry
Tips from the Ultimate Repair Guide
Compiled by Shawna Kulpa and Tina Wojtkielo Snyder
Tip #1
When taking in a chain for repair, David Geller of JewelerProfit suggests laying the chain on a copy machine and making two copies. Staple one to the receipt that you give to the customer and put the other in your job envelope. “If the customer returns to say, ’it broke again—where you fixed it,’ you can get the job envelope, pull out the picture, and lay the chain over it,” says Geller. “You can both see clearly if the damage is where you fixed it or not.”
Tip #2

When sizing down a ring, you will have to apply pressure to it after you’ve cut out the excess. To keep your pliers from marring the ring while you apply pressure to it, wrap the jaws with several layers of masking tape, says Jurgen J. Maerz, technical consultant for Platinum Guild International in New York City. Also, be sure to rotate the pliers around the circumference of the ring, and try to keep it as round as possible.
Tip #3
Have you considered intentionally sizing a ring so it’s 1/8 of a size too small? Brad Simon of B.W. Simon in Spartanburg, South Carolina, encourages you to—and, in some shops, this is standard operating procedure. After soldering, clean the joint on the inside of the ring only. Place the ring on the mandrel and hammer across the solder joint until the ring reaches the correct size. To finish the job, clean up the outside of the ring by filing and polishing. The idea behind this approach is that it’s better for the ring to be a bit on the small side than on the large side. “If you are a little too large, you will need to resize,” says Simon. “In addition, this [process] will work harden the sizing area, making a stronger joint, and [making] finishing and polishing easier.”
Tip #4
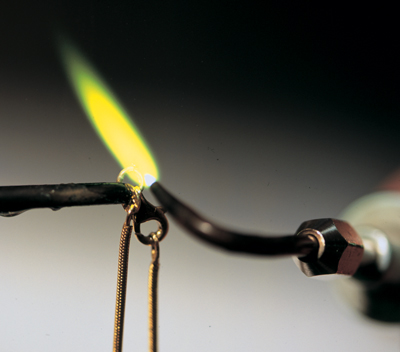
Those new to benchwork are often surprised to discover that the jump rings attaching spring rings to chains are never soldered together. The reason is the steel springs that make the mechanism work: Heat will destroy the temper in the steel spring, and spring rings are so tiny it is virtually impossible to heat the jump ring without destroying the steel spring.
“If you heat the steel spring, it will lose its tension and won’t function at all,” says Alan Revere of the Revere Academy of Jewelry Arts in San Francisco. In addition, the presence of steel forbids the use of pickle on spring rings. “The steel spring will force the copper out of solution and plate the entire piece with copper,” he warns.
However, with practice, the rings attaching lobster clasps to a necklace or bracelet can be soldered together, says Revere. “You need skills to isolate where you’re heating,” he explains. “You do that by using the correct torch with a very small tip. And you isolate the part, either in the air or in tweezers, or with a compound that doesn’t transfer heat. The you go in there fast and quick to do the job.”
And although many jewelers avoid using easy solder for repairs, Revere notes that this is one place where its use is appropriate. “I think this is a fine time to use easy solder,” he says. “[The piece] is not going to be soldered again, and by using the lower temperature solder, you’re reducing the risk of doing some accidental damage.”
Tip #5
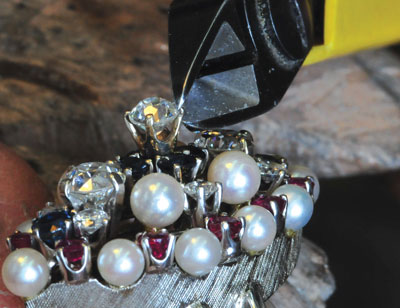
In situations where you must remove a stone prior to retipping or rebuilding a prong, custom jeweler Gary Dawson of Eugene, Oregon, suggests using a brand-new Lindstrom or other very sharp flat side-cutter. “It will accomplish the task of lifting the prong without contacting the gem,” he says.
And if you have to push a stone out of a setting once it has been loosened, avoid using a steel tool, which may result in chipping. Try a wooden dowel, a toothpick, plastic, or copper.