

Quick Clips: Using a Pulse-Arc Welder to Convert Post Earrings to Clip-ons
Quick Clips
Using a pulse-arc welder to convert post earrings to clip-ons
By Sessin Durgham
For certain jobs, pulse-arc welders offer a convenient alternative to both torches and lasers. That’s particularly true for projects involving findings that contain steel springs, which when heated will loose their tension: Welding with a pulse-arc welder will not overheat and temper the steel, so it will not affect the spring action.
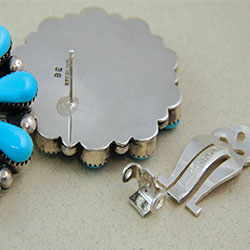
1. For this project, I will use a plug weld and an overlap weld to attach a clip-on joint to a turquoise and sterling earring, without damaging the stones. (Pulse-arc machines don’t have the same reflectivity issues as lasers do when welding silver, nor do they have the potentially damaging heat of a flame.) I used an Orion 150s, but other pulse-arc welders can be used.
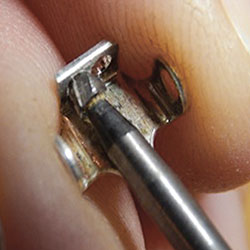
2. To begin, drill two 1 mm holes in the base of the clip-on joint and slightly countersink the holes using a setting bur. The countersink will give you room to angle the electrode into the hole. These holes will later be plugged with filler material, which will give strength to the joint so it can be bent without stressing. (Some joints may need more holes, depending on the geometry and how much strength is needed.) When working with sterling, I like to use fine silver as a filler material, as it creates smooth, porous-free welds and presents no color match issues.
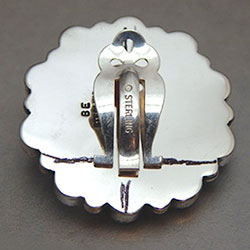
3. After removing the post from the back of the earring with a flush cutter, place the clip about 2 or 3 mm from the bottom of the earring. Using a Sharpie, mark the position for the joint. (Note: Before placing the clip, use rubberized abrasives and polishers to clean and polish the solder spot.)
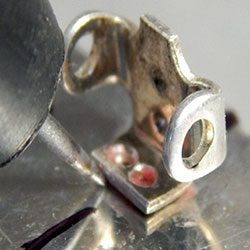
4. Attach a pinch of yellow or red sticky wax to the bottom of the joint to hold it in place. After adjusting the welder’s wattage, use a sharp electrode placed at a 45-degree angle to weld the joint to the earring. For this project, I used 12 watt seconds, which is a low to medium setting. (Because every pulse-arc system is different, I recommend practicing welding on scrap metal to find the best setting for your system.)
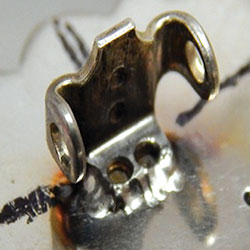
5. The connected joint. I used about 20 pulses to create an overlap weld around the entire perimeter of the joint; no filler wire was required. (I steamed off the wax after the first two or three welds.)
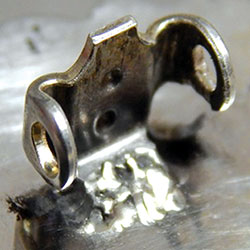
6. For the plug welds, place the electrode into the holes and weld until the walls of the holes completely collapse. You may need to use some silver filler at the plug site to raise it flush with the adjacent surface.

7. Use your favorite grinding and finishing wheels to complete the project. For these earrings, I used Arkansas points and rubberized abrasives.