

Cutting Cues
Tips for making great molds
By Chuck Hunner
Developments in CAD/CAM technology for the jewelry industry over the past two decades have led to a slew of new model and mold materials hitting the market. All require specific temperatures and procedures to achieve the best possible results, but some basic mold-making practices hold true regardless of what materials you are using. The following is a sampling of tips for making great molds:
Start clean. Always wash your hands before you make a mold to avoid introducing grit, buffing compound, or oils to the mold. Cutting through grit and dust dulls the blade, while dirt and oil can roughen the smooth surface inside the mold. Oils and dust can also prevent the mold from curing properly.
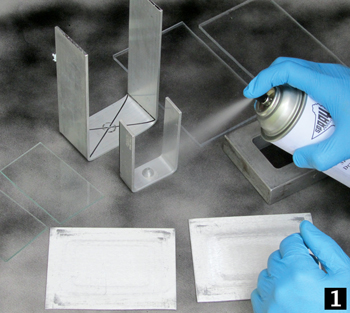
Lubricate to save time. You can waste a lot of time removing molds stuck in their frames. To make this easier, always spray the frame and mold plates with a Teflon dry lubricant before packing a silicone mold (1). I use 565 Teflon spray from Spray Products in Norristown, Pennsylvania. It lays down a thick and even coat of mold release.
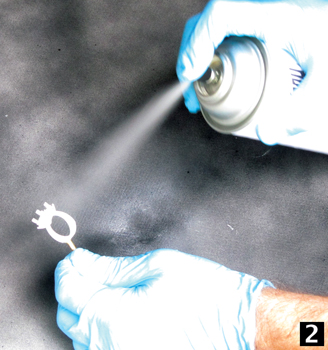
Also, spray your rapid prototype (RP) models with Teflon (2) before making molds of them using either heat-cured or room-temperature-vulcanizing (RTV) silicone. This will enable the mold to pull away from the model more easily during cutting.
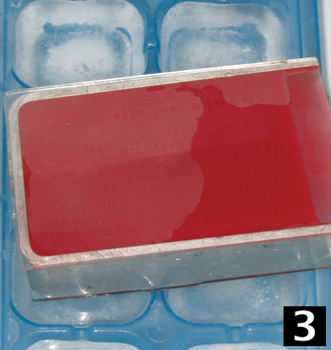
Try a fast freeze. Before separating the glass plates from an RTV mold in a frame, try this trick from Victor Joyner of HD Pattern Co. in Chicago: Put the mold in the freezer for 10 minutes (3). The plates come off the molds more easily—especially if you’ve pre-sprayed them with a light coating of Teflon.
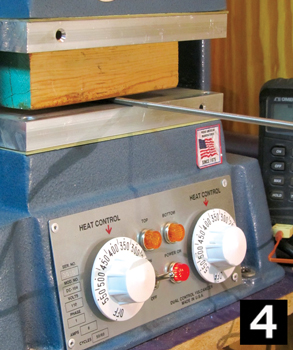
Check your temps. It’s important to make sure that your vulcanizer is supplying even heat to each side of the mold. If one plate is hotter than the other, it will cure one side of the mold faster than the other and leave you with a warped mold. To check the temperature, turn on the vulcanizer and let it heat up for 20 minutes. Place a board on the bottom vulcanizer platen and then place a thermometer on top of the board. Record this temperature for the top platen. Put the thermometer under the board to check the bottom platen (4), and record the temperature.
The temperatures should be within one or two degrees of each other; if they aren’t, adjust accordingly. If the temperatures are more than 10 degrees apart, unplug the vulcanizer, let it cool, and check the connections to the heating elements. Tighten them if necessary. If that does not help, you probably need to replace the heating elements.
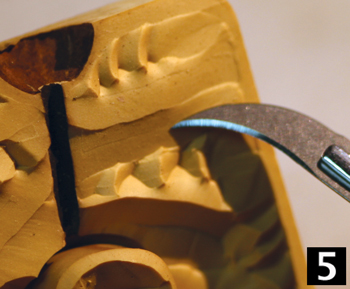
Always use a sharp blade. Watch your cut in the mold for striations. If the cut surface has tiny lines in it parallel to the direction you are cutting (5), your blade is dull. You can feel a dull blade as you pull it through the rubber. You might even feel a subtle tearing sensation in your knife hand as the dull blade rips through the rubber rather than slices. Always start cutting a new mold with a brand new blade.
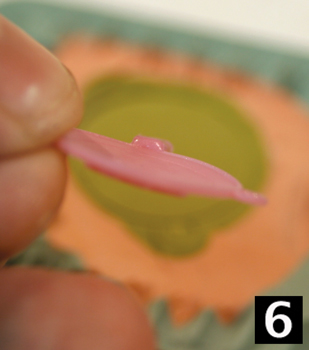
Pack low-temp molds with care. Take care when packing a low-temperature silicone mold that vulcanizes at around 185°F (85°C) to avoid warping the wax. Case in point: I had a very thin wax (0.5 mm with a melting temperature of 230°F/110°C) to mold. I packed a little silicone compound in the back of it to make sure that the back of the model was filled completely, then surrounded the whole thing with more silicone rubber and popped it into the vulcanizer. Because of the very slightly uneven amount of rubber I put behind the wax, the mold turned out a very slightly warped wax (6), showing that even superb mold material can still allow operator error. Be sure to pack your molds evenly for good wax injections.
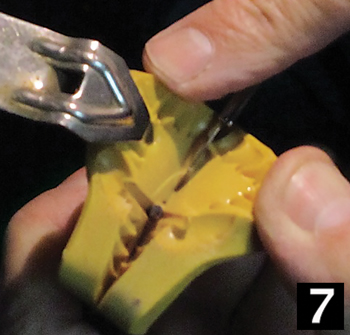
Don’t cut yourself! Never pull the knife through the rubber using your arm muscles, as this can lead to a big cut. Use the muscles in your hand to carefully pull or wiggle the blade through the rubber. Do your best to keep the holding hand hidden behind the mold, and maintain contact with the mold with the index finger on the cutting hand (7). The index finger works like a tool stop and helps to prevent you from cutting past the edge of the mold and flinging the sharp blade into the space outside the mold, which always results in a visit to the emergency room for an appointment with the suture doctor.
Chuck Hunner (flexiblejewelrymolds.com) has been making jewelry molds since 1976. He currently makes interesting molds and studies mold compounds in Asheville, North Carolina.