

A Winged Nymph
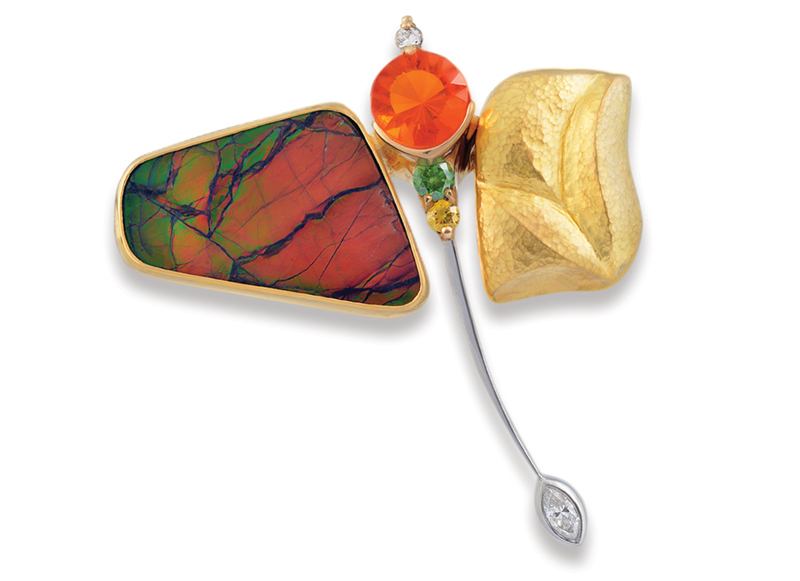
Dennis Dejonghe rediscovers a gem in his “Winged Nymph” brooch
By Irina Hawkins
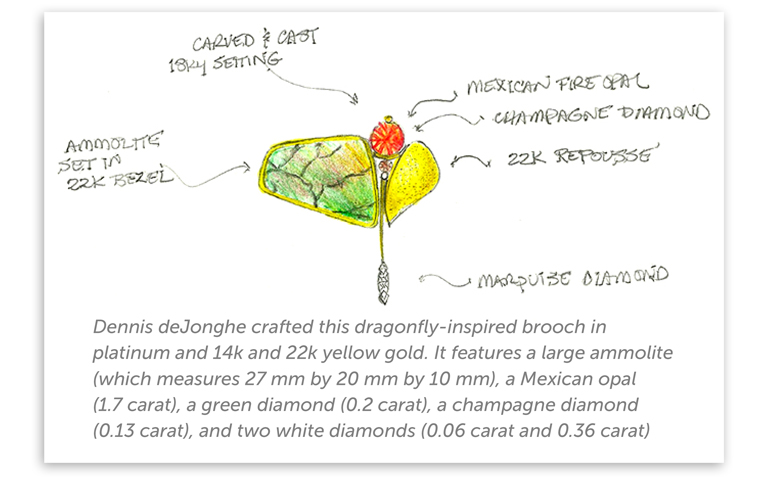
Sometimes a designer sees a stone and is instantly inspired to create a piece. Other times, it may take a day, a week, or even 20 years to be inspired. When deJonghe was looking through his collection of gemstones, he was struck by the beauty of an ammolite he’d had since 1995; he couldn’t understand why he hadn’t worked with the stone yet. And when he then saw a fiery Mexican opal whose color complemented that of the ammolite, he immediately knew he had to design a dragonfly brooch with the two stones.
As he sketched out designs for the brooch, he realized that the ammolite worked well as a wing. For the complementary wing, deJonghe settled on a 22k yellow gold sheet in which he would replicate the feathered lines of the stone using chasing and repoussé techniques. To complete the body of the dragonfly, he used the opal as the head, green and champagne diamonds for the torso, and two white diamonds that acted as the eye and tail.
Once he had all the main components, deJonghe had to figure out how to combine them. After creating a 22k yellow gold bezel for the ammolite, he soldered the bezel to a 14k gold sheet, leaving two overhanging sections near the top and bottom of the bezel. Next, he created the second wing, using a variety of handmade steel punches to hammer and shape the gold. When he was happy with his repoussé work, he filed the back edges of the wing flat and soldered it to a 14k gold sheet, again leaving some overhanging material.
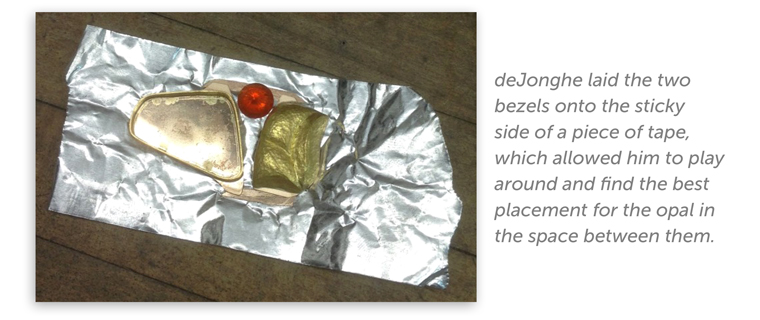
He laid the two bezels onto the sticky side of a piece of tape, which allowed him to play around and find the best placement for the opal in the space between them. He then laser welded two scrap pieces of gold to the overhanging bezel sections to form a temporary bridge, joining the wings together.
To create the torso, deJonghe dripped some green carving wax in between the two wings. Then, using a mini drill, he shaped the wax into the torso and created settings for the center stones. He made a mold around the wax and then cast the component in 22k yellow gold.
deJonghe decided to forge the tail in platinum, believing it would create a nice contrast with the warm yellow gold. To form the tail, he hammered a piece of square wire, creating a thin taper at the bottom. Next, he carved the bezel for the marquis-cut diamond that would lie at the end of the tail. After casting the bezel in platinum, deJonghe set the diamond and soldered the tail to the torso.
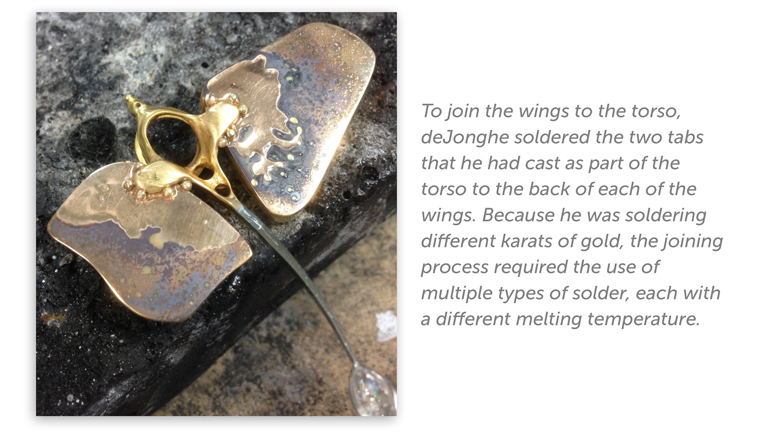
He polished the remaining components and then cut away the temporary bars and excess material from the wings’ bezels. To join the wings to the torso, he soldered the two tabs that he had cast as part of the torso to the back of each of the wings. Because he was soldering different karats of gold, the joining process required the use of multiple types of solder, each with a different melting temperature.
“It was a tense moment,” says deJonghe. “[It was] a tedious process.”
After giving the centerpiece and backs of the wings a high polish, deJonghe masked off the high polished areas with tape and sandblasted the repoussé wing to give it a warm, matte finish.
Then it was time to set the remaining stones. To set the opal, he relied on the half bezel he had created to hold the stone in place while he pushed on a single prong to secure it. “I used minimal prongs be-cause I wanted to show off the colors and the stones,” he says.
As the last step, he soldered a couple of loops and a pin mechanism to the backs of the wings. The iridescent insect now adorns the lapel of a buyer who appreciates not only the craftsmanship of the piece, but also its impressionistic design that flies in the face of literal interpretation.
To read more about deJonghe’s brooch design process and to see his photos, visit his site.